8
ENGLISH
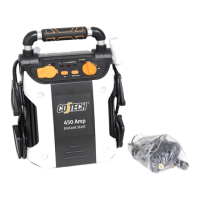
8. Using the compressor
The jump starter has abuilt-in compressor which can be used for inflating tyres, footballs or small inflatable toys.
Theair hose (14) is stored in acompartment beside thepressure gauge. Thecompressor has its own on/off switch (15).
8.1 Inflating tyres or other products with valves
1. Take out thehose (14) and press thehose nozzle securely onto thetyrevalve
as far as possible and press down on thelocking mechanism with yourthumb.
2. Make sure that thehose nozzle is securely inplace.
3. Set theon/off switch (15) to ON to start thecompressor.
4. Check theair pressure using thepressure gauge.
5. When desired pressure is reached, flip up thelocking mechanism and remove thehose nozzle.
6. Set thepower switch to OFF to turn off thecompressor.
7. Let thecompressor cool before storing thejump starter.
8. Replace thehose back in its compartment.
N.B. Ifthejump starter battery is fully charged it will normally be good for pumping about 3 tyres before
completely discharging.
8.2 Inflating items without a valve
3 extra adaptors (18) for thecompressor’s hose nozzle are included.
Thesecan be used for pumping things like footballs, volleyballs, etc.
1. Select theappropriate adaptor.
Takeout thehose (14) and insert thevalve adaptor as far into thehose nozzle
as possible and press down on thelocking mechanism with yourthumb.
2. Make sure that theadaptor is securely inplace.
3. Connect theadaptor to theitem to be pumped.
4. Set theon/off switch (15) to ON to start thecompressor.
5. Check theair pressure using thepressure gauge.
N.B. Smallitems such as footballs, volleyballs, etc. inflate very quickly. Becareful when inflating them.
6. Flip up thelocking mechanism and remove thehose nozzle.
7. Set thepower switch to OFF to turn off thecompressor.
8. Let thecompressor cool before storing thejump starter.
9. Replace thehose back in its compartment.
Warning! Readand follow 1.6 Specific safety instructions for using thejump starter’s air compressor
to minimise therisk for personal injury or property damage.
9. Care and maintenance
9.1 Cleaning and storage
• Turn off thecharge function and close the12 VDC socket cover. Placetheplug securely in thecharger
connection (11), set theon/off switch (7) to OFF and wipe theproduct with asoft cloth and alittle mild
detergent if needed. Neveruse abrasive cleaning agents or solvents.
• Wipe thebattery clamps, making sure that any battery acid or other remnants are removed from theclamps
to minimise therisk of corrosion of themetallic parts.
• Make sure that no liquids penetrate theproduct. Donot use thejump starter if it iswet.
• Make sure thecharger leads are loosely coiled during storage. Theycan be damaged if coiled too tightly.
9.2 Changing the 12 V DC – 12 V DC adaptor fuse
1. Unscrew theridged part of theplug to access thefuse while keeping track of thesmall components (centre
pin, spring and rubber washer). N.B. Allthesmall components must be replaced in exactly thesame
position otherwise theadaptor will not function.
2. Replace thefuse only with one of thesame rating (8A/250V, 6×32 mm).