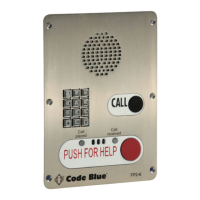
10 Optional Flush Mount Enclosure Installation
page 16 of 45 GU-139-Z1
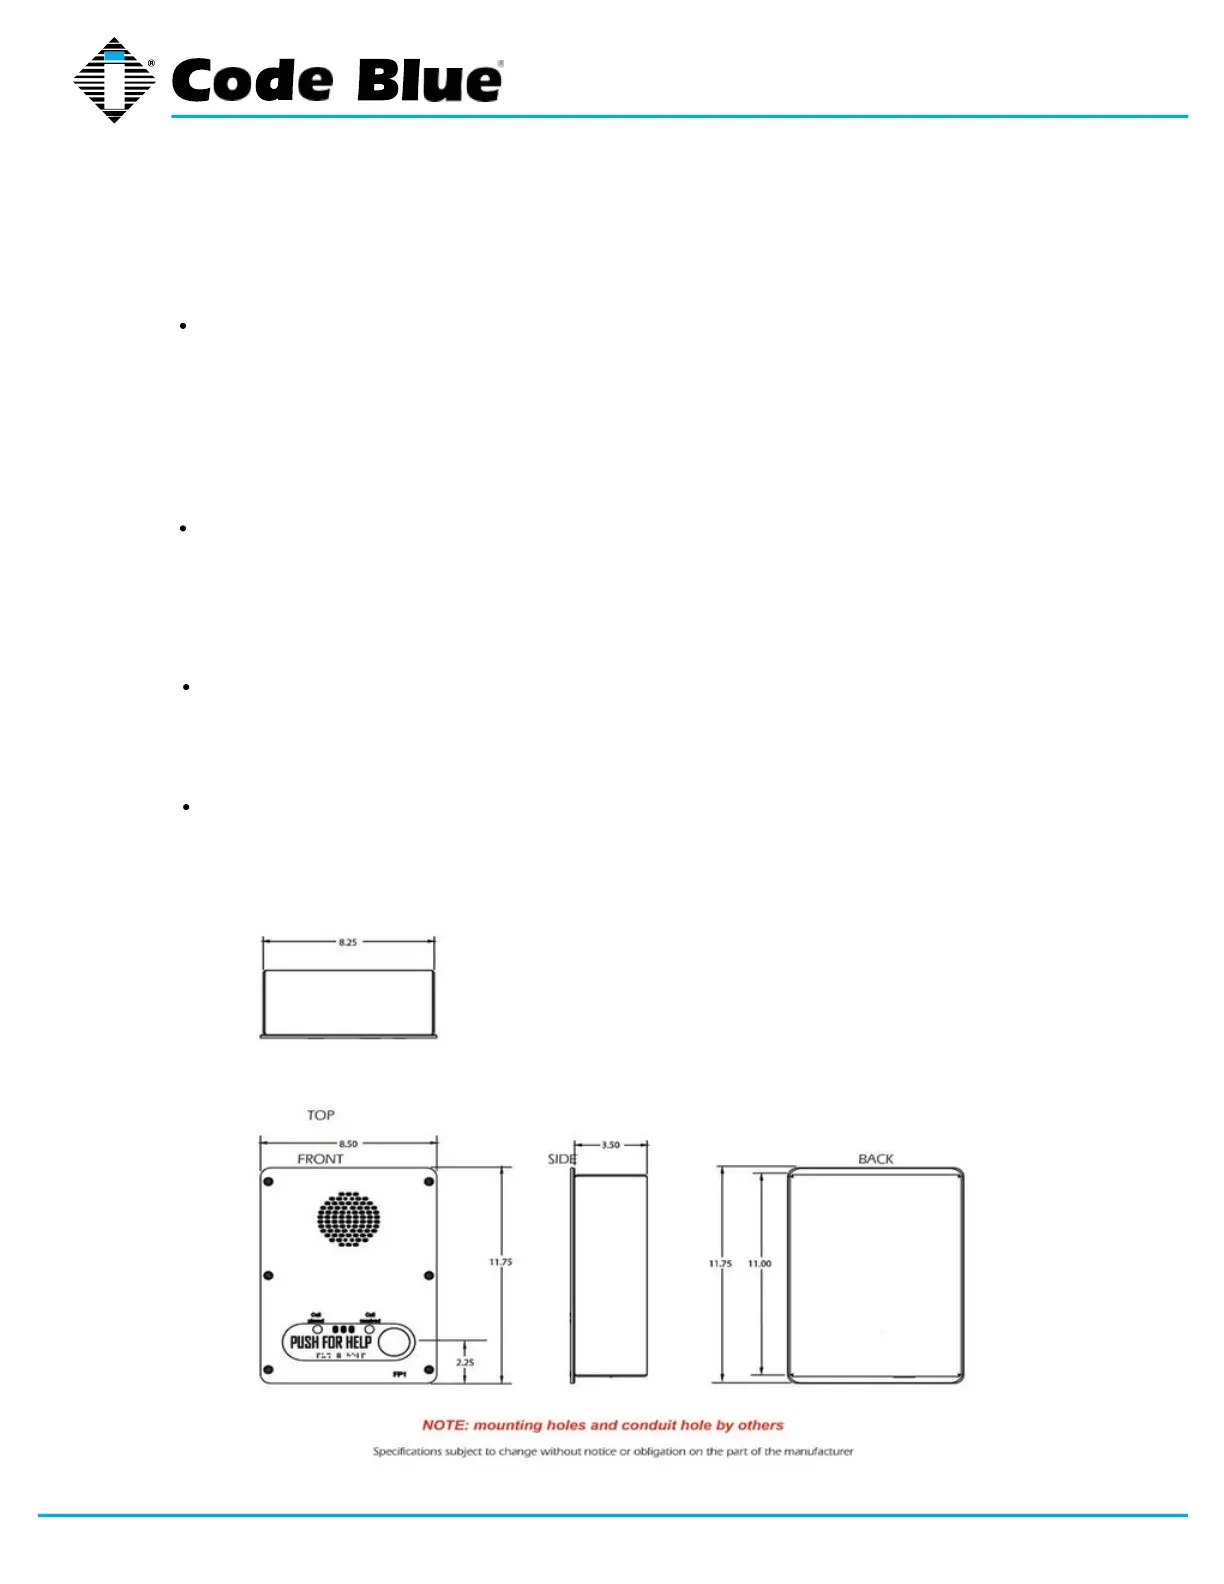
Electrical preparation – The unit may have supply wires run from either (a) behind the
unit through the wall, or (b) below the unit by using an external conduit through the
bottom of the unit’s back plate. Mounting holes in the back, bottom or side of unit to be
administered by the installer.
IMPORTANT: If wiring is coming in from the bottom or back, insure that the conduit is
aligned at this time. Connect electrical and communications wiring (see wiring instructions).
Follow all national and local codes that apply.
Prepare Wall – FME enclosure mounting hole in wall should except the housing
dimensions below and must be smaller than the faceplate dimensions to ensure clean
flush mount look.
Mark the flush mount mounting hole – In order to comply with the Americans with
Disabilities Act (ADA) of 1990, the speakerphone button(s) should be positioned
between 34 and 48 inches from grade level. (Consult an ADA specialist in your area to
verify local and federal guidelines.)
Secure the housing to the wall – The Flush mount enclosure can be mounted from the
back, bottom or side by drilling the mounting holes where needed per the installers
application while still keeping the unit within ADA compliance height. (1.2) Mounting
hardware to be supplied by in- staller.
PRE-INSTALLATION
INSTALLATION PROCEDURES
IA4100
Administrator Guide
Code Blue
• 259 Hedcor Street • Holland, MI 49423 USA • 800.205.7186 • www.codeblue.com