Pag. 8 http://www.coef.it - info@coef.it
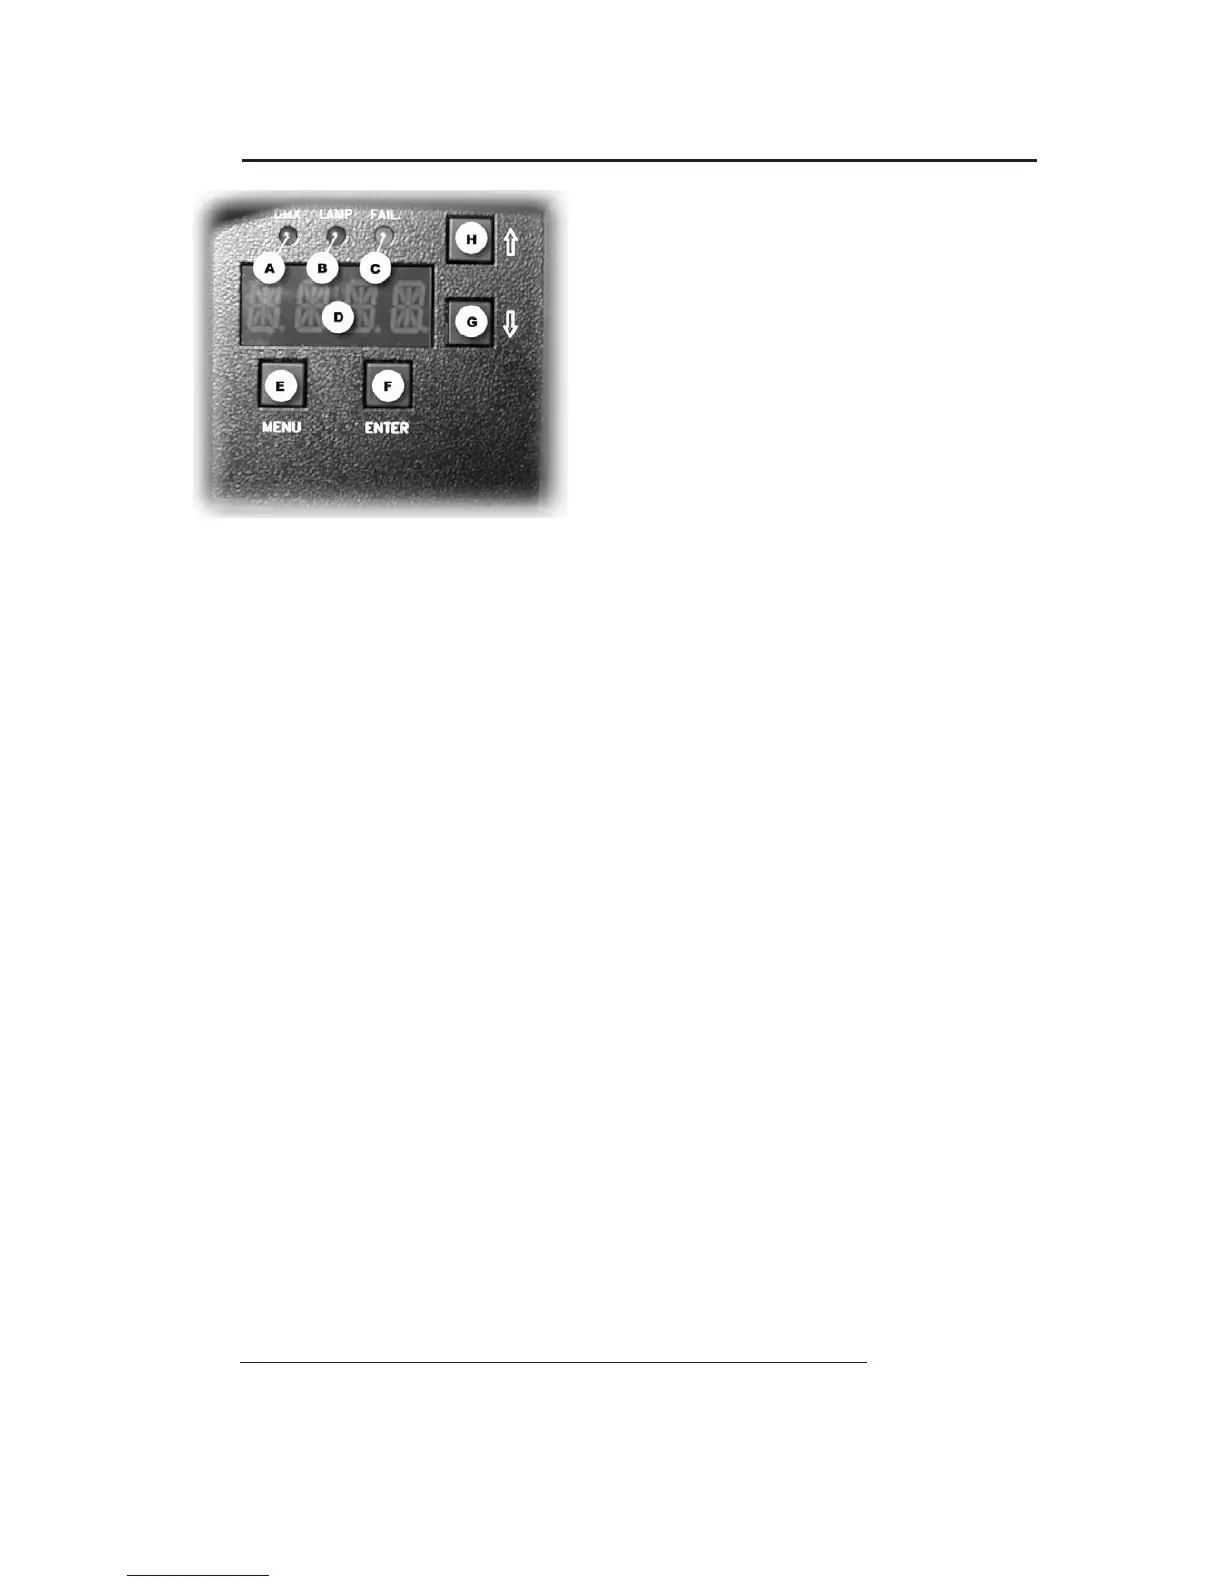
Onthefront panel of MP700 Zoom you'll find a section for
theadditional functions and forsetting theprojector.
Following the picture,you can see all the offered possibili
-
ties in detail.
All operations aretobecarried out with the E
, F, G, H but
-
tons, respectively indicated as MENU, ENTER, DOWN and
UP.
The display D will inform you aboutthe selected functions.
The 3 A, B, and C leds will allow you to know:
A =reception of the DMX line.
B =lamp
ON.
C = errors indicated on theERR table (see table 6.0).
5.0 SPECIAL FUNCTIONS AND PROJECTOR ASSIGNMENT
Theindication of the display will automatically come back after 120 sec. and informonthe set starting channel
DMX. If we are now in a sub-function, this automatic device will not assume control.
On switching theprojector on, the display will indicate thetype of projector and the version of controlsoftware
whichhave been installed. Tothis purpose, please remember that this type of pro
jectorbelongs to a new generation
of projectors, designed with thepossibility of updating the software version through thenormal DMX connection by
means ofaprogrammerdeliberately created: UNI-PROG 8.
After theindication MSTR HOME, thepr
ojector carries outthe RESET andgetsready to be controlled from the
connected console.
The display will indicate 1 asdefault value.This means that thefirstchannel occupiedbytheprojector will re-
spon
d to the valuessent to channel1bythe DMX line.This enablesusto make MP700 Zoom (which we areinstal-
ling) completely independent from control or integral with any other installed projector.
General Rules:
Refer to the TableofSection 6.0 in thefo
llowing page.
By each pressure,Button MENU (E) permits to go backwards by one level.
G and H (DOWN and UP)buttonsselect functions and sub-functions.
Button F(ENTER) enters thefunction and confirms a control.
By pressingButton MENU (E) andbuttons UP
and DOWN (HandG)you can select the menuyouhavetomo-
dify.
Once thewished menu isreached, press Button F(ENTER) to confirm your selection and enter thefunction.
Press G or H to enter the sub-functions if available.
Always confirm your selection with
ENTER.
Press MENU to gooutofthefunction and press again to go back to the startinglevel.
Example: Weinstalled our projector on the ceiling and for thisreason we want the visualization of the display to
becorrect.
Pre
ss MENU
Press H (UP) 11 timesupto“MISC”
Press ENTER the Display will show “RSET”
Press H (UP) twice upto“DSPL”
Press ENTER the Display will show “ONOF”
Press H (UP) once upto“STRV”
Press ENTER the Display will show “STND”; this is
the actual configuration state.
Press H (UP) once uptoR.E.V..; the blinking point indicate theavailable configuration.
Press ENTER ...... The Displayvisualization asbeen rotated to 180°.
Press MENU 4 times to returntostartingMENU.