Do you have a question about the Coleman 17'X9' and is the answer not in the manual?
Select a level campsite clear of rocks, branches, and sharp objects.
Position the tent to face the desired direction and avoid setting up under trees.
For best results in windy conditions, position the end of the tent into the wind.
Layout and position the tent with the screen room facing the desired direction.
Stake down the tent starting with the corners, angling stakes slightly toward the tent.
Keep the tent floor taut and stake down the remainder of the stake loops.
Assemble all shock-corded roof poles to form continuous arches pointing downwards.
Insert center roof poles with red stickers through the two center roof sleeves.
Insert end roof poles with blue stickers through the roof sleeve at the end of the tent.
Assemble center brace poles and insert into curved roof poles to raise the tent.
Attach brace poles to squeeze pins at the bottom of the tent for stability.
Assemble and insert end brace poles into end roof assemblies.
Drape the rainfly over the tent and attach 'S' hooks to the brace poles.
Condensation can form on tent surfaces due to humidity; ensure good ventilation.
Dry tent thoroughly before storage and do not store poles telescoped together.
Remove stakes by pulling on the stake itself, not the tent fabric or loop.
Keep all flame and heat sources away from tent fabric; it meets flammability requirements.
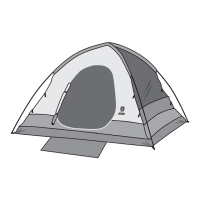
The Coleman Screened Weathermaster® 17'x9' tent is designed for outdoor enthusiasts seeking a spacious and comfortable shelter. This manual provides comprehensive instructions for setting up, using, and maintaining the tent, ensuring a pleasant camping experience.
The primary function of the Coleman Screened Weathermaster® 17'x9' tent is to provide a temporary, portable shelter from the elements. It features a large main sleeping area and an integrated screen room, offering versatile space for relaxation, storage, or an insect-free dining area. The tent's design emphasizes ease of setup and stability, making it suitable for various camping conditions. Its screened weathermaster design suggests enhanced ventilation and protection against insects while maintaining weather resistance.
Before setting up, it is crucial to select a level campsite, clear of rocks, branches, and other sharp objects to prevent damage to the tent floor. To optimize performance in windy conditions, the tent should be positioned with the end facing into the wind.
The setup process begins with laying out and positioning the tent, ensuring the screen room faces the desired direction. The tent is then staked down, starting with the corners. It's important not to stretch the fabric too tightly and to angle the stakes slightly toward the tent to maintain tautness of the floor. All remaining stake loops should be secured, and the door should be unzipped for easier access during assembly.
The tent utilizes a system of shock-corded poles for its structure. The roof poles, when assembled, form a continuous arch with both ends pointing down. The center curved roof poles, identified by red stickers, are inserted through the two center roof sleeves and the roof pole sleeve at the front of the screen room. The end roof pole, marked with a blue sticker, is then inserted through the roof sleeve at the end of the tent.
The center of the tent is raised using shock-corded brace poles, identified by red stickers. These longer poles should initially be adjusted to the innermost hole "A." The square ends of these brace poles are then inserted into the curved roof poles, raising the tent upright. These brace poles attach to squeeze pins at the bottom of the tent. It's important to ensure that the brace poles naturally point straight down when attaching them to the curved poles. This process is repeated for the brace poles at the front of the screen area.
To raise the ends of the tent, end (blue sticker, round ends) shock-corded brace poles are used. These brace poles are inserted into the end roof assemblies. When attaching these brace poles to the curved poles, it's critical to ensure that the bottom of the brace pole naturally points down and toward the center of the tent. These brace poles also attach to squeeze pins at the bottom of the tent. The poles can be adjusted to accommodate uneven terrain.
The rainfly is an essential component for weather protection. The narrower end of the rainfly is draped over the tent, with the wider end covering the screen room, ensuring it covers the center and end pole sleeves. "S" hooks on the rainfly are then attached into holes in the brace poles to secure it. A doormat can also be staked down for added convenience.
Under certain conditions, such as cold weather or high humidity, condensation may form on the inside surfaces of the tent. This is a natural phenomenon caused by water vapor from breath, perspiration, or wet clothing inside the tent, and it is not indicative of leakage through the tent fabric. Condensation can be minimized by removing wet clothing from the tent and by ensuring good ventilation.
The tent fabric meets the flammability requirements of CPAI-84, meaning it will burn if left in continuous contact with any flame source. Users are warned to keep all flame and heat sources away from the tent fabric. Applying any foreign substance to the tent fabric may render its flame-resistant properties ineffective.
Proper maintenance is crucial for extending the lifespan of the tent. It should never be stored, even for a short period, without being thoroughly dried and having any caked dirt brushed off. Stakes and poles should not be packed inside the tent; instead, they should be stored in a separate bag to prevent damage to the fabric.
When disassembling the tent, stakes should be removed by pulling on the stake itself, not on the tent fabric or the tent stake loop. Pulling on the fabric or loop can cause damage.
Tent poles should not be left telescoped together during storage. This practice can lead to issues with the shock cords and overall pole integrity over time.
Leaving the tent set up for weeks at a time is not recommended. Prolonged exposure to the ultraviolet (UV) rays of the sun can seriously damage the material and/or cause it to become discolored, compromising the tent's durability and appearance.
By following these instructions for setup, usage, and maintenance, users can ensure their Coleman Screened Weathermaster® 17'x9' tent remains a reliable and comfortable shelter for many camping adventures.
| Category | Tent |
|---|---|
| Material | Polyester |
| Setup Time | 15 minutes |
| Doors | 1 |
| Poles | Fiberglass |
| Product Name | Coleman 17'X9' |
| Dimensions | 17' x 9' |
| Capacity | 8 persons |
| Water Resistance | WeatherTec system |
| Center Height | 6 ft 2 in |