15
• Changing the mode of operations
• Manually canceling the event from the home screen indicator.
Canceling Energy Savings Enrollment
The option to cancel enrollment in Energy Savings can be found by going to
Menu > Settings > Energy Savings > Energy Savings Settings > Factory
Reset Energy Savings Settings
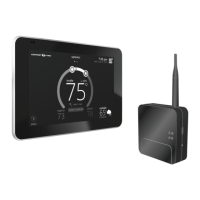
Advanced Settings
This section is for installers and technicians ONLY to customize system settings
and run various diagnostic tests.
View Dealer Control Center
Allows installers and technicians to perform custom congurations tailored for
the homeowners unique requirements.
Restart
Options are to restart Smart Hub, thermostat or both.
General
This section provides information and setting changes for various displayed
items.
About
This page will provide detailed information concerning the HD Display
(thermostat info) and Smart Hub. Provided are: model number, serial number,
hardware, software and Wi-Fi revisions.
In addition, for thermostat and Smart Hub, a software update option is listed.
Select software update and set Automatic Updates to YES or NO (default is
NO). You can also select check for updates now.
Dealer Info
This page will display or allow information to be changed concerning the dealer.
Items included are:
• Dealer Phone Number
• Name,
• Website
• Dealer Address
Dealer Access
Alerts and Notications: Default is OFF. Turning on this feature will allow
automatic notications to be sent to your dealer concerning maintenance.
Screen Lock
There are three options for screen locking. Default is unlocked.
• Unlocked - Changes can be made to any settings.
• Partially Unlocked - Screen is locked but temperature settings can be
changed.
• Locked - No changes can be made.
To unlock partially locked or locked, press anywhere on the screen and hold
for ve seconds.
Date & Time
The following items can be set on this screen:
1. The clock can be changed to 24 hour (military). Default is OFF.
2. The following settings are only available if the system is not connected to
the Internet.
• Daylight Savings - ON or OFF. Default is ON.
• Time Zone: Options are Pacic, Mountain, Central and Eastern.
Default is Central. Select time zone and press SET.
• Set Time - Local time can be adjusted. Press SET to nish.
• Set Date - Current date can be set. Press SET to nish.
NOTE: If the system is connected to the Internet, only changing to the 24 hour
clock is available. To change either time zone or daylight Savings,
temporarily disable Wi-Fi to make adjustments to those settings.
Language
This allows the language used on the screen to be changed. Options are
English, Français and Español. Default is English.