Page 13 Vers. 1.0
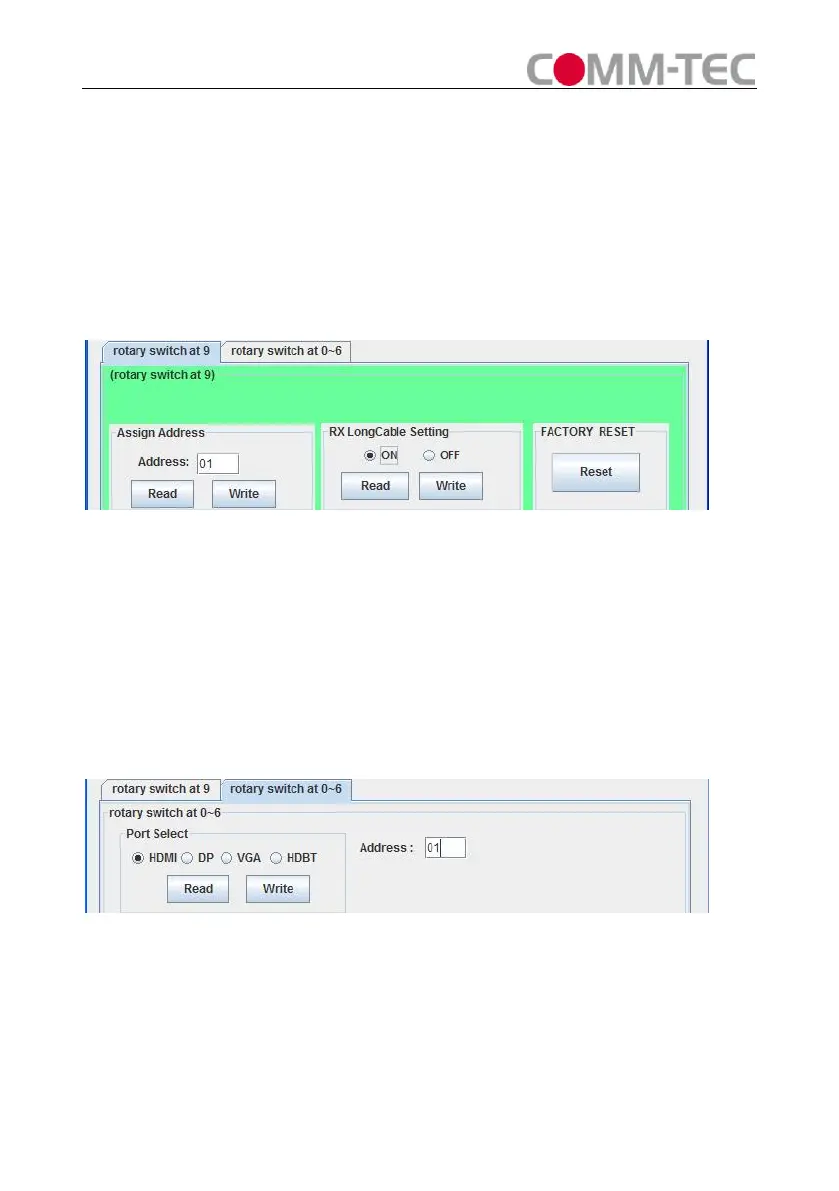
address.
Click “Read” button to get address.
RX LongCable Setting(only for DaisyNET-RX):
Turn ON or Turn OFF LongCable mode
FACTORY RESET:
Click “Reset” button to recover to factory settting.
Figure 9
4) Set Rotary Switcher to position 0~6(recommend 6)
Port Select(only for DaisyNET-TX):
Enter Address of DaisyNET-TX you want to control (If unit has no address you
must assign an address).
Click “Read” button to get current selected input port.
Select Port and click “Write” to set.
Figure 10
EDID Edit(only for HDMI and DP inputs of DaisyNET-TX):
Select HDMI or DP Port, click “Read” button to get current EDID.
Click “Save as” button to save EDID read from display equipment as “*.bin” file.
Click “Open” button to open saved “*.bin” file, select the Input Port in “Port Select”