Page 12 Installation and Operation Manual D SERIES Ceiling Loudspeakers
Rotate the back can as necessary to ensure all of the clamps are oriented to
contact and compress the C-ring to the ceiling tile during Step 5 as follows.
Note: If you’re using loose wires, rather than conduit, it makes sense to first connect the
wires to the terminal block atop the can, and secure them with the top cover/strain
relief, before installing the can through the cutout and into place in the C-ring.
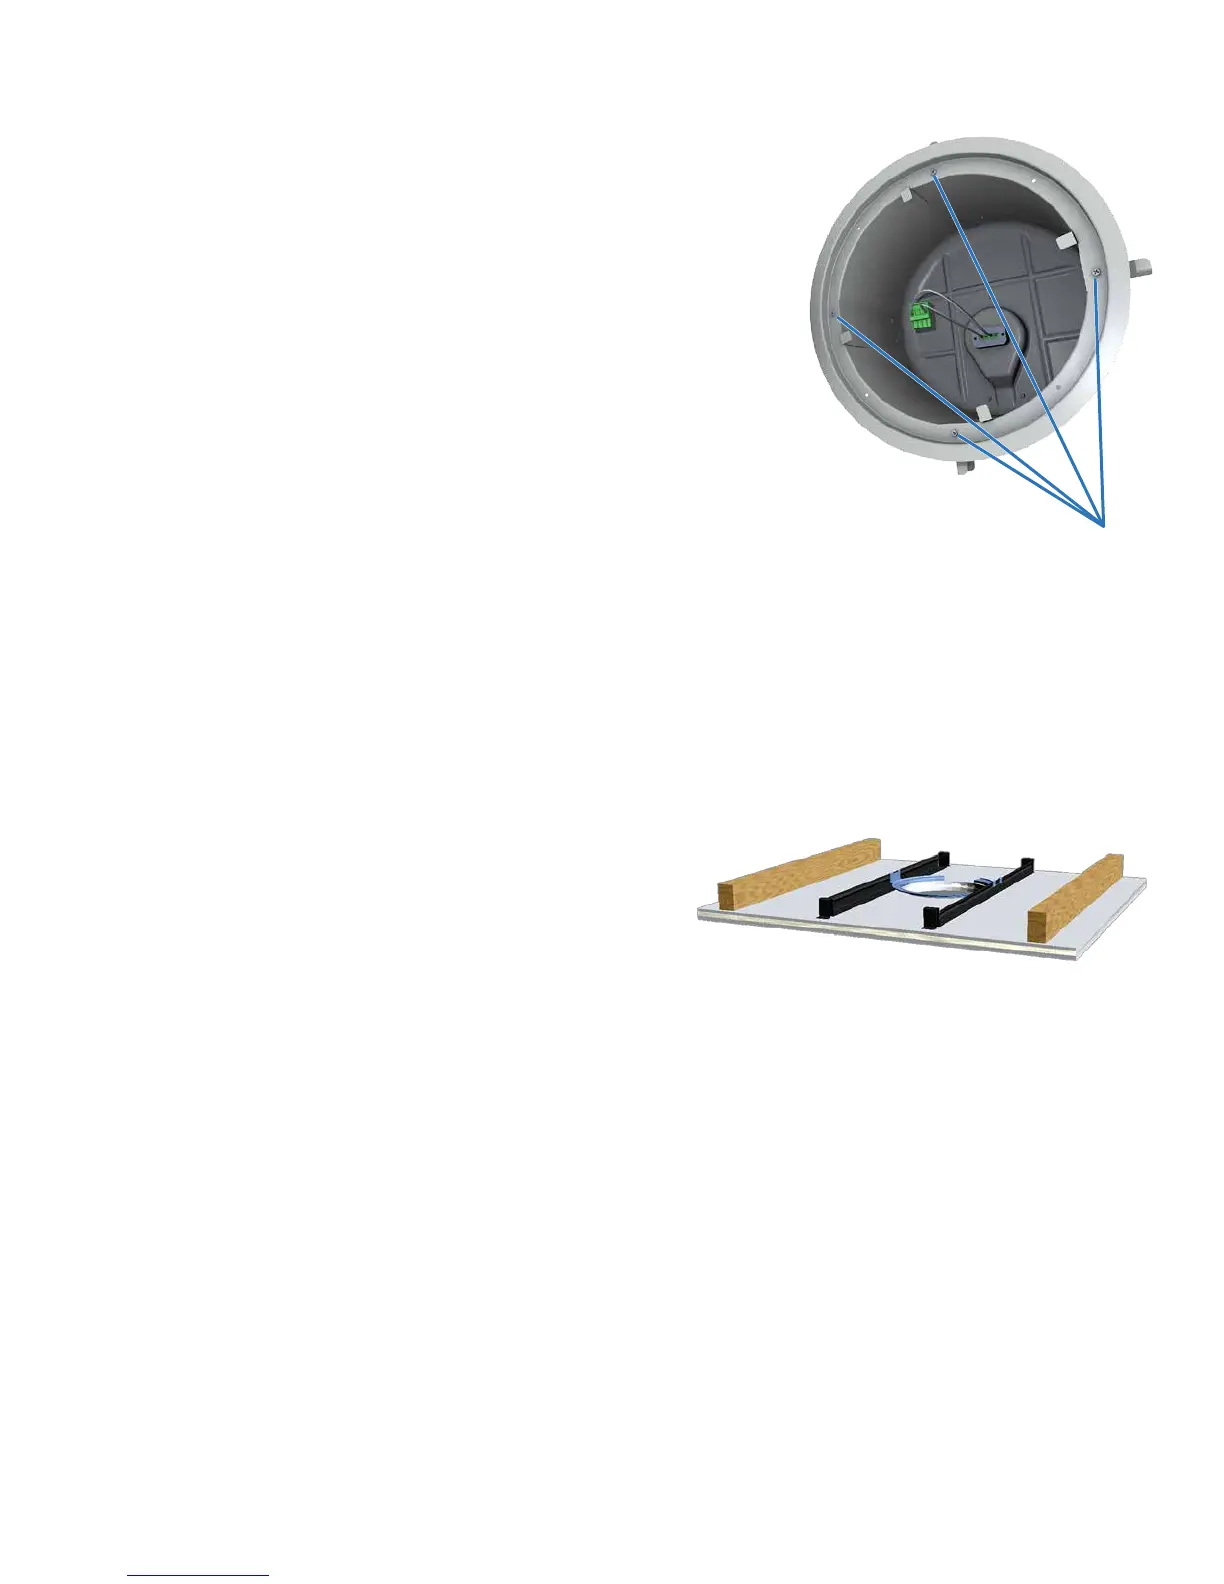
5. Locate the four Phillips-head can clamp actuators around the perimeter of
the back can’s front flange (see Figure 10). Using a #2 Phillips screwdriver
twist each actuator clockwise until you feel resistance as the can clamp
presses against the ceiling.
6. Repeat for as many loudspeakers as you need to install. Refer to page 14 for
instructions on installing the loudspeaker into the back can.
Figure 10. Turning the can clamp
actuators clockwise securely locks the
back can into the ceiling.
Dry-Wall Ceiling Installation
There are four basic ways to install a D SERIES loudspeaker assembly into
a drywall ceiling (a.k.a. sheet rock or gypsum board).
Some are for new
construction, others for retrofit to existing construction. We recommend some
methods over others and of course the choice is yours.
A. The preferred method for new installations is to use the optional New
Construction Bracket, pre-installing it directly to the supporting beams
before the sheet rock is applied. Multiple small holes on wings to either side
of the main cutout hole allow the installer to use screws or nails to secure
the ring to the straddling beams. See the following subsection for step-by-
step details and variations.
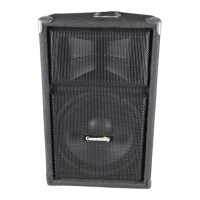
B. An alternative method for new installations – where the
ceiling has already been completed – is to use the C-ring
Support Plate along with the Tile Bridge Support Rails. While
there are in fact not going to be truss members across which
the rails fit, nonetheless they will distribute the weight of the
loudspeaker assembly across a greater area than the C-ring
Adapter alone and will thus avoid sagging that might otherwise
occur over time. Cut the hole using the provided template. It
is then easy to pass the Tile Bridge Support Rails through the
cutout and snap the C-ring Support Plate on top of them. Refer
to Figure 8 and to Figure 11.
C. Retrofit a D SERIES Loudspeaker (driver/face plate without
back can) into an existing back can using a corresponding D SERIES Face
Adapter Ring.
D. Retrofit an entire Community D SERIES Loudspeaker Assembly (including
back can) into an existing back can using a corresponding D SERIES Can
Adapter Ring.
Note 1: If you are retrofitting a new loudspeaker alone, without back can, into an
existing low-profile back can for a 4.5" competitor’s model (minimum 3.5" / 89 mm
deep), use the D4LP (with Can Adapter/Trim Ring). Both the D4 and D4LP use the same
loudspeaker which has a shallow depth.
Note 2: Face Adapter Rings are only available for D4, D4LP, D5 and D6 loudspeakers.
Figure 11. New installation in an existing drywall
ceiling using the Tile Bridge Support Rails and C-ring
Support Plate.
Back Can Installation (continued)