Page 8 Installation and Operation Manual D SERIES Ceiling Loudspeakers
Installation and Wiring
Note: This section describes the wiring connection of the loudspeaker to the can,
and the wiring between the can and loudspeaker. Installation order will depend
upon the facility and the installer; pre-installation of the cans including routing
the wires to the can location, or cans and loudspeakers at the same time. There
is no "perfect or preferred" order for installation. This section describes the
general means to wire the cans and loudspeakers before mounting the can into
the ceiling (or wall).
This manual will serve to assist in wiring and physically mounting D SERIES
loudspeakers. The directions include assistance to those installers using a
complete Community package of loudspeakers and accessories, including
the back cans, grilles, and tile rails. We include instructions for use of
optional Community D SERIES retrofit adapters so that Community D SERIES
loudspeakers can be mounted in other manufacturers' cutouts and/or back
cans. If accessory products from a dierent manufacturer are used, please
refer to the installation manuals supplied with those products.
Power Determination
As detailed subsequently, there is no need to specially select dierent wire
terminals for 8 ohms or for various 70V and 100V power taps. Instead, a face-
mounted tap switch allows you to make this selection. Once the loudspeaker
is mounted correctly in the ceiling, set the tap switch to the appropriate tap
setting before any audio is passed through the loudspeaker. Do not change the
setting on the tap switch while the loudspeaker is in use.
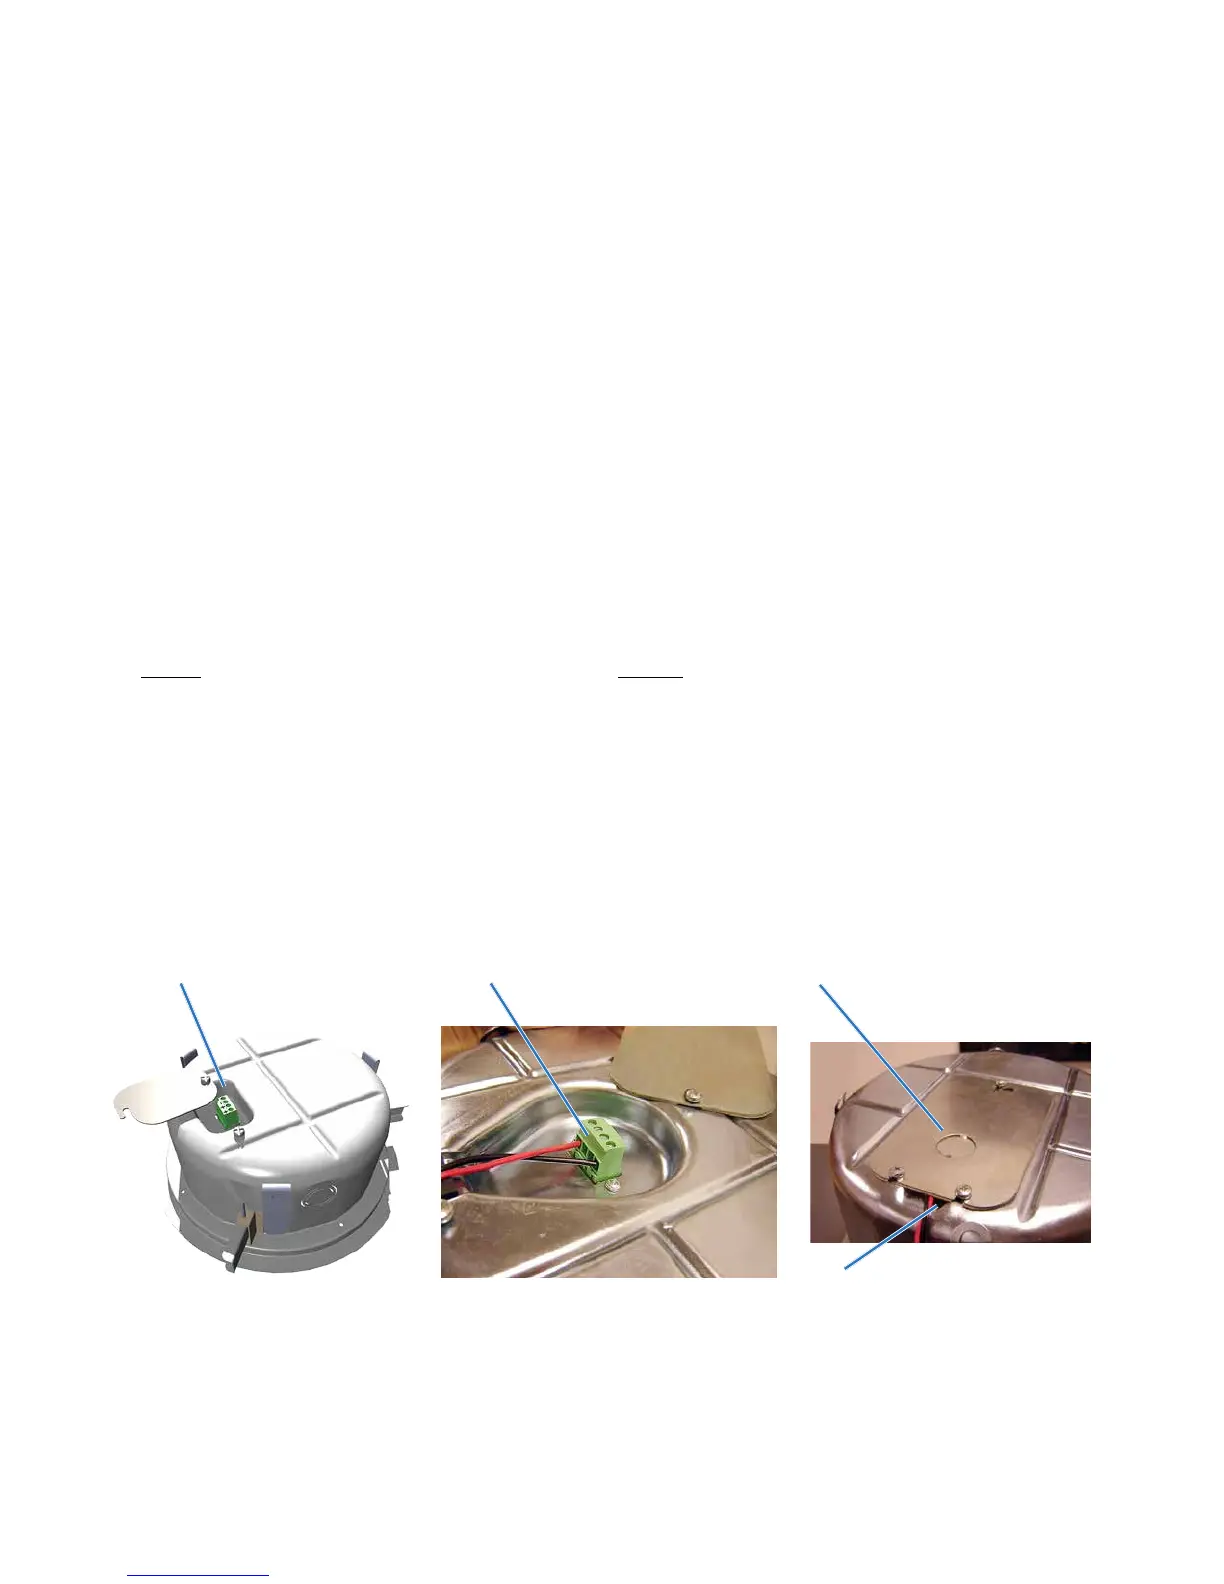
Figure 3. Non-conduit guided wiring to can and wire restraint
(Only use this method when permitted by applicable building and electrical codes!)
Terminal Block (4.5" can)
Terminal Block (6.5" can) showing
wire connections to the block for a
single cable (not daisy-chained)
Built-in cable strain relief
Cover/strain relief plate swiveled into
closed position and secured to clamp the
cable firmly.
Note the half-inch (12.5 mm) knockout in the
cover that may be used for conduit.
Installation in back cans without
conduit
The only tool required is a screwdriver,
which is provided in the Loudspeaker
package. D SERIES back cans include a
swivel-out terminal access cover that
also serves as a cable clamp when
tightened in place. The terminal block
in the can’s outer recess has two (+)
connections and two (-) connections.
If you’re only connecting one (dual
conductor) cable, you can use either
(+) and (-) terminal, as illustrated in
Figure 3. If you’re daisy-chaining a
cable to the next can, you can connect
the next cable to the remaining (+)
and (-) terminals. There is no need to
connect jumpers or try to stu two
wires into one terminal block port
because each pair of (+) and each pair
of (-) terminals is directly jumpered
together on the input connector as
well as internally on the PC board.
Due to this internal jumper on the
connector, the parallel connection
will be maintained even if the input
connector comes unplugged from the
loudspeaker’s PC board (Figure 4).