Page 14 Installation and Operation Manual D SERIES Ceiling Loudspeakers
Secure the Loudspeaker In the Back Can
When you have made the electrical connections from the wires coming into the
can to the loudspeaker then you can mount that loudspeaker into the can.
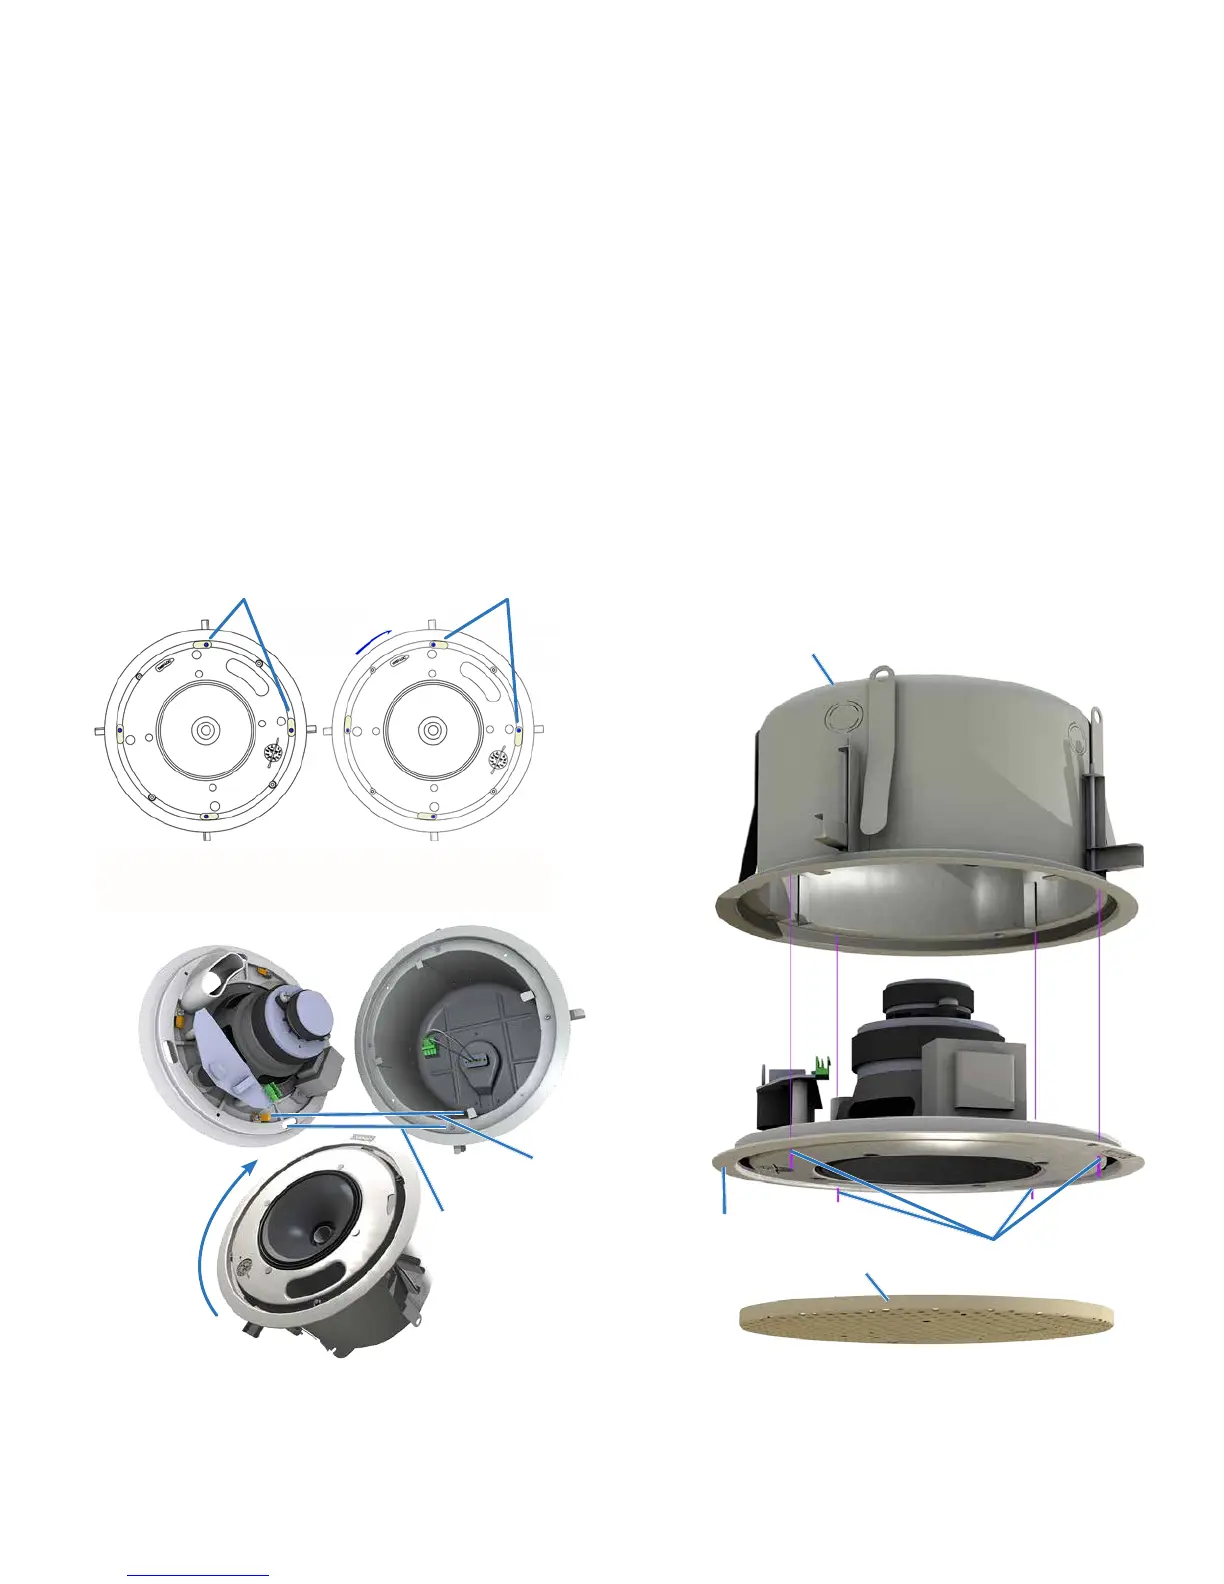
1. Four Twist-Assist™ face tabs protrude just inside the can opening. Align the
four slots along the periphery of the loudspeaker face with the Phillips-
head can clamp actuators. The actuators should be positioned so that they
are at the far right of the slots (viewed through the slot from the front of the
loudspeaker).
2. Twist the loudspeaker clockwise a few degrees so the Twist-Assist™ face
tabs are positioned at the left of the face slots as you look at the front face
(Figures 13 and 14).
3. Four 4mm sheet metal screws come from the factory partially inserted into
the plastic face. Use a screwdriver to install these captive screws into the
can. Tighten so they are snug against the face, but do not over-tighten them
(Figure 15).
Figure 14. Four Twist-Assist™ face tabs inside
the back can instantly secure the loudspeaker to
the back can with a twist.
Align screw to
slot (Qty 4)
Twist face to lock
Allows tabs to
mate in can.
Figure 15. Use the four included, captive, 4mm sheet
metal screws to secure the loudspeaker into the can.
Use the screws after inserting loudspeaker into the
back can and twisting to retain it.
Figure 13. Initial position (left) and loudspeaker face
twisted to lock (right)
T
u
r
n
Align slots in face over
clamp actuators
Position of actuators
with face locked
Back Can
Grille
Face
Captive 4mm sheet
metal screw (4)
Note: Some codes now require that the
grille have a safety cable; your local codes
may vary. In any case, Community makes it
easy to comply with an included security
cable system, as detailed in the next
section.