D SERIES Ceiling Loudspeakers Installation and Operation Manual Page 15
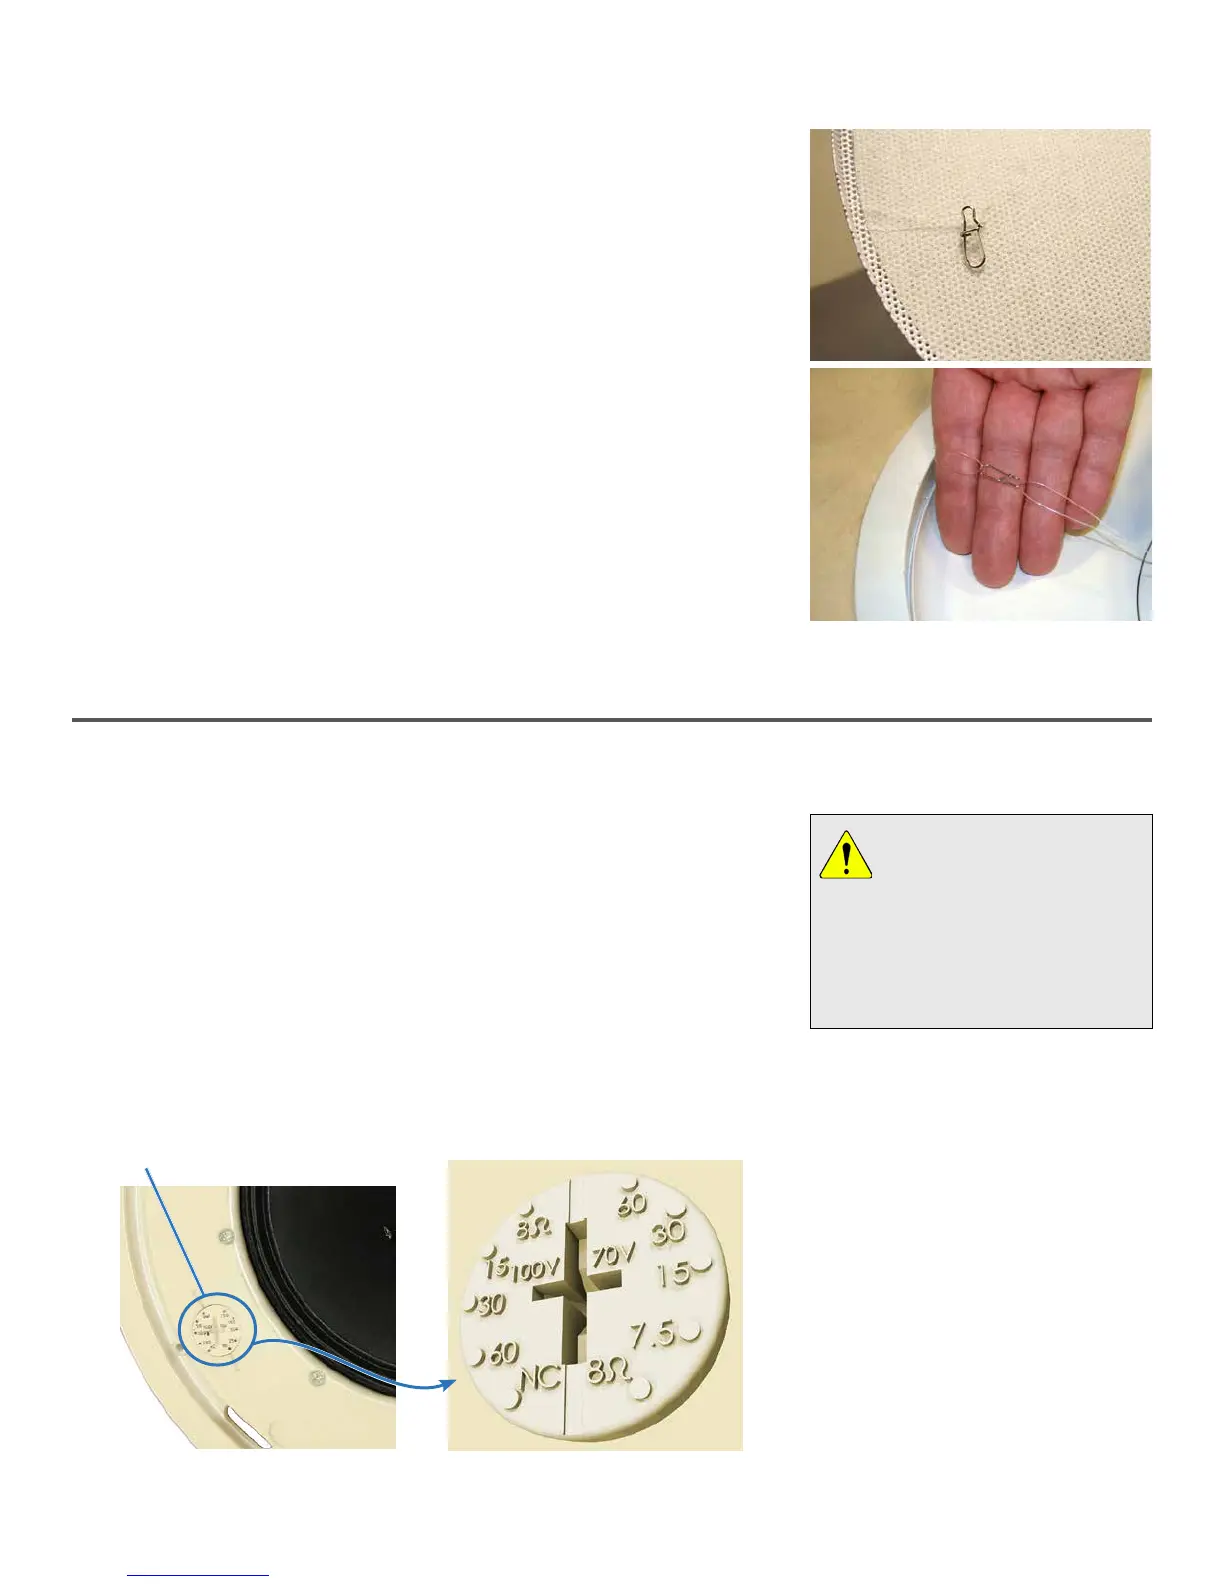
1. Once the loudspeaker is secured in the back can, you can attach the safety
cable between the grille and loudspeaker. There is a nylon mono filament
loop attached to the grille and looped through a metal clip. Another
mono filament line is located inside the bass reflex port of the face of the
loudspeaker. Use the metal clip to link these two mono filament loops
(Figure 16).
2. Carefully lower the grille until the cable holds it, and let go. It should hang
harmlessly from the mono filament line.
3. If you’re proceeding with setup, you can leave the grille hanging so you can
adjust the power setting as noted below. Otherwise, snap the grille into
position on the face of the loudspeaker bae.
Figure 16. Grille safety clip and line (top)
should look like this (bottom) when
attached.
Attach Grille Safety Cable
Figure 17. Setting Loudspeaker Tap
Face-mounted, screwdriver-
adjustable loudspeaker power /
voltage setting dial.
Enlarged detail of typical adjustor dial
(Available settings vary with model.)
Loudspeaker Tap Setting
Use a standard #2 or #3 Phillips or a medium slot-blade screwdriver (not the
one provided with the loudspeaker kit), or just press with your thumb firmly,
and twist to adjust the power control dial on the front face of the loudspeaker
bae. As shown in Figure 17, you can make any of five dierent settings,
although the dial has dual calibrations so at first glance it appears to have
ten settings. The 8 ohm position is the same on both sides and is for a low
impedance connection. On the left side of Figure 17’s close-up detail view are
the power values for 100V connections, and on the right side the power values
for 70V connections. (The actual power values on this dial will vary with the
model of loudspeaker installed.)
Note: The letters NC mean
"no-connect" but they do not
actually break a connection.
DO NOT USE this setting if you’re using
a 100V distribution scheme as the
loudspeaker may draw excessive
power; it corresponds to the highest
power that can be drawn with a 70V
source.
This control makes it very easy
and fast to balance an installation
since there is no need to drop the
loudspeakers out of their back cans
and move wires to dierent terminals.