COMPA TECH S.r.l.
Web: www.compasaw.com - E-mail: info@compasaw.com
Tel. (+39) 059 527887 - Fax (+39) 059527889
Manuale d’uso
Operator’s handbook
Mode d’emploi
- 29 -
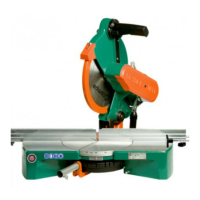
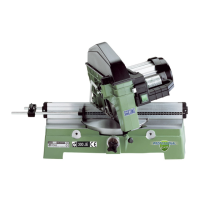
5. INSTALLATION
Remove the machine and accessories from the pack-
aging. Place the machine on a suitable surface that
is resistant and stable.
5.1 Positioning
Place the machine on a work bench, at a height of
about 90 cm, with a supporting surface of at least 60
x 80 cm.
Make sure to choose an area that is sufciently lit
and with enough space around the machine for cut-
ting the pieces to be processed.
The clearance to leave around the machine must be
at least 80 cm more than the largest workpiece that
you will be handling.
Make sure the machine is properly balanced and
levelled.
Secure the machine to a stable structure, using the
two holes provided on the rear side of the base, so
as to prevent overturning.
5.2 Electrical connections
Before connecting the machine to the mains, make
sure that the motor voltage, indicated on the special
plate on the motor, corresponds to the mains voltage.
As far as three-phase motors are concerned, when
turning on the machine, make sure the blade is
spinning in the direction indicated by the arrow on
the front left side of the blade arm. If this is not
happening, invert the position of the centre power
supply cord with either of the two side ones.
CAUTION! Make sure the grounding cable
is connected to the factory/workshop
grounding system.
The motor (type S6 - 40%) is developed for con-
tinuous operation with an intermittent load and
does not call for particular attention.
Should you need to use an extension cord, make
sure that the size of the cord is suitable for
withstanding the power draw of the machine. It
is advisable to use the shortest extension cords
possible.
Always unplug the machine before performing
any work on the machine, such as maintenance
or blade replacement.
When the machine is plugged in, never leave it
unattended.
Never carry the machine when it is plugged in.
5.3 Suction system connections
The machine can be connected to an independent
aspirator or bench with aspirator, which are both
available upon demand.
To connect the machine to the above mentioned
aspirator, plug the suction intake in the rear tting
on the arm or the rear tting on the turntable.
The external suction system must guarantee a suc-
tion speed of at least 30 m/s.
5.4 Adjustments
5.4.1 Positioning stop rods
To obtain pieces of identical sizes, use the stop rod
units tted both on the right and left sides of the
supporting table.
To t the stop rod unit:
Loosen wing nut D (g. 12) on the bottom side
of the support table.
Fit rod F (larger diam.) of the stop rod unit into
the hole on the top end of the table. Push it for-
ward until it stops.
Secure the rod in place with the wing nut.
Position the stop rod unit and secure in place
with the special screws.
CAUTION! Make sure that the stop rod
does not interfere with the downward
movement of the blade.
5.4.2 Table angle adjustment
The cutting head can turn 45° towards right and
towards left.
To perform these adjustments:
Give the release lever, under the handle activat-
ing rotation of the grooved rotating sector, a rm
press (Fig. 8).
Turn the sector and put it in the position corre-
sponding to the requested angle.
Release the lever.
Make sure the locking pin is correctly inserted
into the groove on the rotating sector.
Special adjustable stroke end devices have been
tted to the base in order prevent injuries due to
rotation of the grooved sector beyond the 45° right
and left positions.