6-8
GETTING STARTED
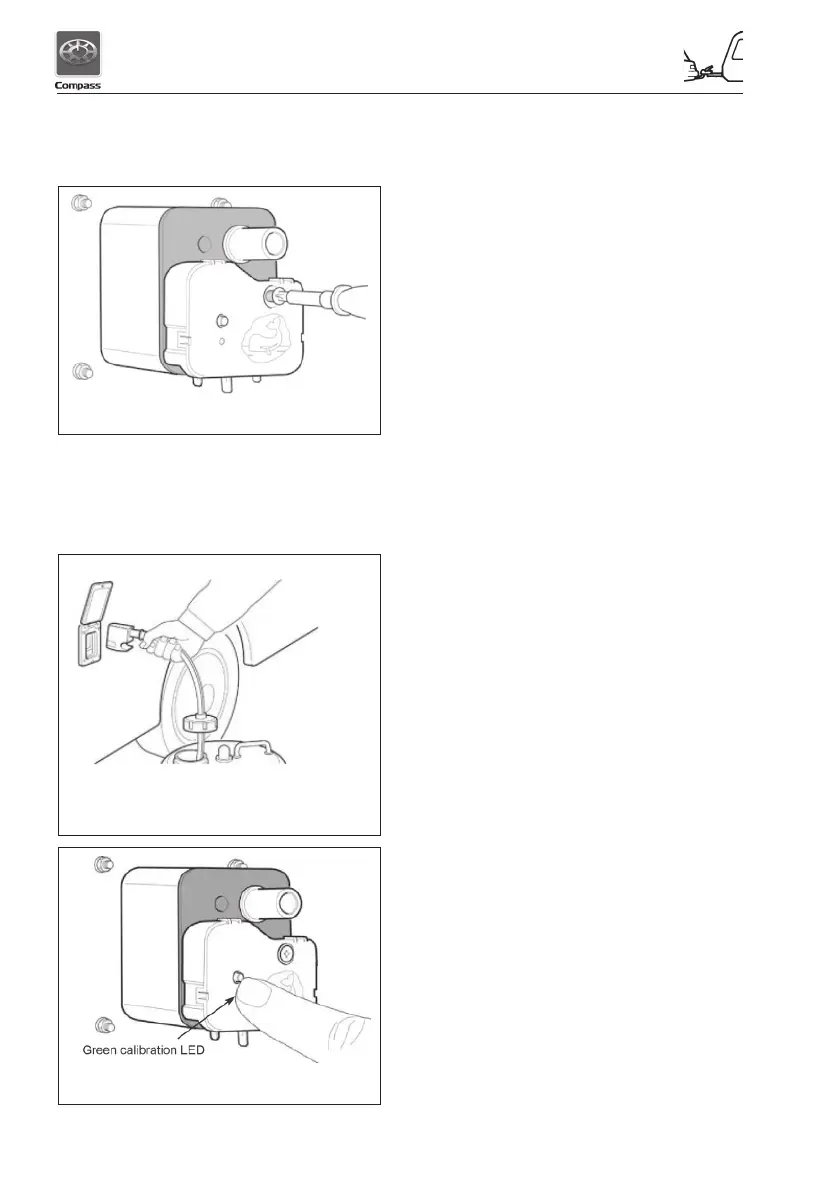
Fig 6 Installing and callibrating the system
Step 6 - Plug Watermaster IC onto socket
(see Fig 5) and tighten screw (NB -
Do Not Overtighten)
To connect the plug and pump kit
Priming:
Step 1 - Place pump into a full water
container (Fig 6).
Fig 5 Insert screw into Watermaster IC
Fig 7 Installing and calibrating the system
Step 2 - Insert plug into wall socket and
close lid to lock plug in place.
Step 3 - Adjust dust cover over opening in
container (Note: dust cover should
not be secured to water container
as air must be allowed to enter
container to replace water being
pumped out).
Step 4 - Switch on 12 volt supply at main
panel (Isolator switch) - the pump
should start to run.
Step 5 - Open one cold tap (eg. kitchen
sink)
Step 6 - After trapped air has been expelled,
water will flow from the open tap.
Step 7 - When air has enn expelled turn off
tap, the pump should turn off after
approximately 10 seconds.
To calibrate the System
Step 1 - Press and hold the calibration
button until the green LED starts to
flash after 1-3 seconds (Fig. 7)
Step 2 - Open the tap and the pump should
start (there maybe a short delay)
Step 3 - After approximately 30 seconds,
turn off the tap
Step 4 - After approximately 10 seconds,
(the pump should still be running),
press the calibration button again
Step 5 - The LED should turn solid green
and the pump will stop after
approximately 10 seconds. The
green LED should turn off and blink
briefly every 5 seconds. The system
is now calibrated.
The Watermaster IC is now installed and your
water system is ready for use.
Note: In normal operation the pump may
continue to run for up to 15 seconds after the
tap is closed.