16
OPERATING INSTRUCTION
The following Operating Instructions are used to guide the operation. The step-by-step details are listed below:
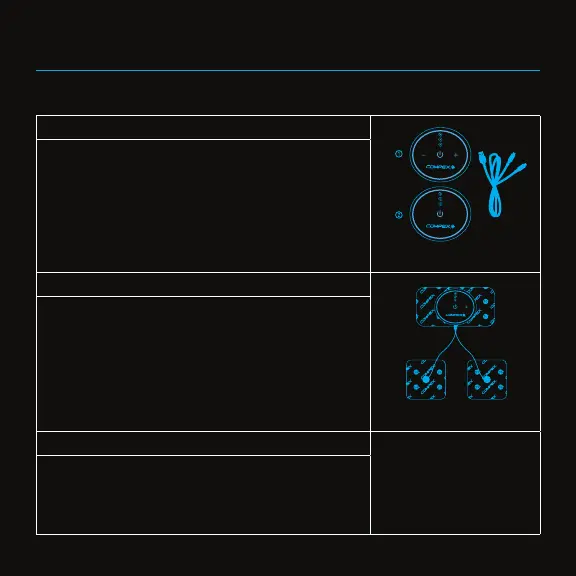
STEP 1 – Check the battery power of the device
The devices comes with rechargeable batteries and can be used as received. If the battery
icon is flashing when turned on, it means the battery is running out of power. Turn off and
charge the device with the enclosed USB cable. The LED light flashes during charging, and
becomes solid when the device is charged fully.
Note: When the battery is full, the 3 yellow LED lights are on; when the battery is running low,
only one yellow LED light is on.
STEP 2 - Install the electrode pad onto the device
Snap the enclosed rectangular electrode pad onto the device through the snap-on connector,
and use the lead wire to connect the device to the two square electrode pads. This should be
done prior to applying the device onto the skin of the treatment area.
STEP 3 - Put the electrode pad-installed device on the stimulation-needed body area
Place the pad-installed device onto the treatment area (such as the bicep). Press down firmly
and ensure a full and firm contact with skin.
Note: The skin should be clean and dry before placing the electrode pad-installed device.
Battery charging
Electrode pad installation
Place the device on the body area