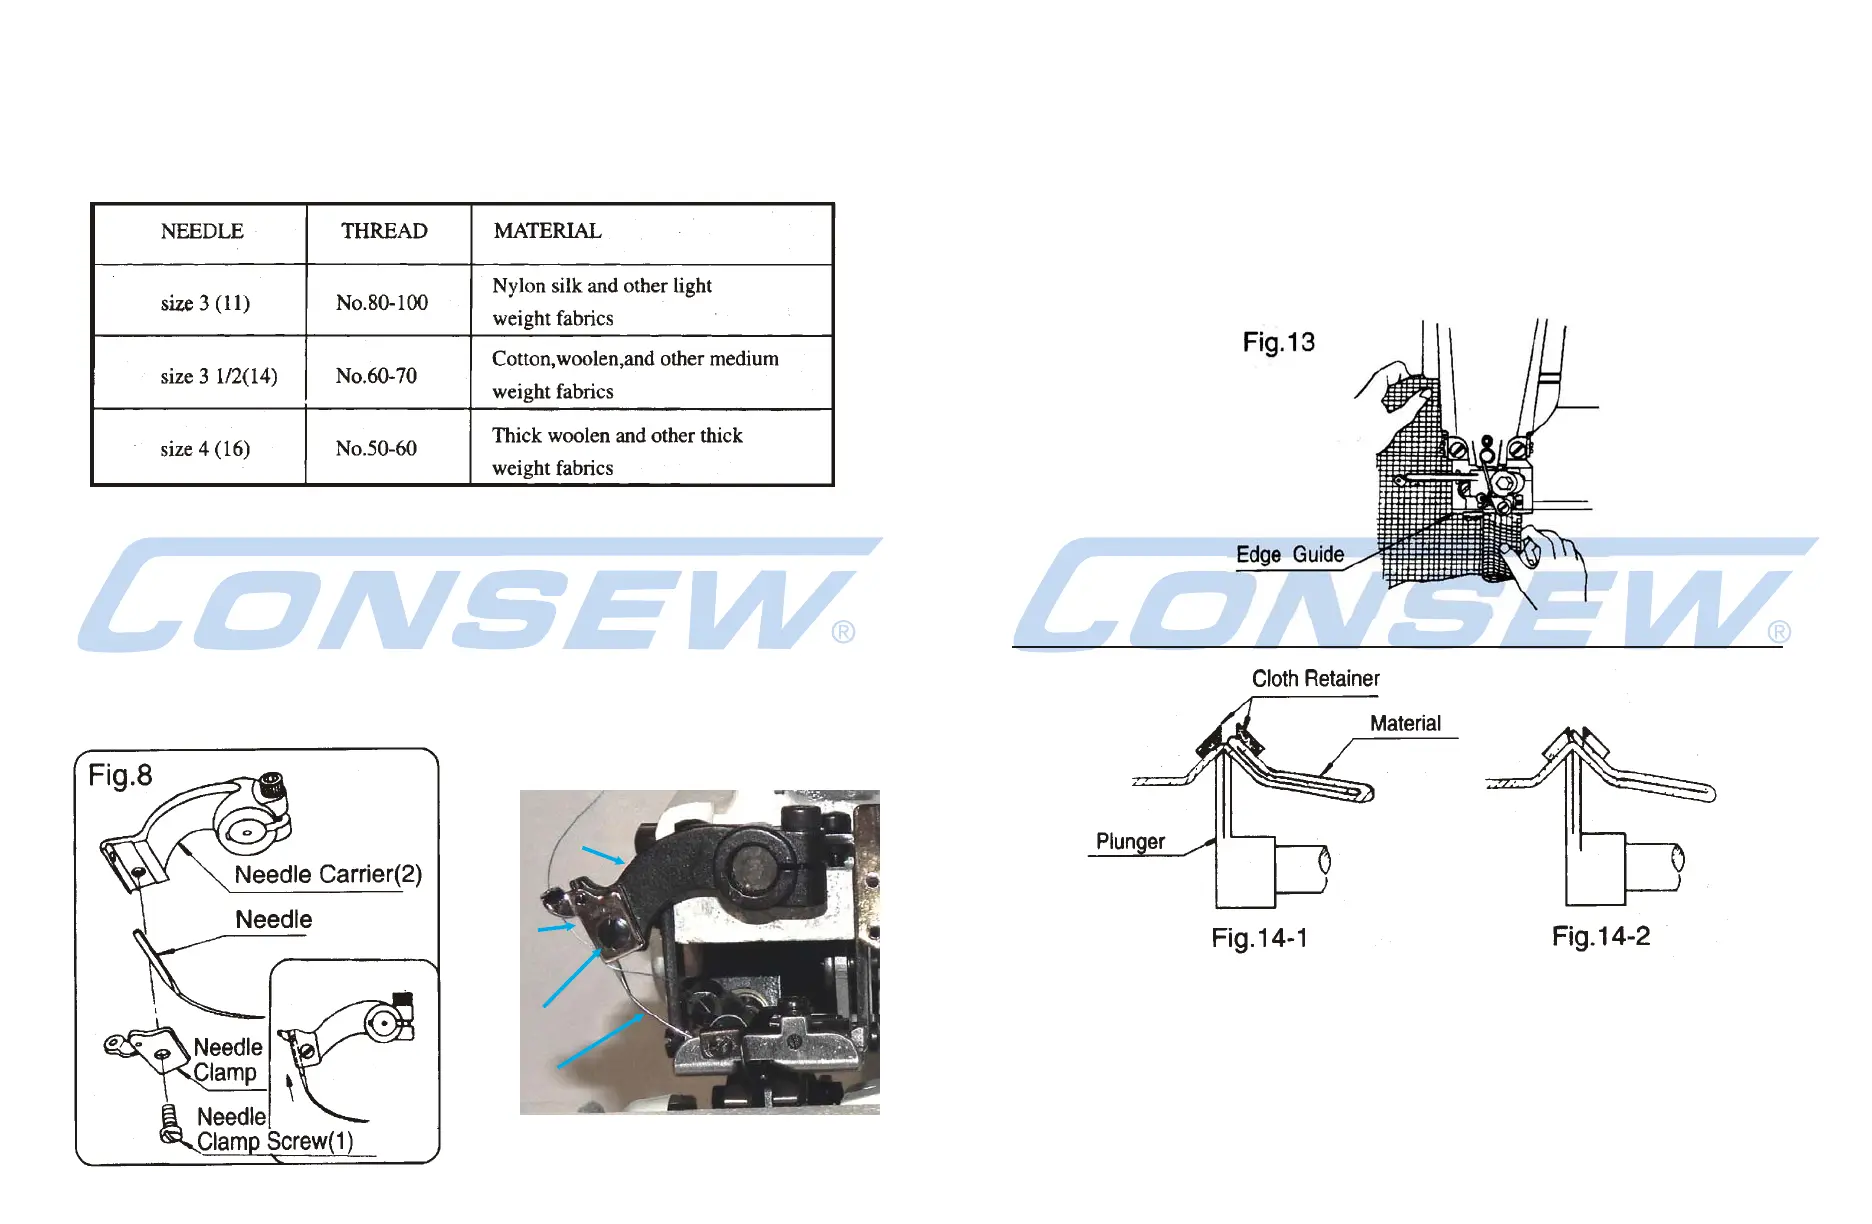
10
4. Needles and Thread
The recommended needle is system LW x 6T (or style 29-43)
Blindstitch Machine Needle. Size range from No.3 to No.4.
To assure satisfactory operation needles, thread and fabric
must be matched as suggested in the table below:
5. Replacing the Needle (Fig.8)
Turn handwheel away from you (clockwise direction) until needle reaches
to the end of its return stroke- as far left as possible. Remove needle to be
replaced by loosening needle clamp screw (1) about two turns. Insert new
needle into its seat on the needle carrier (2) pushing it as far to the left as it
will go. Now, tighten needle clamp screw (1) to hold the needle in place. .
Note: Fig.8 shows needle carrier parts in a disassembled view.
Needle
Carrier (2)
Needle
Clamp
Needle
Clamp
Screw (1)
Needle
Fig.8b
11
When the article is in proper position, completely release the knee lifter.
This will bring the bed back up and securly grab the material
Depress the foot controller and started sewing slowly. Watch as the material
passes the edge guide (Tip:
Don’t watch the needle go back and forth. Keep your
attention on the item you are sewing and guide it where you want it to sew.
)
Fig.14-1 shows how to insert material for double folded edge sewing.
Fig.14-2 single folded edge sewing.shows how to insert material for
Depress knee lifter. This causes the cylinder bed of the machine to
swing downward and creates a gap between the presser foot and
the cylinder bed. Insert the work in the gap just opened in such a
manner that the folded or sewn edge of the article is alongside the
edge guide of the presser foot.
6. Inserting the work piece and Starting to Sew (Figs.13-14)