6
MODEL 75T
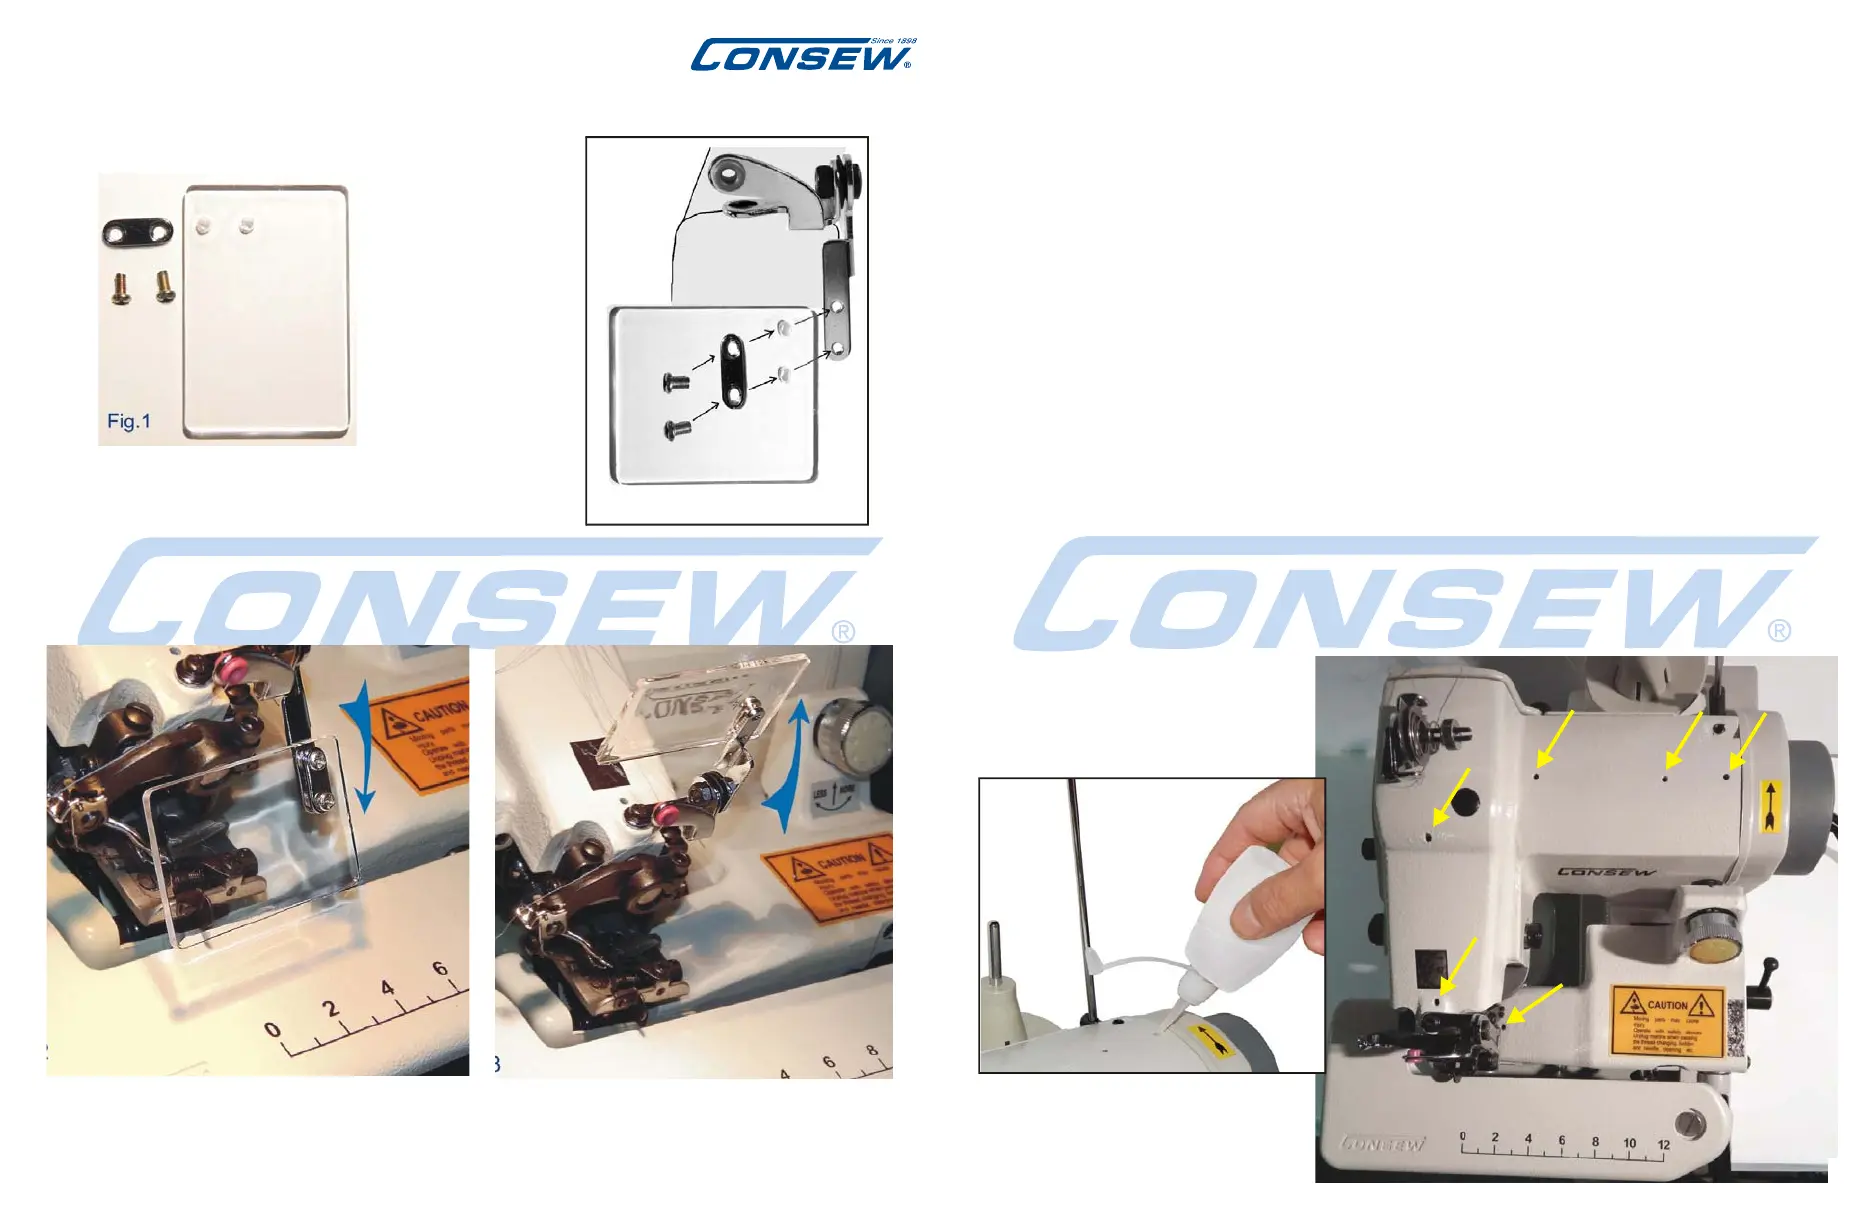
E. Optional Clear Acrylic Shield
(provided with machine - Fig Shield1)
To Install:
Using the two small
screws provided,
screw through the
metal plate and
the shield into the
two screw holes in
the swing arm
located just to the
right of the needle
assembly.
(Fig Shield 2)
In the “Down” position (Fig.Shield3)
the shield helps keep fingers
out of the needle area
In the “Up” position (Fig.Shield4)
it is out of the way
Fig. Shield 3
Fig. Shield 4
Fig. Shield 1
Fig. Shield 2
Lubrication is important for the trouble-free operation and long service life of the
machine. Therefore, after setting-up machine as per instructions, you should lubricate
it before using.
A convenient oil dropper filled with fine machine oil is provided with the tool kit.
(Use a pin to pierce the tip of the spout. Be sure to snap the cap on tightly after
opening to avoid leakage. You may want to keep it in a small resealable plastic bag
when storing.)
Lubrication Regimen
Carefully place a drop sewing machine oil into all the holes indicated by arrows on
Fig.7. There are 6 of them. Remember to give the machine a wipe down to remove
any residual oi1 that might stain your work.
As a part of regular daily maintenance, you should oil the 6 oil holes with a drop of
machine oil (in Fig.7) before starting work.
Tip: It is suggested that you do this at the end of the previous days work because
this would allow any excess oil to settle and with a quick wipe the machine will be
clean and ready to go the next day.
2. Lubrication (Fig.7)
Fig.7
OILING POINTS
Note: Internal Lubrication is
covered in sections
12 and 13.
7