12
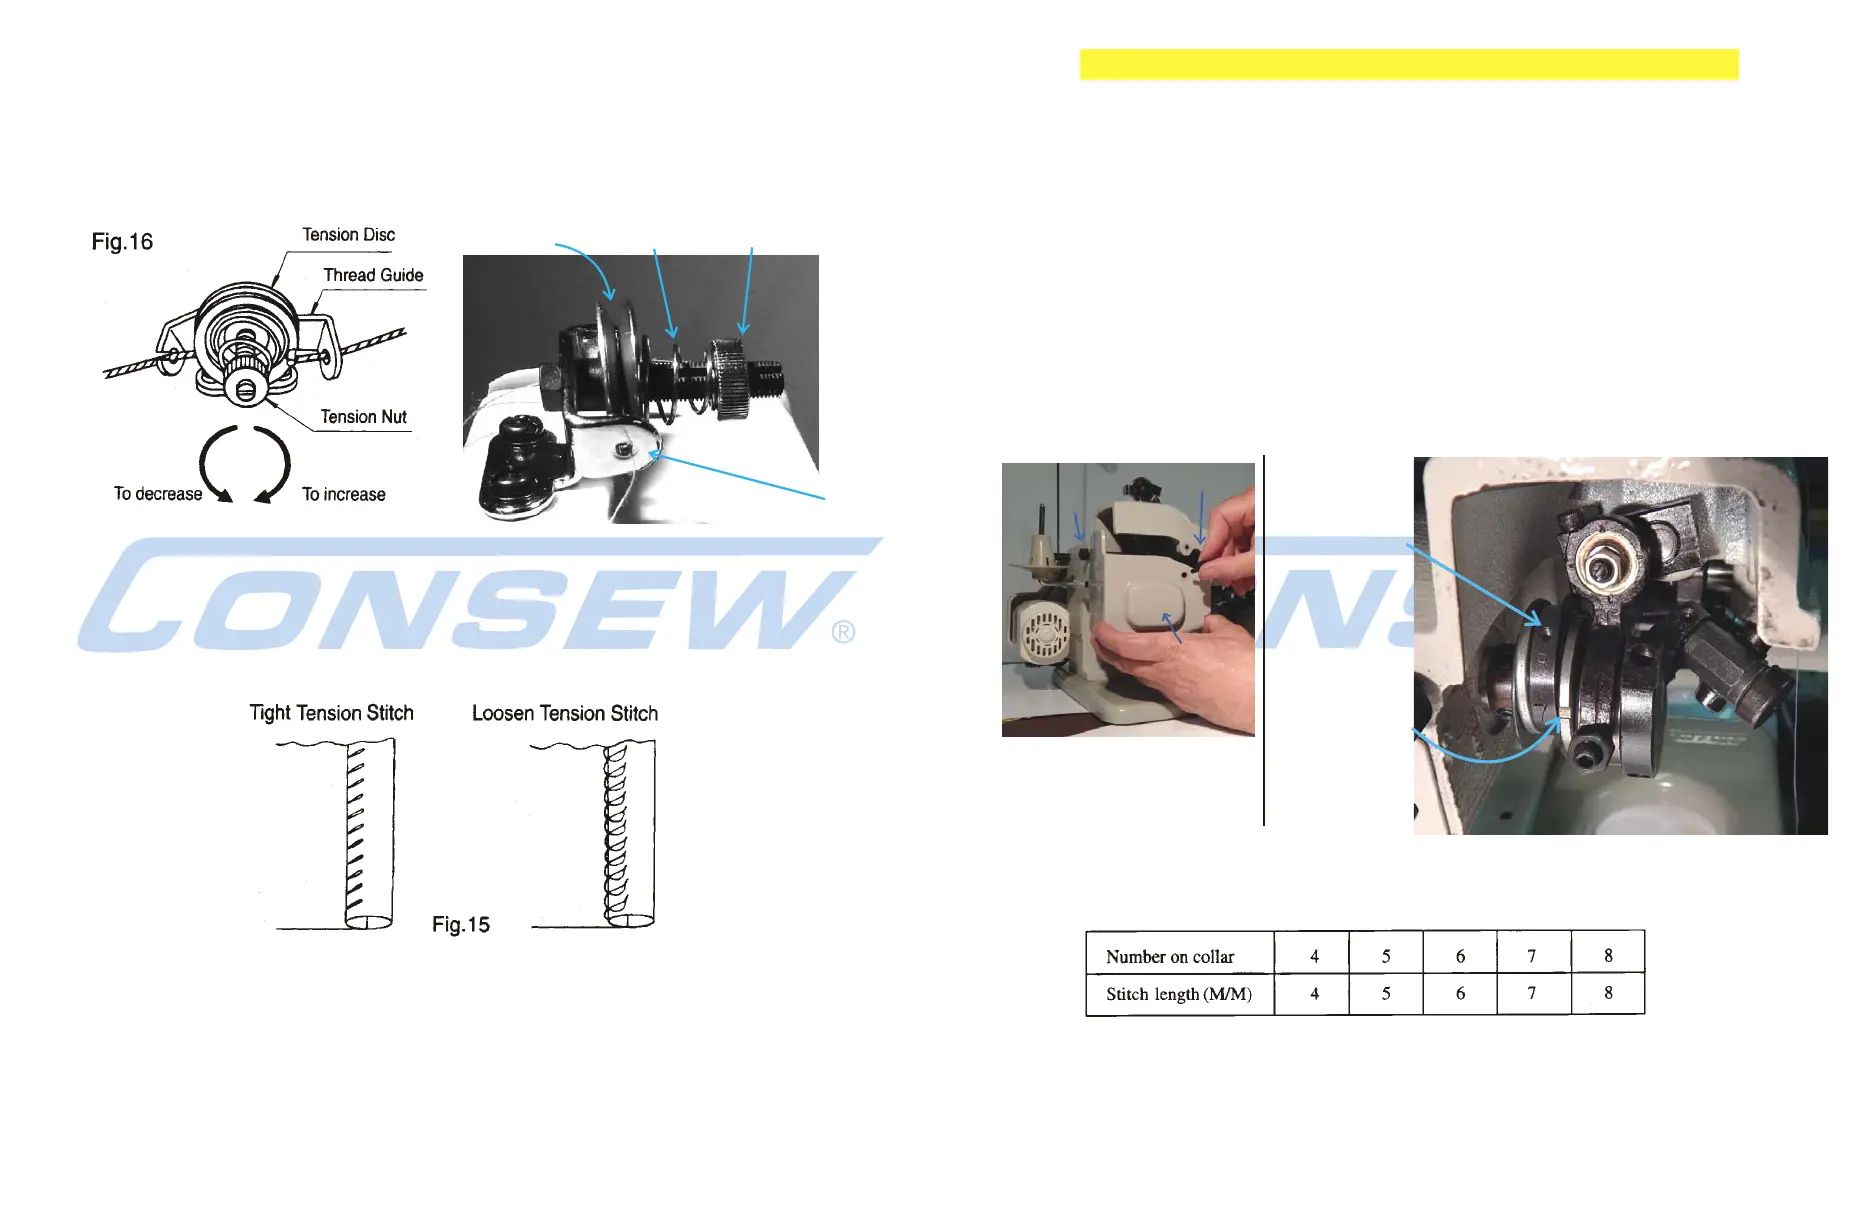
7. Adjustment of Thread Tension
Different kinds and weights of material and the various sizes of thread require
respective thread tensions. Thread tension is regulated by turning the tension
nut located at the top of the machine arm.
To increase thread tension, turn the nut away from you (clock wise).
To decrease the tension, turn the nut towards you (counter-clockwise).
Do not turn, tighten, or loosen tension more than about one quarter
turn at one time. Test for results and readjust, if necessary.
Fig.15 below shows the results of more and less thread tension.
Tension
Discs
Tension
Nut
Thread
Guide
Tension
Spring
13
Open side/back cover by just loosening the rear thumb screw and removing
the side thumb screw (Fig.17A).
Inside, Loosen the two set screws (1) in stitch regulating collar. You can see one in
Fig.17B. You can see the other one by Rotating the Gray Handwheel on the side of
the machine 1/3 of a turn clockwise. You are best off loosing that one first.
Then go back and loosen the one next to the number “8” so as soon as it is
loose, you can make the adjustment. Now you should be able to turn the co11ar
until desired stitch length number is lined up next to the indicator notch (2) in the
eccentric wheel . Then, tighten both screws (1) securely.
The factory setting for stitch length is usually set at "6" or “7”.
8. Regulating Stitch Length (Fig.17)
(1) Set Screw is
in this threaded
hole in the
stitch regulating
collar. There
are two of them!
Use small
Allen Wrench
(2) This is the
notch in the
eccentric wheel.
The number next
to it indicates
the stitch length.
In this case it
is set at “7”.
Just Loosen
this one
Take Off
this one
Back and Side
Cover
Fig.17A
Removing side/back cover.
Fig.17B
Each number on the collar (1) corresponds to the following stitch length in millimeters:
In order to choose a stitch length, you willprobably want to test various stitch lengths
on different materials so as to get an idea as to what works best in each situation.
Safety Warning: Pull out the AC power plug before working inside machine!