Revised: 15/02/16 31/03/2016
11
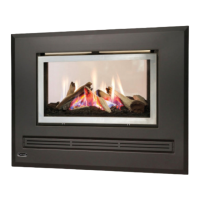
INBUILT HORIZONTAL Flue Installation
1. Determine the exact location for the heater.
2. Mark the exact location for the wall penetration
a. Determine that you will not be cutting through any vertical wall studs.
b. Check that the location of the wall-mounted terminal conforms to the requirements of
AS/NZS5601.1 – Location of a Flue Terminal.
3. Cut 2 holes 60 & 70mm in diameter at 160mm centres holes to be side by side in the horizontal.
4. Use the back of the cowl as a template for fixing holes.
5. Fit flex flue to spigots on the rear of the cowl using provided hose clamps and seal with silicone
(high temp).
NOTE- it may be necessary to trim the flue depending on wall thickness.
6. Attach the back of the cowl to the wall. Silicone around outside.
INSTALLATION - GAS PRESSURE TO GAS VALVE
NATURAL GAS 1.13 kPa.
Only to be carried out by a Coonara authorised technician!
1. Unpack flue kit and log set. (Packed inside with heater).
2. Carefully remove the cardboard carton surrounding the heater.
3. Remove fascia on Barossa & both fascias on the Clear View. To remove fascia undo 2 screws
either end of air intake panel and slide fascia up vertically off the hooks.
4. To eliminate damage to the fascias, DO NOT unscrew heater from the pallet until after fascias have
been removed.
5. Carefully tip heater on its end and remove 3 dimpled plates (for transport only)
6. Lift heater into position in the cavity.
7. Remove glass & frame, from front of heater only, by undoing 4 screws on the side of the door
8. Carefully place logs into place as per diagrams.
9. When installing logs do not bend sensors.
10. Start by pressing power button on the thermostat and then follow the instructions in the thermostat
manual supplied. Heater will not light for approx 1 minute. Once the firebox gets warm it will then
go to higher temp. Switch off using power button on the thermostat. This may have to be done 2 –
3 times, until gas lines and the unit is purged.
11. Re assemble heater in reverse order.
INSTRUCT CUSTOMER OF CORRECT OPERATING PROCEDURE
.