Coopra Advanced Heating Technologies Installation manual E40C
15
CHAPTER 2. INSTALLATION
2.1. Mounting the assembly bracket
To mount the assembly bracket on a brick wall of
sufficient thickness, use the screw plugs that are
supplied. When you have determined the place of
assembly, proceed as follows:
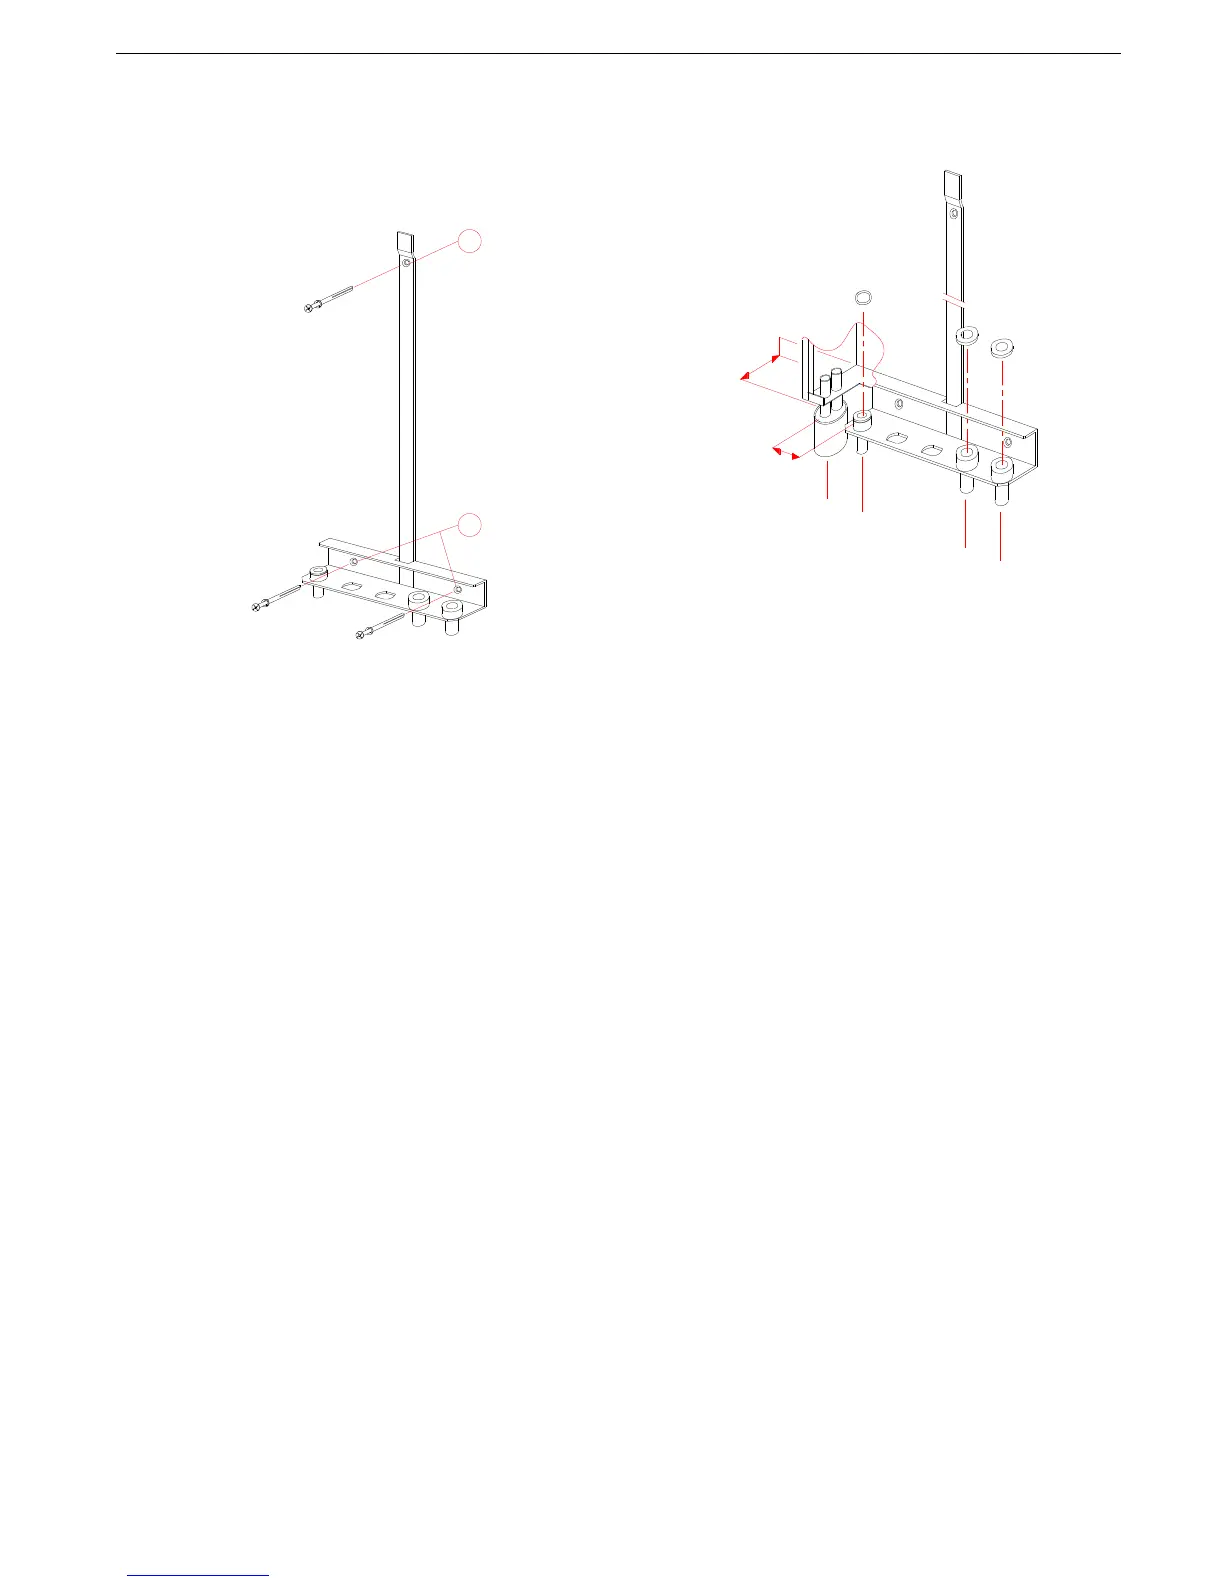
- Draw the position of the hole (1) in the strap of the
assembly bracket.
- Use a masonry drill of 8 mm diameter to drill a hole with
a sufficient depth in the wall.
- Keep the hole (1) in the assembly bracket in front of the
hole in the wall and fit one of the screws supplied through
the assembly bracket in the hole.
- Align the assembly bracket with the aid of a spirit level.
- Use a masonry drill of 8 mm diameter to drill holes with
a sufficient depth in the wall through the two bottom
holes (2) in the assembly bracket.
- Fit two of the screws supplied in the bottom holes.
- Fix the assembly bracket firmly by tightening all screws.
2.2. Water and gas connections
1 = Heating return
2 = Heating flow
3 = Gas connection
4 = Draconin connection
2.2.1. Gas connection
- Connect the gas pipe to connection (7)
- Install the gas pipe stress free.
- Include an approved stopcock in the pipe.
- Carefully blow the gas pipe clean.
2.2.2. Heating water connections
- Connect the heating return pipe to connection (1)
- Connect the heating flow pipe to connection (2)
- Install a filling and draining device in the heating
system.
- Stopcocks must be fitted in the heating return pipe (1)
and the heating flow pipe (2).
- The heating return pipe (1) must be fitted with a suitable
expansion vessel.
- If it may be expected that the heating water will be
severely contaminated by under floor heating, fitting is a
2 kg dirt filter in the return pipe is recommended. Coopra
cannot give a guarantee for damage to the unit that is
caused by dirt in the system.
- A differential bypass valve must be installed on plants
where it may happen that various radiators are
simultaneously excluded from the circuit because of
closure of control or zone valves.
- Before connecting the unit, rinse the system completely
to remove all contamination.
1
2
3
2
1
4
40
75
 Loading...