Chapter 4—Seal Replacement
Instructions
For all models 521 and 1021.
Simple as A, B, C... but watch alignments A, B and C or
your new seal will leak!
Caution: Bleed all pressure from the pump and
piping before starting to install your seal assembly.
Cleanliness
Even the smallest amount of dirt on your new seal
can cause early failure. Keep all parts, tools and your
hands clean while installing the seal. Never touch the
smooth lapped faces of the carbon rotor or seal seat.
With LP-Gas, anhydrous ammonia, and similar liquids,
the fluid is 5 to 10 times thinner than water so the
smooth/lapped surfaces of the new seal need to be as
clean as possible.
Workmanship
This pump is a precision piece of equipment with very
close clearances and should be treated with care. Never
beat on it when inserting or removing parts.
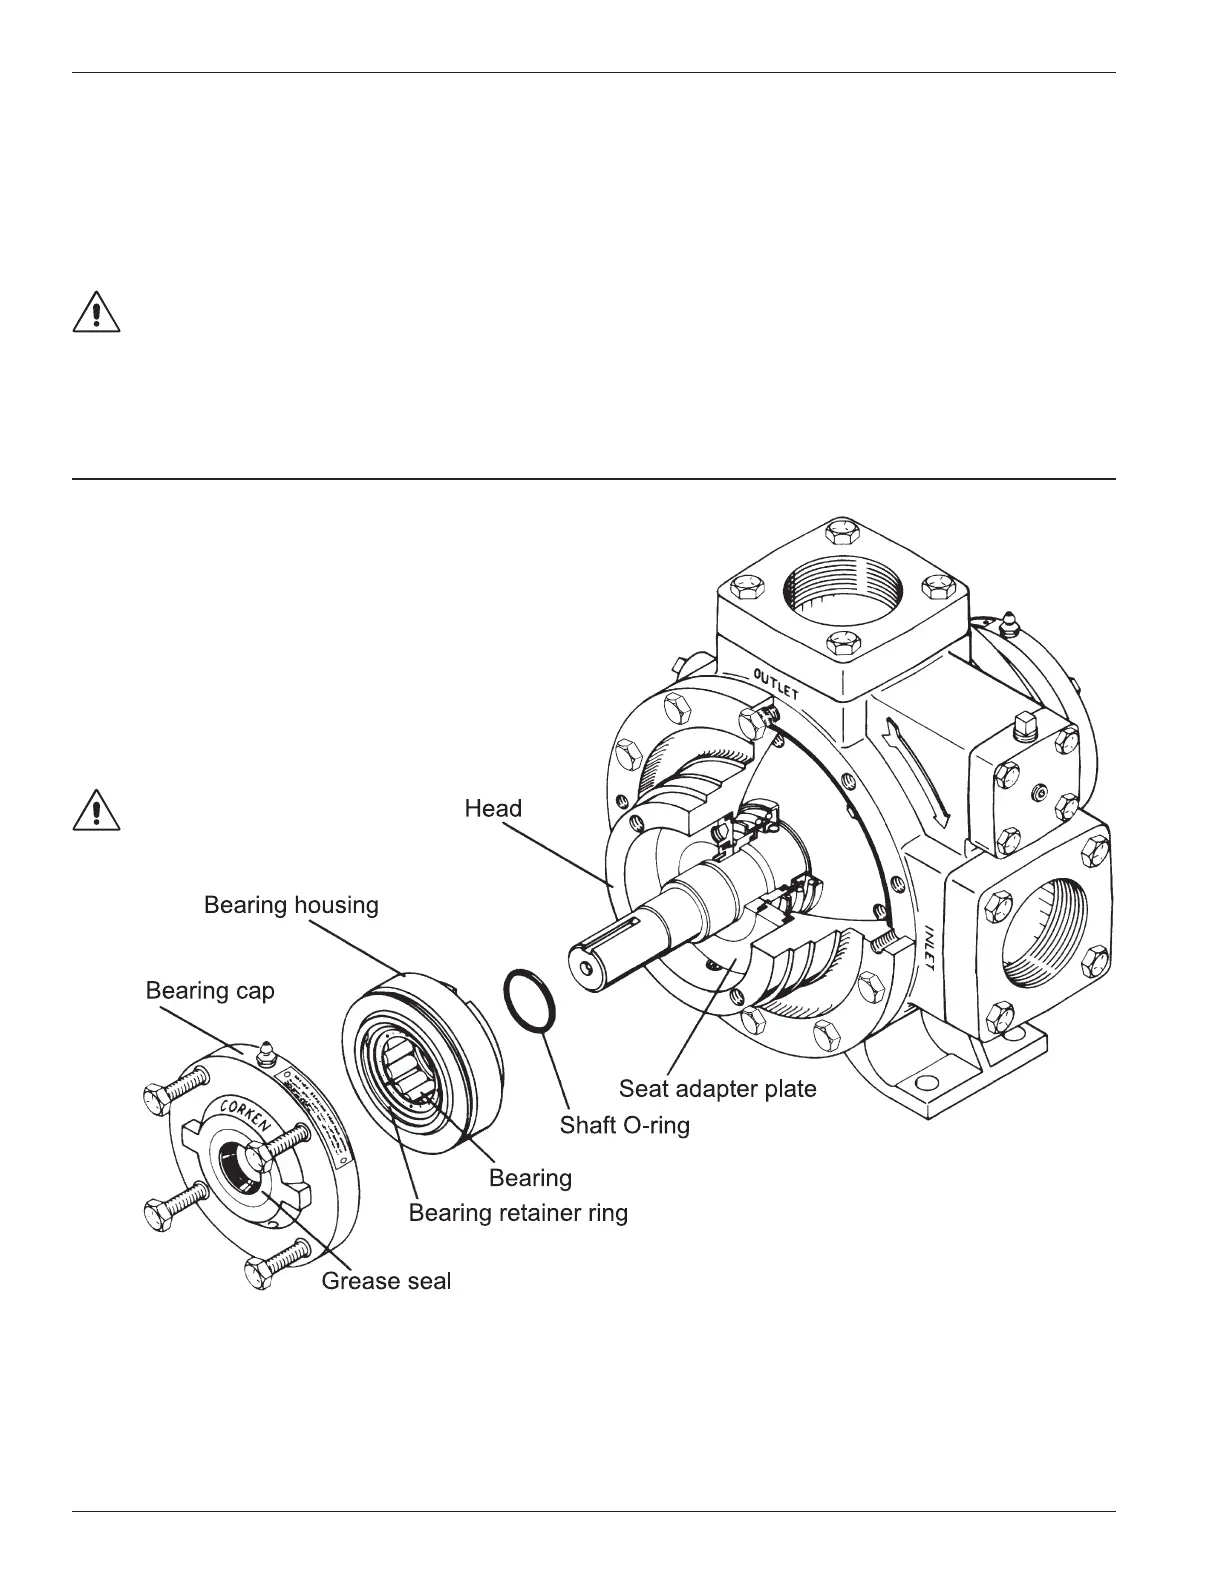
Step 1
Depressurize and open the pump.
Remove the bearing cap and bearing housing. Should
the bearing housing be rusted or frozen in place it may be
necessary to remove the entire pump head. The housing
can then be driven out gently with a block of wood.
Remove the old shaft O-ring and discard it. Never reuse
an old O-ring except in an emergency. If you are also
installing a new bearing or grease seal do so now.
Follow established safety
regulations!
10