8
4. Testing with the OTDR
4a. General testing procedure
To test in any mode, simply attach the fiber to the correct port. Note that some
modules can test both MM and SM fiber. Make sure that you connect the fiber to the
correct port which is labeled on the module. To start the test you need to select the
green Start button. The parameters you set vary from mode to mode and will be
discussed in the following sections.
4b. Setting up your OTDR
The following screenshots were taken from the Advanced Mode Testing module. Also,
the create ref/template setup tab in Template Mode is not shown. Please refer to the
main reference manual to see that tab. To get to the OTDR setup, press the OTDR
Setup button in the main menu on the right side of the screen(see Fig.9,button 9).
The setup tabs will load up and should look like the following.
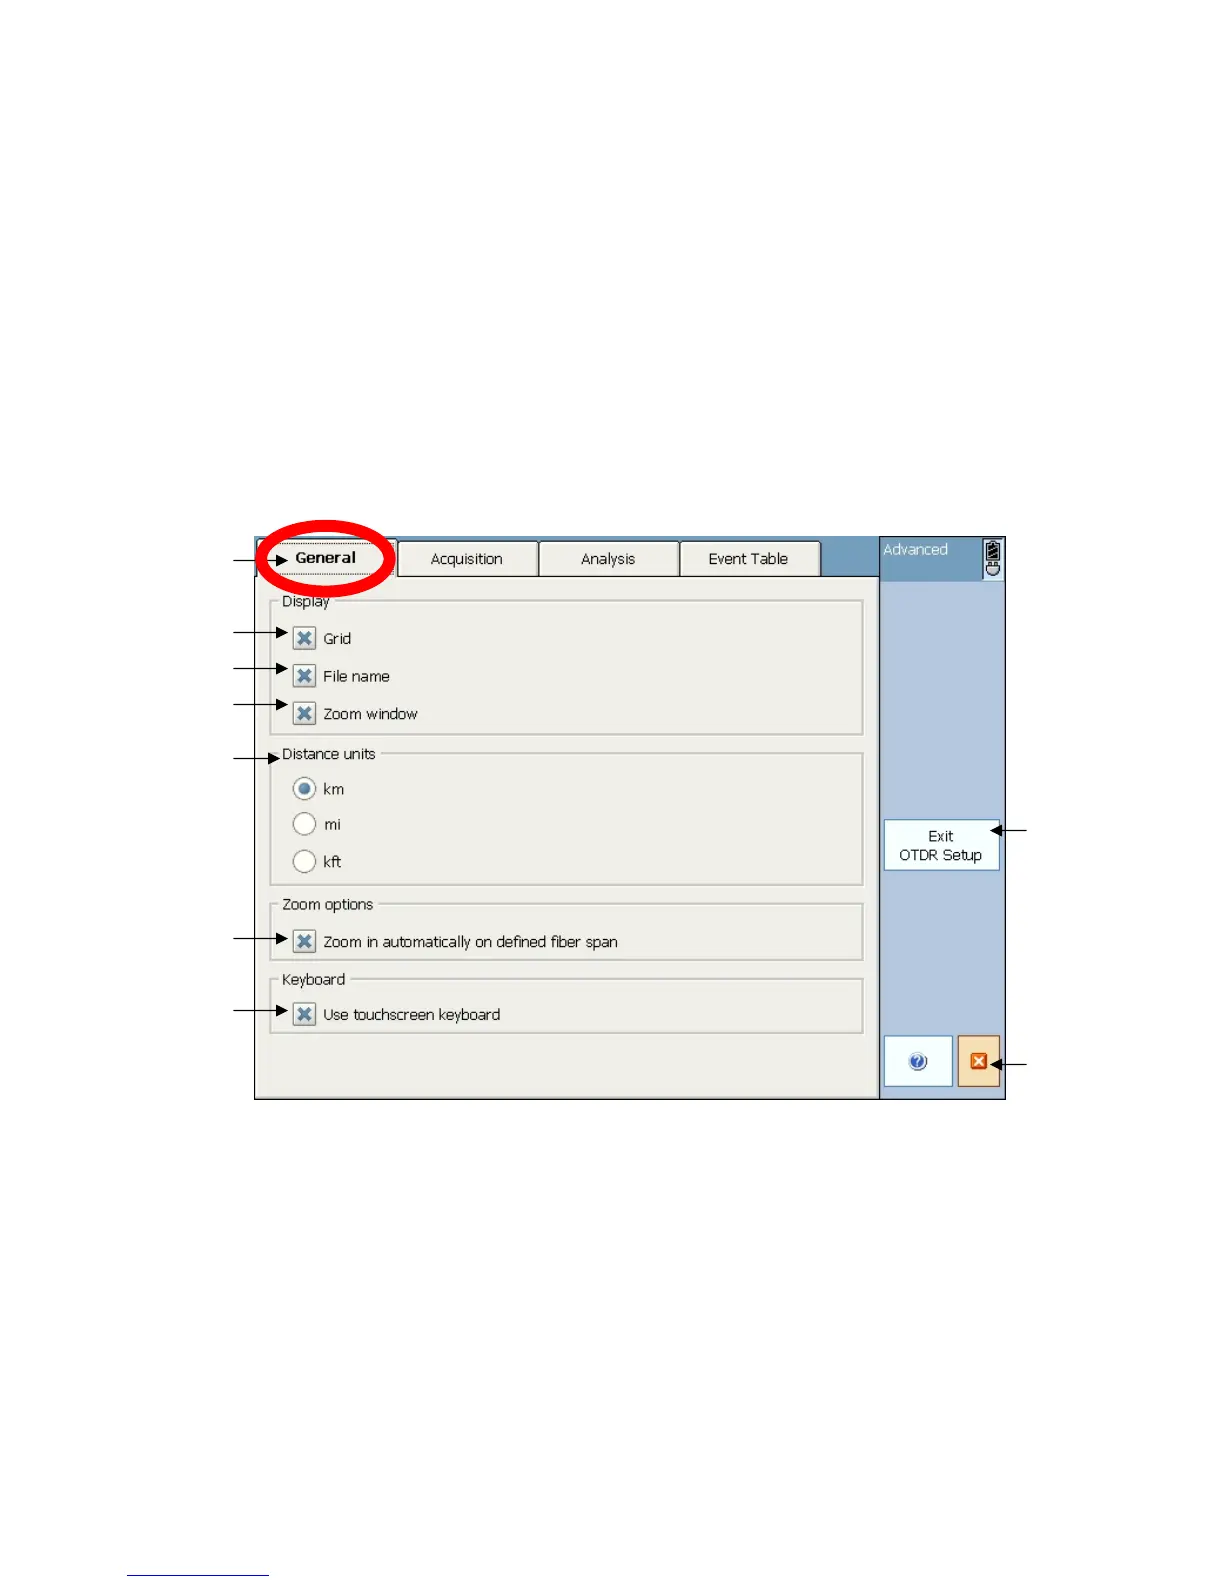
Figure 5. OTDR setup – General tab
1. General Setup tab- Select this tab to access the general setup functions.
2-4. Display settings- Select whether or not you want a grid, the file name, or the
zoom window to appear on the trace.
5. Distance units settings- Select what units you would like to work in.
6. Automatic zoom button- Select this option if you want the OTDR to automatically
zoom in on a defined span after each trace is shot.
7. Touchscreen keyboard setting- Press this button if you want to turn on/off the
touchscreen keyboard.
8. Exit OTDR Setup button- press this button to exit setup and save settings
9. Close module button- press this button to close module, not the setup window.
 Loading...