VentoVind
™
installation
Note that any electrical installations carried out in connection with this work must
be done by a qualified electrician in accordance with local and national regulations.
VentoVind™ must be connected to an earthed, single phase 230 VAC/50 Hz socket.
The socket must be fused up to 16A and an earth-fault breaker is recommended.
Relevant protective equipment and protective clothing must be used in accordance
with the employer's regulations/applicable local work environment plan AFS2012:02
AFS1981:14.
VentoVind™
is installed and assembled in the following steps.
Step 1: Make connections to outdoor air and power.
Step 2: Seal the attic.
Step 3: Assemble the equipment.
Step 4: Start the unit.
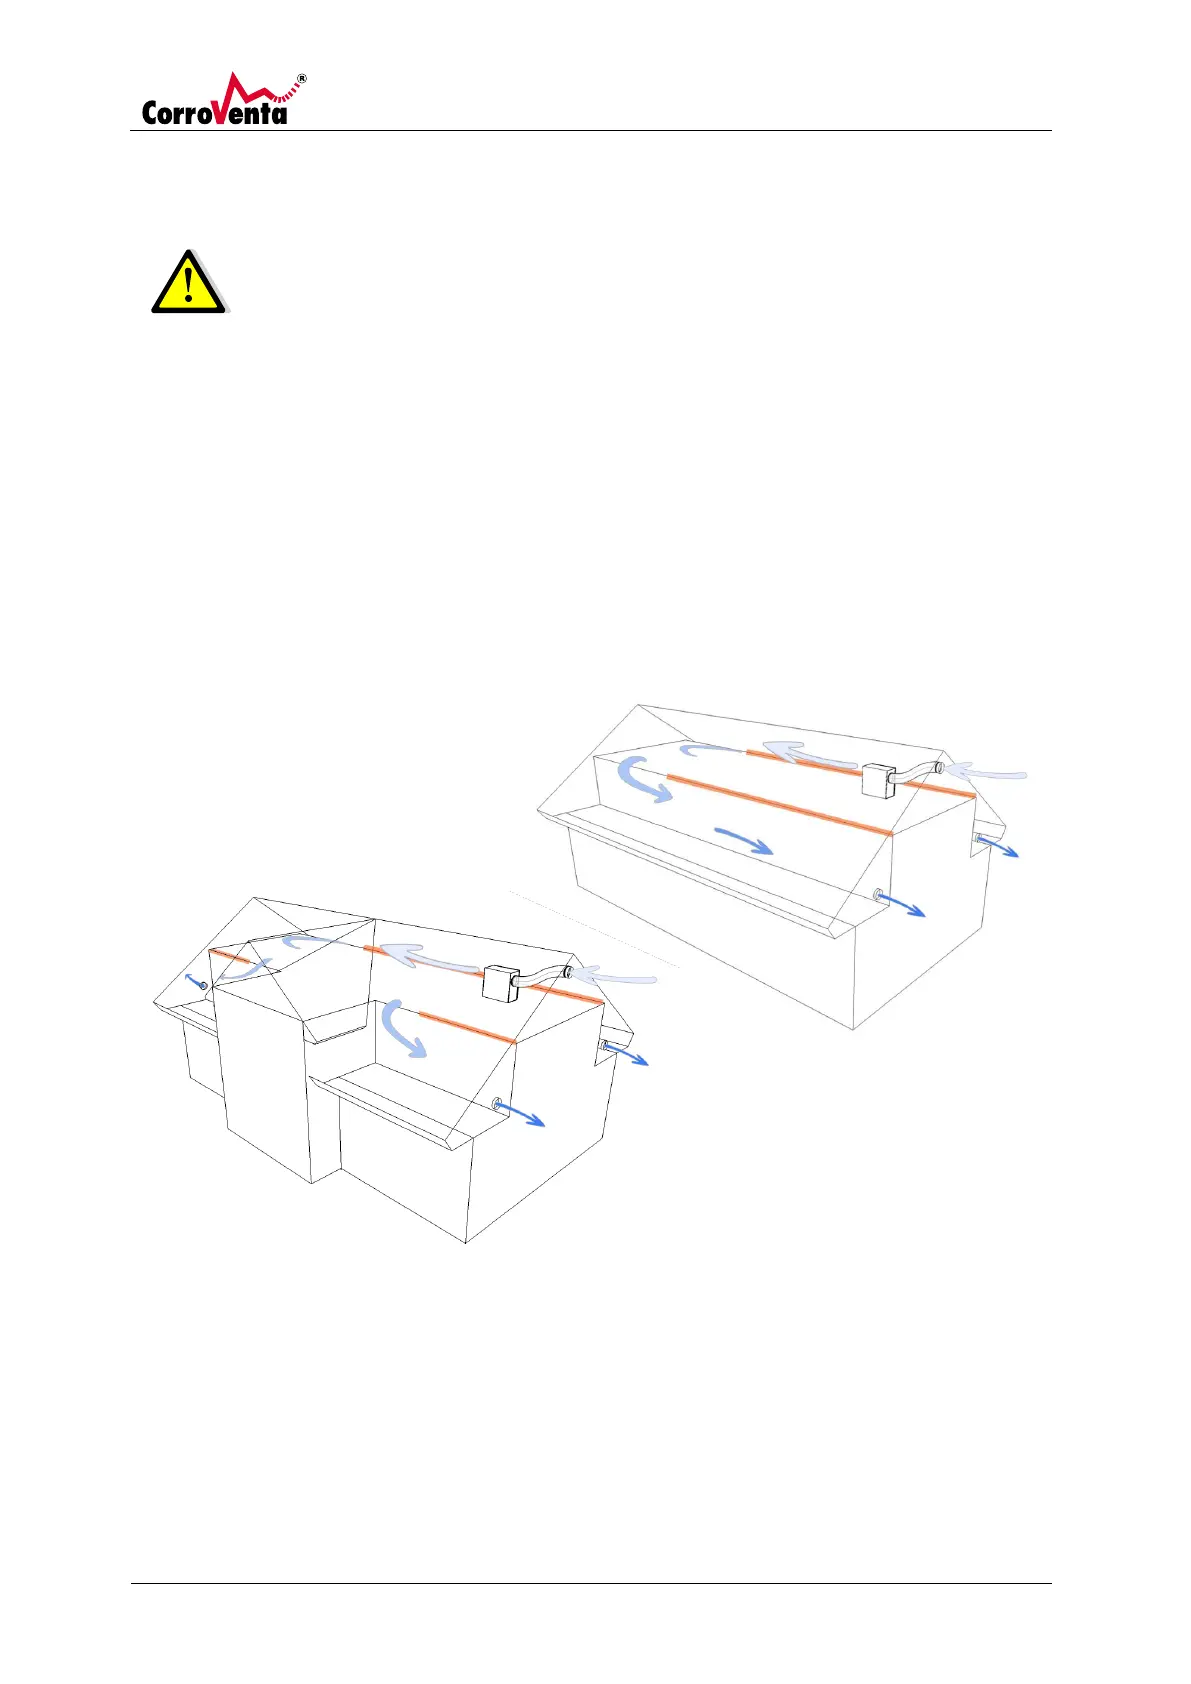
Planning installation, vents and air flow
In the vast majority of cases, existing vents can be found in the gable ends of the house which can be
used for VentoVind™. Ensure that vents have satisfactory capacity in order to achieve the correct air
flows. Avoid existing vents with louvres as these are very likely to cause wind noise when the fan
operates. Regardless of whether it is one continuous roof space attic, divided roof space attic or attic
space on the same level as the living space, try to design the installation so that the drier outdoor air
flows through the entire attic space before it is evacuated to the surroundings again. In simpler