Vapour barrier at joist level
Newer houses have plastic sheeting at attic joist level, usually reinforced ones. Even in such houses,
however, there may be some leaks that should be sealed. Large leaks through attic joists are usually
most easily detected in the wintertime when there is a greater risk of condensation. Sometimes the
leak manifests itself as local mould infestation on the ceiling above. Depending on the type of
construction and leakage, aging-resistant PE tape intended for the vapour barriers or polyurethane
foam can be used as sealing materials. Ensure that the vapour barrier is not damaged by the selected
sealing material.
Other leaks
Other ventilation leaks, for example at roof lead-ins, roof entrances or gable ends can be sealed as
best as possible using suitable material. Joint foam and sealant can be used for smaller cracks and
plastic or sheet material may be needed for larger holes.
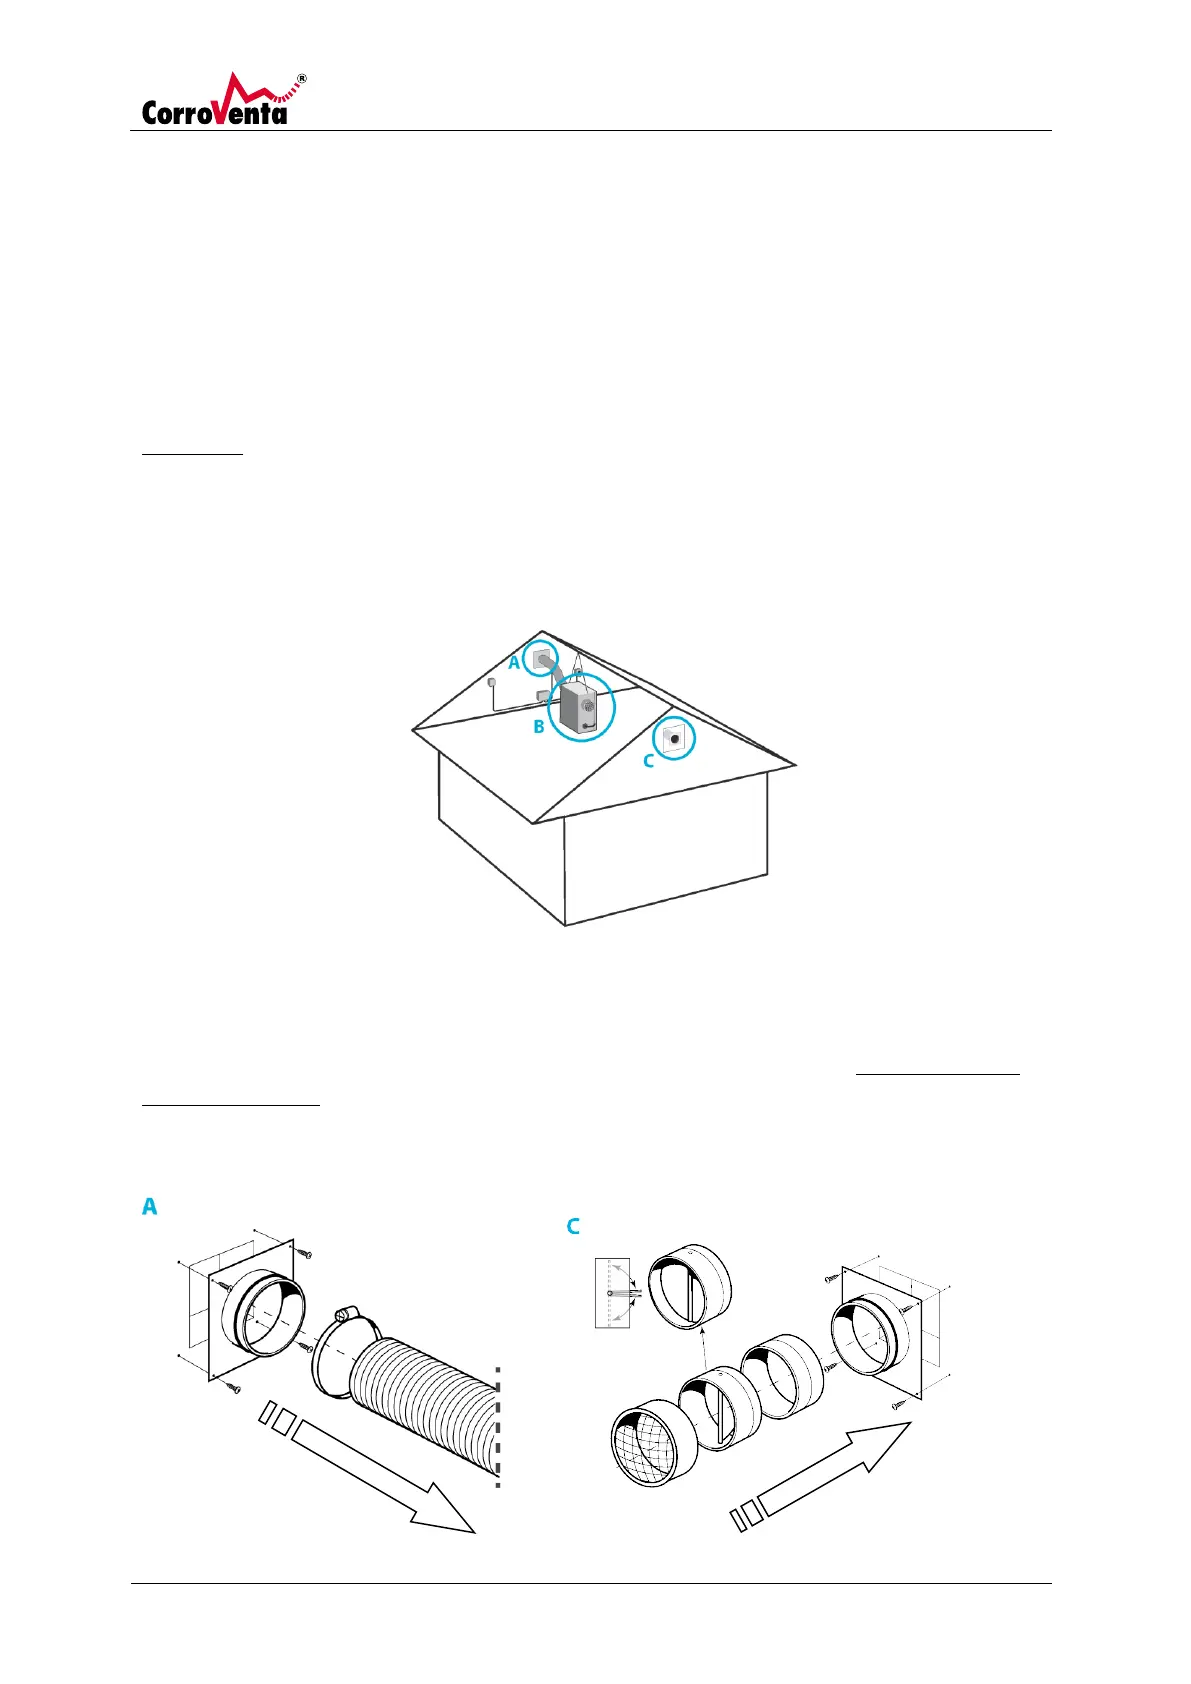
Installation
Dampers and wall plates
Install wall plates in the attic space over the openings for inlet (A) and outlet air (C). Install nipples,
mechanical dampers and guards on the wall plates for outlet air (C). To ensure the mechanical
opening and closing function of the damper, the damper must be installed with the centre shaft in
the vertical position. The function of the damper is to allow air to exit the attic in the event of
overpressure. Ensure that the damper opens when touched lightly, and springs back and closes
without problem. Finally, install the guard. The intended air flow is indicated by arrows.