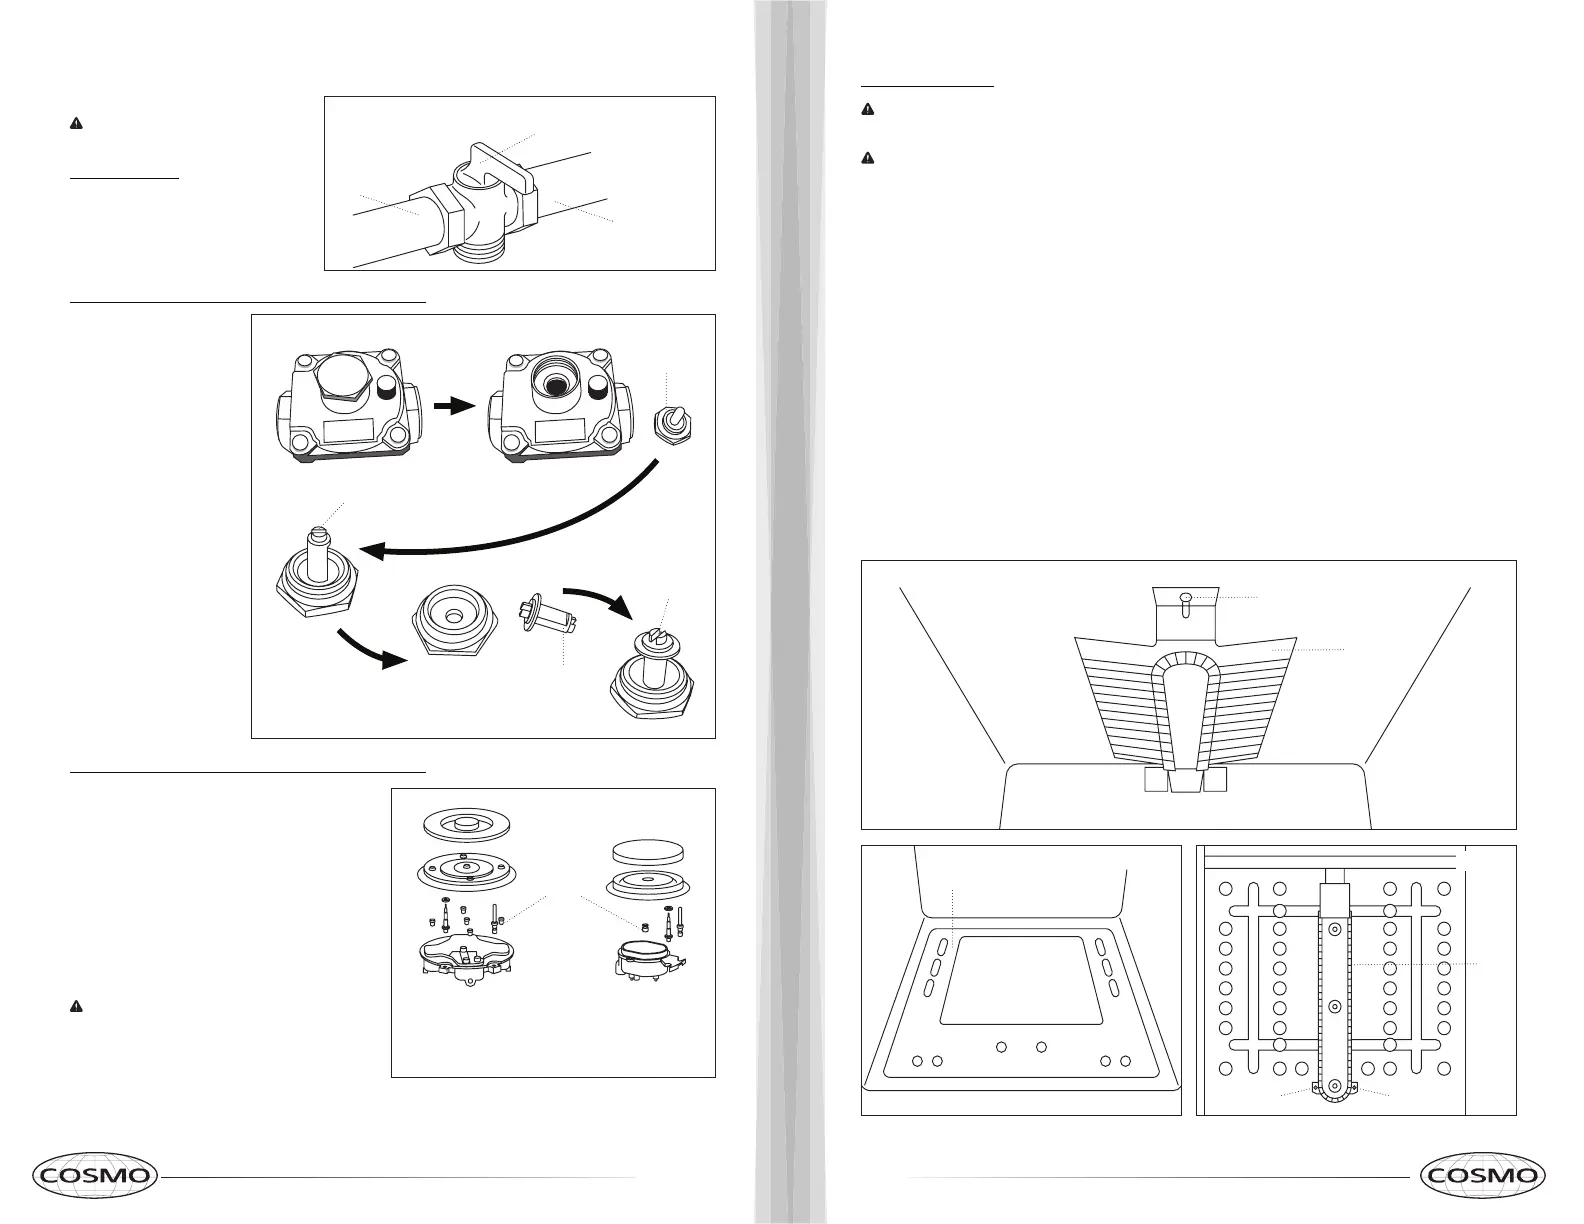
Figure 20
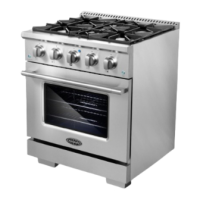
Figure 19
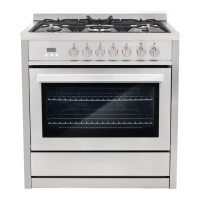
Figure 18
The conversion must be performed by a qualified technician in accordance with the kit instructions and all local
codes/requirements�
CAUTION: Failure to follow instructions
could result in serious injury�
Shut-Off the Range
1� Turn the manual shut-off valve to the
closed position�
2� Unplug range or disconnect power�
How to Convert Gas Pressure Regulator (Natural Gas to LP Gas)
Manual Shut-Off Valve
“Closed” Position
Regulator Cap
Retainer Pin
Retainer Pin
Retainer Pin
To Range
Gas Supply Line
How to Convert Gas Pressure Regulator (Natural Gas to LP Gas)
1� Turn gas pressure
regulator cap counter-
clockwise with a
wrench to remove�
2� Remove the retainer
pin that is currently
positioned for use
with Natural Gas�
3� Turn the retainer pin
upside down and
re-install into the
regulator cap� It is
now positioned for
use with LP Gas�
4� Screw the regulator
cap back into the
regulator and reattach
the regulator to
the nipple and flare
union�
1� Remove the burner grates, burner caps and
burner heads�
2� Using a 7 mm nut driver, remove the burner
orifices�
3� Install the proper orifices in replace of the ones
that were removed�
4� Re-install the burner bases, heads and top grates�
Make sure the burner caps are properly seated on
the burner heads�
NOTE: The triple burner has only two injectors, one
injector mounted in the center and another mounted
below the cover plate� To access the second injector,
remove the two screws and the cover plate�
Triple Ring Burner
5 Orifices
Change Burner Orifices
IMPORTANT: Carefully read and observe each orifice label for correct location� See the Burner Chart earlier in
this section�
NOTE: First remove all orifices and then start replacing them� This will help avoid the possibility that some
may not be replaced�
Change the broil burner orifices:
1� Open the oven door then take out the racks and broiler tray�
2� Unscrew the screws(1) at the front of the broil burner then pull forward the burner to remove it�
3� Using a 7 mm nut driver, remove the burner orifices�
4� Install the proper orifices in the exact locations�
5� Proceed in reverse to reinstall the Broil burner�
Change the bake burner orifices:
1� Open the oven door then take out the racks and broiler tray�
2� Remove the bottom bake burner cover and now bake burner will come out�
3� Unscrew the screws(2) at the front of the bake burner then pull forward the burner to remove it�
4� Using a 7 mm nut driver, remove the burner orifices�
5� Install the proper orifices in the exact locations�
6� Proceed in reverse to reinstall the Broil burner�
Figure 21
Figure 22
Screw
Broil
Burner
Bottom Bake Burner Cover
Bake
Burner
ScrewScrew
Figure 23
 Loading...