12
ENGLISH
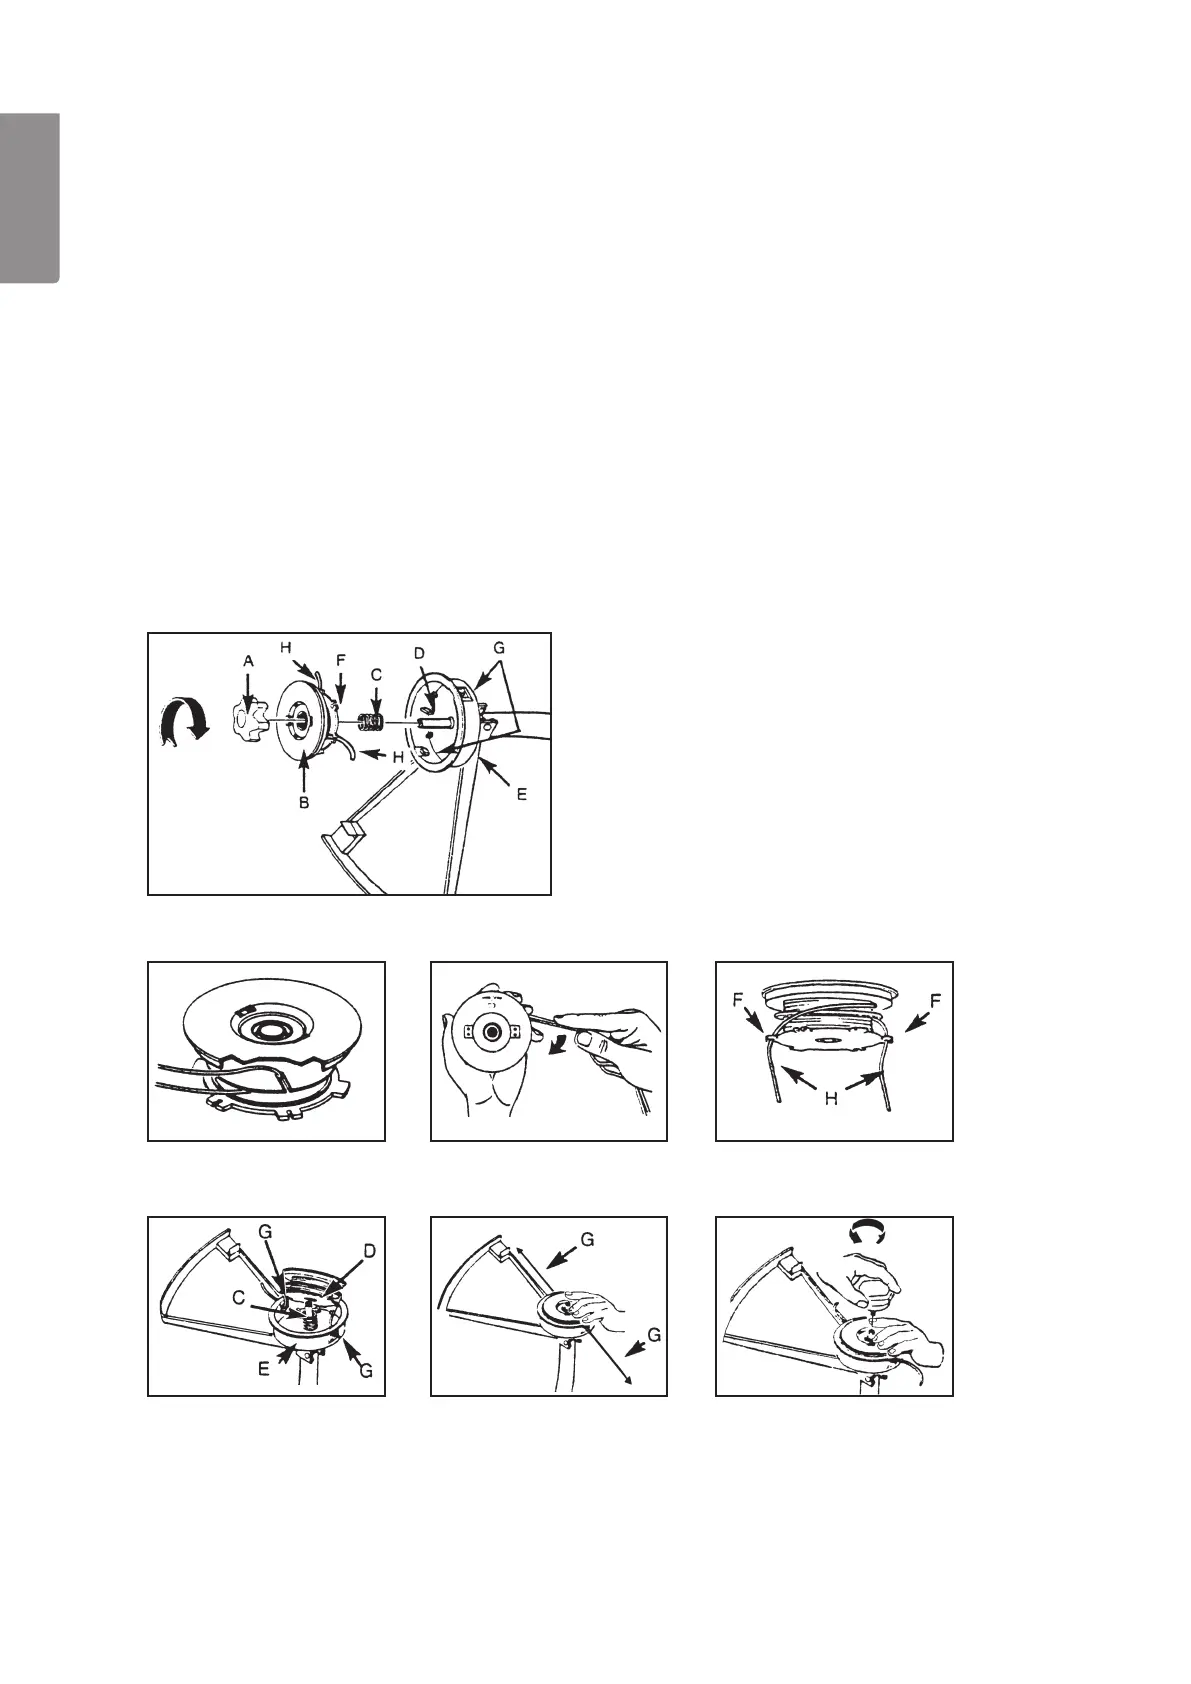
A. Locking cap
B. Spool
C. Spring
D. Spindle
E. Housing
F. Line slot
G. Line hole
H. Trimmer line
Fig. A Fig. B Fig. C
Fig. D Fig. E Fig. F
9.1 Changing the trimmer line
1. Turn thelocking cap (A) clockwise and remove it either by hand or using thesupplied spanner.
2. Remove thespool (B) and thespring (C) from thespindle (D).
3. Remove theexisting trimmer line (H).
4. Cut an8.6 metre length of trimmer line (Ø 2.4 mm). Fold it in themiddle so you end up with two 4.3 metre
lengths. Place thecrease of thefold into one of theslots in thedisc dividing thespool. See fig. A.
5. Wind both ends of theline around thespool clockwise. Hold theline with your fingers while winding to keep
it taut. Stop when about 15 cm of line remains. See fig. B.
6. Press theends of theline into theslots (F) on opposite sides of thespool. See fig. C.
7. Push in thespring (C) on thebottom of thespool (if not already in). Pull theends of theline through
theholes (G) in theside of thehousing (E). See fig. D.
8. Push thespool (B) into thehousing whilst feeding theends of theline through theholes (G). See fig. E.
9. Press thespool (B) in so that thespring becomes compressed. Tug theends of theline, freeing them from
theline slots (F) in thespool.
10. Push theassembled trimmer head securely onto thespindle and hold it in position. Tighten thelocking cap
(A) anti-clockwise (only finger-tight). See fig. F.
11. Cut theends of theline so they are no longer than 13 cm.