23
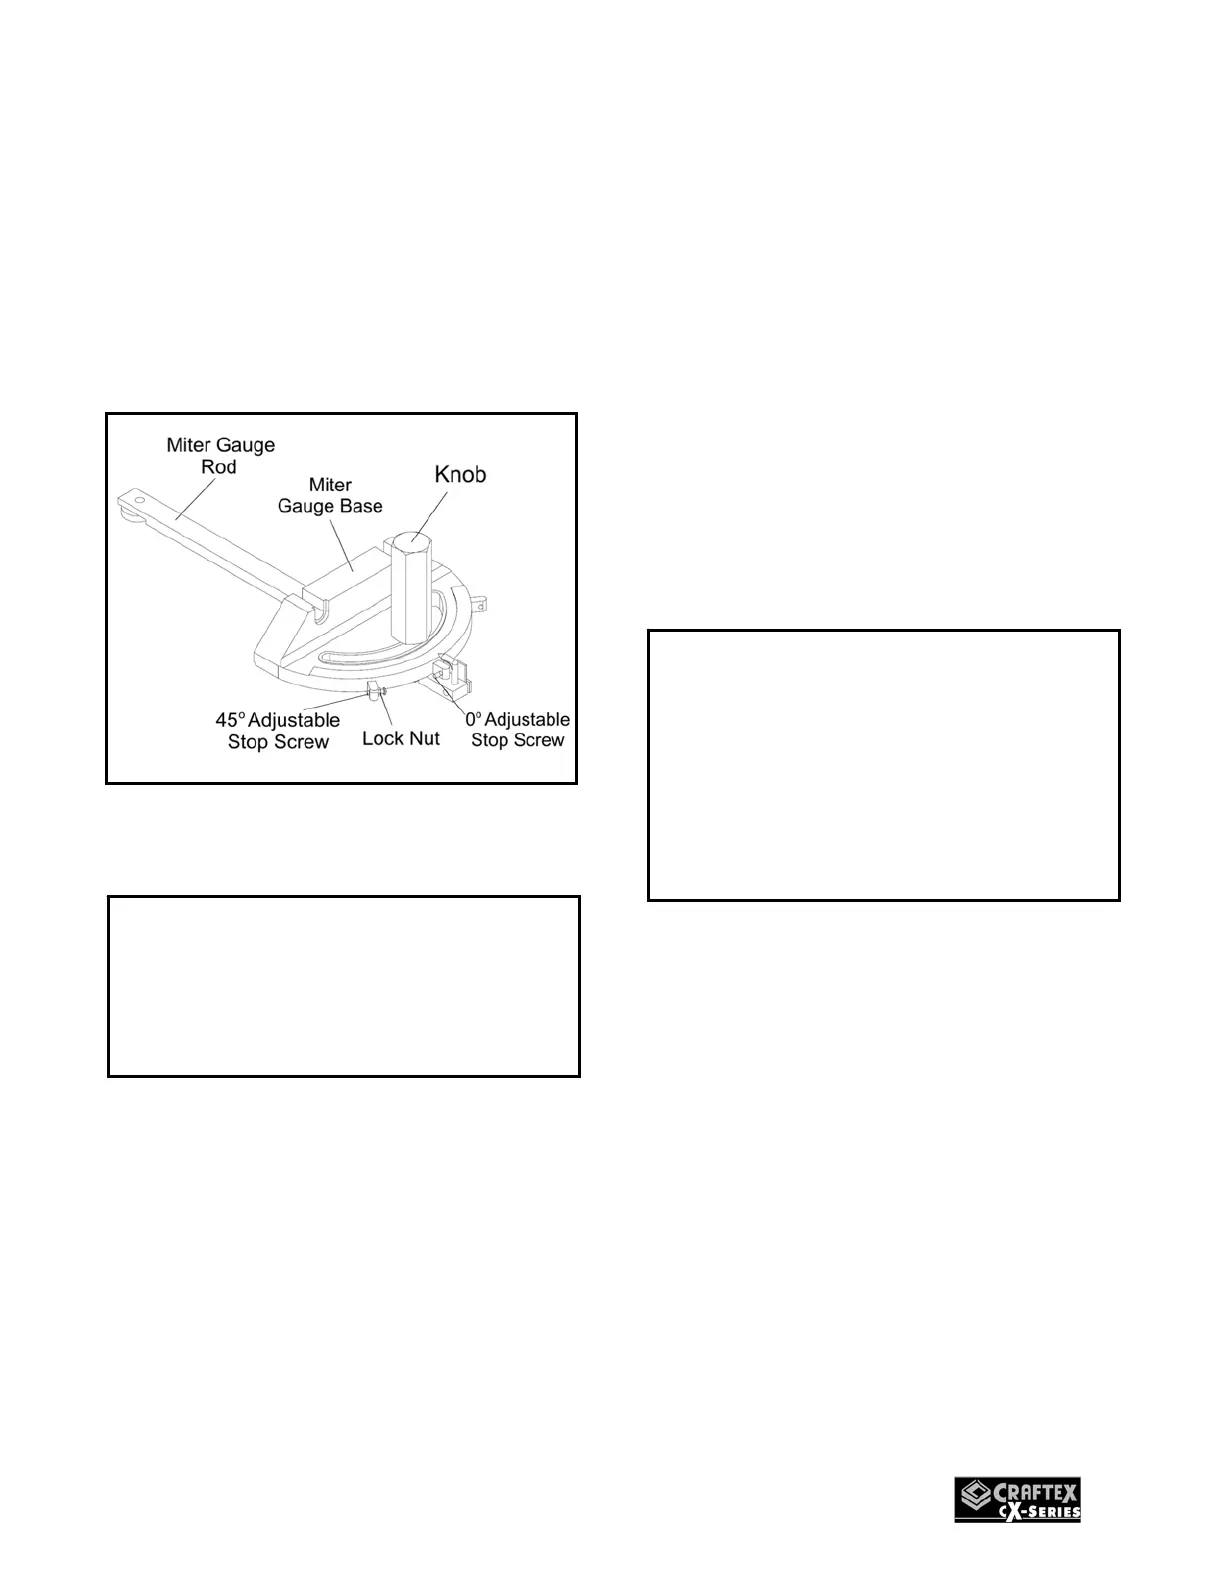
Place a 90° square against the miter gauge
rod and the miter gauge base. If the rod is
not square, loosen the knob, adjust the rod,
and retighten the knob.
Adjust the 0° stop screw until it rests
against the stop pin. Adjust the plus and
minus 45° stop screws using a 45° triangle
and the steps above. See figure-37.
Figure-37 Adjusting the miter gauge
MAINTENANCE
1. The unpainted components such as the
precision-ground cast-iron table top
should be protected with a coat of paste
wax and then buffed dry.
2. Regularly vacuum all sawdust from the
saw’s interior and vacuum the motor
openings as well.
3. Check drive belts for wear and correct
tension on a regular basis.
4. Check that the blade guard and anti
kickback pawls operate properly.
IMPORTANT
Miter gauge provides close accuracy in
angled cuts. For very close tolerance,
test cuts are recommended.
WARNING
While assembling any part, servicing or
making any adjustments, make sure the
switch is in the OFF position and the
cord is disconnected from the power
source. Failure to do so may result in
serious personal injury or death.


 To Next Page