Do you have a question about the Craftsman 113.198411 and is the answer not in the manual?
Identifies key dangers like kickback and blade contact.
Explains danger, warning, and caution signals.
Explains feeding workpiece incorrectly and its dangers.
Lists 8 critical steps to reduce injury risk.
Details protective clothing and eye protection.
Covers keeping area clear, safe, and well-lit.
Outlines safe operating procedures for the saw.
Guidelines for blade selection and maintenance.
Locating and understanding safety labels on the saw.
Instructions for unpacking and organizing parts.
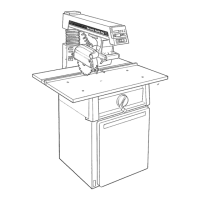
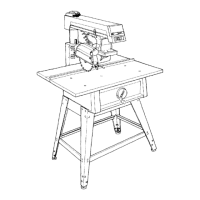
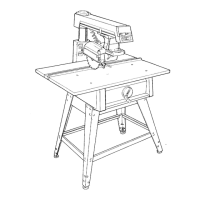
Lists components for the 6-drawer model.
Identifies necessary tools for assembly.
Lists common components for both saw models.
Steps to assemble the cabinet for the 6-drawer model.
Instructions for attaching casters and foot assemblies.
How to connect foot assemblies to cabinet side panels.
Steps for assembling slide brackets and rear supports.
How to adjust feet for stability and proper saw operation.
Steps for assembling drawers for the 6-drawer model.
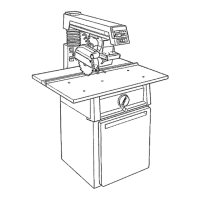
Steps to assemble the cabinet for the 2-door model.
Steps for mounting the cabinet doors and magnetic catches.
How to attach the handwheel to the saw.
Steps to install the saw motor.
Instructions for placing and securing the saw to the cabinet.
Steps for installing the table lock mechanisms.
Instructions for attaching the front table to the saw.
How to insert, secure, and remove drawers from the cabinet.
Operation of power switch and miter lock.
Details how to lock the blade at various bevel angles.
Explains swivel and rip lock functions for positioning.
Handwheel function and general control locking advice.
Explains the digital display and its functions.
Troubleshooting display errors and battery problems.
Procedures for battery installation and replacement.
Steps to calibrate the miter encoder for accurate readings.
Further calibration steps for the miter encoder.
Steps to calibrate the bevel encoder for accurate readings.
How to set zero points for miter, bevel, and elevation.
Calibrating the zero point for in-rip cuts.
Calibrating the zero point for out-rip cuts.
Steps to ensure smooth up/down movement of the radial arm.
Steps to make the front work table flat and parallel.
Further steps for ensuring table flatness and parallelism.
How to adjust table locks for secure fence and table positioning.
Ensuring blade travels perpendicular to fence for accurate crosscuts.
Adjusting arm alignment for accurate crosscuts.
Ensuring blade is perpendicular to table for crosscuts.
Aligning blade perpendicular to fence for ripping and crosscutting.
Adjustments to ensure blade is perpendicular to fence.
Ensuring blade is perpendicular to the table for ripping.
Adjustments for blade squareness to table during ripping.
Steps to make blade parallel to table for edging.
Final parallelism adjustments and guard mounting.
Steps for mounting and adjusting blade guard and spreader.
Final adjustments for guard and spreader alignment.
Details of the saw's AC motor.
Information on connecting to 120V or 240V power.
Guidelines for using extension cords safely and effectively.
Illustrates basic crosscut types and body positioning.
Crucial safety warnings and precautions for all crosscuts.
Explains guard, pawls, and spreader functions for crosscutting.
Pre-cut safety checks for accurate and safe crosscuts.
How to create and maintain table and fence slots for cuts.
Detailed steps for creating necessary kerfs in the table and fence.
Step-by-step guide for performing crosscuts.
How to set up for making multiple identical crosscuts.
Explains in-rip and out-rip positions for ripping operations.
Guidance on setting up workpiece relative to blade and fence.
Critical safety warnings and precautions specific to ripping.
Explains common causes and dangers of kickback and wrong feed.
Function and adjustment of guard, pawls, and spreader for ripping.
Pre-cut safety checks for ripping operations.
Creating rip kerfs and adjusting the blade guard.
Fine-tuning pawls/spreader and performing rip cuts.
Hand and body positioning and pressure during rip cuts.
How to perform bevel rips and use dado/molding accessories.
Specific instructions for edging and general accessory safety.
Information on fences and how to make/use push sticks.
Building and using auxiliary fences and push blocks.
How to make an auxiliary fence for edging.
How to make and use a featherboard for rip cutting.
Catalog of recommended accessories for the radial arm saw.
Details on the function and safety of the lower retractable guard.
Definitions of technical terms used in the manual.
Tips for achieving precise cuts with the radial arm saw.
Steps for accurately cutting pieces for a four-sided frame.
Benefits of table cover and decimal to fraction conversion.
Safety rules, cleaning procedures, and pawl replacement.
Details on points needing periodic lubrication with oil.
How to adjust bevel and swivel locks for proper operation.
Adjusting arm fit and carriage bearings for smooth travel.
Steps for adjusting bearings and miter lock.
Steps for adjusting the rip lock for smooth carriage movement.
Explains overload protection, circuit issues, and performance factors.
Steps for connecting the saw to different power supplies.
Common issues with the digital display and their solutions.
Resolving display errors and basic motor issues.
Addressing low power, overheating, and stalling motor issues.
Diagnosing and fixing inaccurate crosscuts and bevel problems.
Resolving rough cuts, binding, and workpiece pull-away.
Fixing clamping force, depth issues, and table leveling.
Diagram showing major saw parts and their key numbers.
Detailed list of parts with key numbers and descriptions.
Exploded view of the saw's base and column components.
Detailed list of parts for the base and column assembly.
Exploded view of the yoke and motor components.
Detailed list of parts for the yoke and motor assembly.
Exploded view of the yoke assembly components.
Detailed list of parts for the yoke assembly.
Exploded view of the saw's arm components.
Detailed list of parts for the arm assembly.
Exploded view of the table components.
Exploded view of the foot assembly for the 6-drawer model.
Exploded view of the cabinet for the 6-drawer model.
Detailed list of parts for the 6-drawer model cabinet.
Exploded view of the cabinet for the 2-door model.
Detailed list of parts for the 2-door model cabinet.
Exploded view of the drawer assemblies.
Exploded view of the saw's motor components.
Exploded view of the blade guard and related parts.
Instructions for ordering replacement parts for the saw.




 Loading...