Do you have a question about the Craftsman 113.19771 and is the answer not in the manual?
General safety advice for operating the radial saw.
Specific safety precautions for ripping operations on the radial saw.
Specific safety precautions for crosscutting operations on the radial saw.
Safety advice regarding the use of accessories with the radial saw.
Information regarding the power source and motor specifications for the radial saw.
Details on how to connect the radial saw to the electrical supply.
List of tools and initial steps for unpacking and pre-assembly.
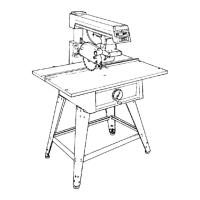
Step-by-step instructions for assembling the steel legs.
Attaching and leveling table mounting support channels.
Critical adjustment for column tube alignment within its support.
Ensuring the carriage travels in a straight line for accurate crosscuts.
Aligning the saw blade perpendicular to the work table.
Adjusting the blade to the rip fence to correct heel conditions.
Adjusting for vertical heel conditions in blade angle.
Procedures for installing and adjusting the rip scale indicators.
Guidance on positioning the guard and antikickback assembly for ripping.
Essential requirements before performing crosscut operations.
The process of sawing workpiece by pulling blade through using fence support.
Sawing a board at an angle other than 90 degrees.
Sawing with blade set at an angle to the table.
Combination of miter and bevel crosscuts.
Requirements and precautions for ripping operations.
Process of sawing workpiece by feeding into the blade using the fence.
Ripping operations with the saw blade tilted from perpendicular.
Instructions for operating the Dado Head.
Instructions for operating the Molding Head or Drum Sander.
Troubleshooting inaccurate miter crosscuts on the radial saw.
Diagnosing and fixing cuts not perpendicular to the table top.
Addressing inaccuracies in blade bevel angle cuts.
Correcting rough tooth marks or "heel" on the saw kerf.
Troubleshooting binding, smoking, or motor stoppage during ripping.
Addressing the issue of boards pulling away from the fence during ripping.
Troubleshooting when the workpiece strikes the spreader during ripping.
Diagnosing and resolving issues with smooth arm travel on tracks.
Resolving insufficient clamping force at miter angles other than 45 degrees.
Addressing insufficient clamping force at bevel angles other than 45 degrees.
Fixing depth of cut variations across the workpiece.
Troubleshooting the blade advancing too quickly through lumber.
General maintenance advice for the radial saw.
Guidance on lubricating specific parts of the radial saw.
List of recommended accessories for the radial saw.
Exploded view and parts list for the radial saw leg set.
Exploded view and parts list for the yoke assembly.
Exploded view and parts list for the base assembly.
Exploded view and parts list for the arm assembly.
Exploded view and parts list for the guard assembly.
Information and procedures for ordering repair parts for the saw.




 Loading...