Do you have a question about the Craftsman 113.196120 and is the answer not in the manual?
Explains major hazards associated with using the radial arm saw.
Explains safety alert symbols and signal words used in the manual.
Describes kickback as uncontrolled propelling of the workpiece back toward the user.
Describes wrong way feed as feeding workpiece into the outfeed side of the blade.
Details the functions and features of the saw's safety guard.
Outlines hazards related to the clear plastic portion of the saw guard.
Provides essential personal safety guidelines for operating the saw.
Details safety measures for the work area around the saw.
Outlines safety instructions for operating the saw itself.
Provides safety guidelines for handling and cutting workpieces.
Details safety precautions related to saw blades.
Identifies and explains the location of safety labels on the saw.
Details safety labels located near the saw handle, guard, and motor.
Introduces the importance of proper assembly, adjustment, and alignment.
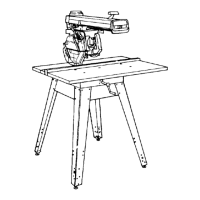
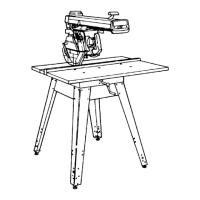
Lists and identifies the parts included with the saw assembly.
Provides step-by-step instructions for assembling the steel legs for the saw.
Details how to mount the saw assembly onto the legs or base.
Instructions for attaching the elevation crank to the saw.
Guides the user through attaching the motor carriage to the saw arm.
Instructions for installing the arm cap and trim.
Steps for safely removing the saw blade.
Instructions for attaching the table supports to the saw.
Details how to adjust the arm lock for proper function and security.
Explains how to adjust the yoke clamp for smooth operation.
Details the purpose and adjustment of the bevel lock lever.
How to adjust the arm for vertical and horizontal movement.
Critical adjustment for removing looseness and ensuring smooth vertical movement.
Instructions for adjusting carriage bearings for accurate cuts.
Adjusting table supports and leveling the front table for accuracy.
Steps to ensure the front table is perfectly flat for accurate cuts.
Adjusting the radial arm to be square to the fence for accurate crosscuts.
Instructions for installing the table clamps to secure sections.
Aligning the blade square to the table for accurate crosscuts.
Aligning the blade square to the fence to reduce kickback and splintering.
Aligning the blade parallel to the table to prevent workpiece damage.
Installing and adjusting rip scale indicators for quick settings.
Instructions for installing the saw's safety guard.
Positioning the riving knife in line with the blade for safety.
Explains the function and operation of the miter/arm lock lever.
Describes the function and operation of the power switch.
Explains the function and use of the safety yellow key.
Details the function and operation of the bevel index lever.
Explains the function and operation of the bevel lock lever.
Describes how to raise and lower the radial arm using the crank.
Explains the function and operation of the table clamps.
Details the function and operation of the yoke index lever.
Explains the function and operation of the yoke lock handle.
Describes how to lock the carriage to the radial arm for ripping.
Explains how to use the rip scale and indicators for measurements.
Describes the saw handle's function and trigger mechanism.
Explains how to loosen and tighten the guard clamp screw.
Details the function and operation of the saw's guard.
Explains how to loosen and tighten the hold down knob.
Describes the function of the hold down during ripping and crosscutting.
Explains how to loosen and tighten the riving knife bracket.
Explains how to use the guard tab to manually raise the clear plastic guard.
Explains how to loosen and tighten the pawls/riving knife knob.
Describes the function of pawls in preventing kickback during ripping.
Explains the function of the riving knife in reducing kickback.
Lists the electrical specifications for the saw's motor.
Details requirements for connecting the saw to a 120V power supply.
Guidelines for using extension cords with the saw.
Explains the motor protector and how to reset it.
Instructions for changing the motor voltage from 120V to 240V.
Defines crosscutting as cutting a workpiece to length.
Details hazards associated with crosscutting and how to avoid them.
Warns about exposed blade teeth during crosscutting.
Warns about the risk of the carriage moving forward unexpectedly.
Warns about workpieces being picked up and thrown by the blade.
Explains the need for and creation of crosscut kerfs in the table and fence.
Provides step-by-step instructions for performing crosscuts.
Explains efficient repetitive crosscutting using stops.
Offers useful tips for improving crosscutting results and saw longevity.
Defines ripping as cutting along the length of a workpiece.
Explains the two main blade positions for ripping.
Defines infeed and outfeed directions relative to the blade.
Guides on how to position workpieces for ripping.
Explains the use of push sticks and blocks for safe ripping.
Details hazards associated with ripping and how to avoid them.
Warns about hazards in the outfeed zone of the blade.
Explains what kickback is and how it occurs.
Provides steps to reduce the risk of kickback.
Warns about the dangers of feeding the workpiece incorrectly.
Explains the function of the hold down during ripping.
Describes the function of pawls and riving knife for safety.
Step-by-step guide for setting up the saw for ripping.
Specific considerations for setting up bevel cuts during ripping.
Instructions for performing rip cuts.
Information on using dado blades and molding heads.
Explains the technique of edging using dado or molding heads.
Instructions for using molding heads and drum sanders.
How to make and use a featherboard for ripping.
Instructions for making and using push sticks.
Information on fences and their requirements.
How to make and use an auxiliary fence and push block.
How to use a straight edge for ripping irregular workpieces.
Safety precautions for using saw accessories.
Information on installing and using dado blades.
Information on using dado/molding heads for edging.
General information about saw maintenance needs.
Instructions for cleaning sawdust and debris from the saw.
Details which parts need lubrication and how to apply it.
Instructions for replacing dull pawls.
Steps for safely changing the saw blade.
Practices to ensure accurate cutting results beyond alignment.
Addresses common motor issues like overheating, stalling, or not running.
Addresses common cutting issues like inaccuracy or bevels.
Continues addressing cutting issues like workpiece binding or slow motor.
Addresses issues with saw movement and blade stopping.


 Loading...