EasyManua.ls Logo

Craftsman 113.19770 User Manual

Craftsman 113.19770
44 pages
To Next Page IconTo Next Page
Page #1 background imageLoading...
Page #1 background image
i
Sears
owners
manual
MODEL NO.
113.19770
SAW ONLY
113.197750
SAW WITH LEGS
Serial
Number . _
Model and serial
number may be found
at the front of the base.
You should record both
model and serial number
in a safe place for
future use.
CAUTION:
Read GENERAL
and ADDITIONAL
SAFETY
INSTRUCTIONS
carefully
Sold by SEARS,
Part No. 63676
CRRFTSMRNo
IO-INCH
RADIAL SAW
assembly
operating
repair parts
ROEBUCK AND CO., Chicago, IL. 60684 U.S.A.
Printed irl U.S,A

Table of Contents

Question and Answer IconNeed help?

Do you have a question about the Craftsman 113.19770 and is the answer not in the manual?

Craftsman 113.19770 Specifications

General IconGeneral
BrandCraftsman
Model113.19770
CategorySaw
LanguageEnglish

Summary

General Safety Instructions for Power Tools

Additional Safety Instructions for Radial Saws

Electrical Connections

Power Supply

Details about the power source and motor specifications for the radial saw.

Electrical Connections

Information on connecting the radial saw to the electrical power source, including grounding.

Motor Safety Protection

Wire Sizes

Locations and Functions of Controls

Assembly and Alignment

Tools Needed

Lists the tools required for assembling and aligning the radial saw.

Framing Square Must Be True

Instructions on checking the accuracy of a framing square for alignment procedures.

Unpacking and Preassembly

Steps for safely unpacking the radial saw and checking the included parts.

Assembling Steel Legs

Mounting Saw

Removing Saw Blade

Alignment Procedure

Attaching and Leveling Table Mounting Support Channels

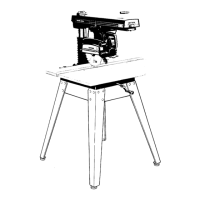
Instructions for attaching and leveling the table mounting support channels for accurate saw alignment.

Installation of Front (Work) Table

Adjusting Column Tube in Column Support

Squaring Cross Cut Travel

Squaring Saw Blade to (Work) Table

Squaring Blade to Rip (Guide) Fence Blade Heel Adjustment

Vertical Heel Adjustment

Installing and Adjusting Rip Scale Indicators

Alignment of Spreader for Ripping

Fence Locations

Key Saw Controls

Depth of Cut (Elevation)

Explains how to use the elevation crank to raise or lower the saw blade.

Angle of Cut (Miter)

Details the proper indexing method for setting miter angles for accurate cuts.

Yoke Pivot (Ripping)

Describes the controls used for ripping operations, specifically the yoke pivot.

Carriage Lock

Explains how to lock and release the carriage for safe and stable operation.

Blade Angle (Bevel)

Covers the controls for setting the blade angle, including bevel lock and index levers.

Power Switch and Key

Accessory Shaft

Positioning Guard, Antikickback and Spreader Assembly for Ripping

Basic Saw Operations

Requirements for Crosscut

Operation No. 1 Crosscut

Operation No. 2 - Miter Crosscut

Operation No. 3 - Bevel Crosscut

Operation No. 4 - Compound Crosscut

Requirements When Ripping

Operation No. 5 - Out-Ripping and In-Ripping

Operation No. 6 - Bevel Ripping

Dadoing

Molding/Sanding

Adjustments to Compensate for Wear

Adjusting Bevel Lock Lever

How to adjust the bevel lock lever for proper locking action at any angle.

Yoke Lock Handle Adjustment

Procedure to adjust the yoke lock handle to eliminate play and ensure proper friction lock.

Arm to Column Adjustment

Adjusting Carriage Bearings

Arm Lock Adjusting Wheel

Arm Index Rod Adjustment

Trouble-Shooting

Miter Crosscut Accuracy Issues

Addresses problems with inaccurate 0° or 45° miter crosscuts and their causes.

Table and Blade Angle Accuracy

Troubleshooting for cuts not square to the table or inaccurate bevel angles.

Cut Edge Quality (Heel Condition)

Explains and resolves the 'heel' condition causing rough tooth marks on cut edges.

Ripping Performance Problems

Diagnoses issues like motor slowdown, binding, and workpiece alignment during ripping.

Saw Movement and Clamping Issues

Solutions for smooth saw movement and insufficient clamping force at various angles.

Cut Depth and Speed Consistency

Addresses problems with inconsistent cut depth and blade advancing too quickly.

Maintenance and Lubrication

Maintenance

General maintenance advice including cleaning and checking antikickback pawls.

Lubrication

Details on which points require periodic lubrication and which do not.

Recommended Accessories

Lists available accessories for the radial saw, with part numbers.

Repair Parts

Figure 1 Leg Set

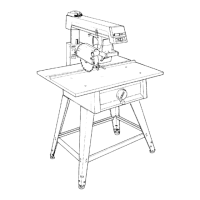
Diagram and parts list specifically for the leg set assembly of the radial saw.

Figure 2

Figure 3 - Yoke Assembly

Figure 4 - Base Assembly

Figure 5 - Arm Assembly

Figure 6 - Guard Assembly

Service

How to Order Repair Parts

Related product manuals