_1_ WARNING: Do not allow famiSa_tywith tools to
make you careJess.Rememberthat a careless
fracbonof a second issufficientto intiictserious
]njury.
_k WARNING: Alwayswear safety gogglesor safety
glasseswith side shieldswhen operatingtools.
Failureto do so could resultin objects beingthrown
intoyour eyes, resultingin poasibisseriousinjury.
_1= WARNING: Do not use anyattachments or acoas-
series not recommended by th_rna_u_oturer of
this tool.The use of attachments or accessories not
recommended can resultin serlouspersonalinjury.
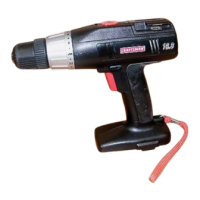
APPLICATIONS
You may usethis tool for the foUowingpurposes:
• Drillinginwood
• Drillinginceramics, plastics,fibergtess,and laminates
• Ddlling in metals
• Mbdng paint
CAUTION: If at anypoint duringthe charging
processnone of the LEDs are lit, removethe bat-
tary pack _'om _e chargerto avoid damagingthe
product. DO NOT insertanother battery.Return the
charger and battery to your nearestservicecenter
for service or replacement.
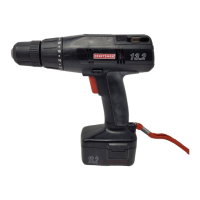
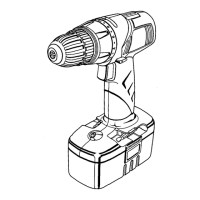
CHARGING THE BAI-I'ERY PACK
The battery pack for this tool has been shippedin a low
charge conditionto prevent possibleproblems.Therefore,
you shouldcharge overnightpriorto use.
NOTE: Batterieswill not reach furl oharge the first time
theyare charged. Allow several cycles(operationfollowed
byrecharging]for them to become fully charged.
• Charge battery pack onlyw_ththe charging assembly
provided.
• Make sure powersupply is normalhouseholdvoltage,
120 volts,60 Hz, AC on_y.
• Connect charger to power supply.
• Place battery pack in charging stand.Align raiseddb
on bat_eP/pack with groovein chargingstan_. See
F/gum 2.
• Press down on b_ttsrypack to be'sure contacts on
battery pack engage properlywith contacts in charging
stand.
• The charge indicator light (LED), located on the charg-
ing stand,wi_ I'_ghtup red and glowwhen the eharger
is properlyconnectedto powersupply. "Thislight
indicates thecharger is operatingproperty.It will
remainon unblbatterypack is removedfrom charging
stand or charger is disconnectedf_om power supply.
• After normaJusage,3 hoursork_saof chargingtime is
required to hJftyrecharge battery pack.
NOTE; If both red and orangeLED ind_caforsglow, the
battery pack isdeeply orcompk=.te0jd(scharged, and
6 hours er longerof chargingtime }srequiredto fully
rechargethebatterypack,
Ifthechargerdoes notcharge_hebatterypack,or
the orangeLED corr_nuesto glow after more than 30
m_nutesof chsrg'lng,returnthe battery pack and charg-
inge.ssemb[yto your nearestSears Repair Center for
electricalcheck.
• The batterypackwill become slightlywarm tothe
touch whilecharging.This is normaland does not
indicate a problem.
m Do not place chargerin an area of extreme heat or
cold. It wiltwork best at normalroom temperature.
II When batteries become fully charged, unplugcharger
from powersupply and removethe battery pack.
CHARGING A HOT BA'rrt=RY PACK
When usingyourtool continuously, the batteries Inyour
battery pack willbecome hot. Youshouldlet a hotbattery
pack cool down for approximately 30 minutes before
attempting to recharge.
NOTE: This situationorgyoccurs when continuoususe of
your ddll causes the batteriesto become hot. It does not
occur under nonT_ circumstances.Refer to =CHARGING
THE BATTERY PACI_ for normalrecharg]ngofbattedes.
Ifthe chargingaasembly doesnot chargeyour battery
pack undernormalcircumstances,returnboth the battery
pack and chargingassembly to your nearest Sears Repair
Center for electricalcheck.
10