ROUTER MOUNTING KIT
Readtheseinstru_ionscompletelybeforemounting
yourrouter totheaccessorytableofyourCraftsman
table sew.
A muter mountedon the accessorytablewillprovide
expandedcapabilitiesfor making rabbets,grooves,
chamfers,dovetails,and mortise and tenon joints.
Thismuter mounUngkitwillaccommodatemost
CraRsrnanand Ryoblreuters.
Ifused and stored properly,the routermountingkit
willgive you years of dependable, trouble-free
performance,
10
6
= (b
3 °O,r
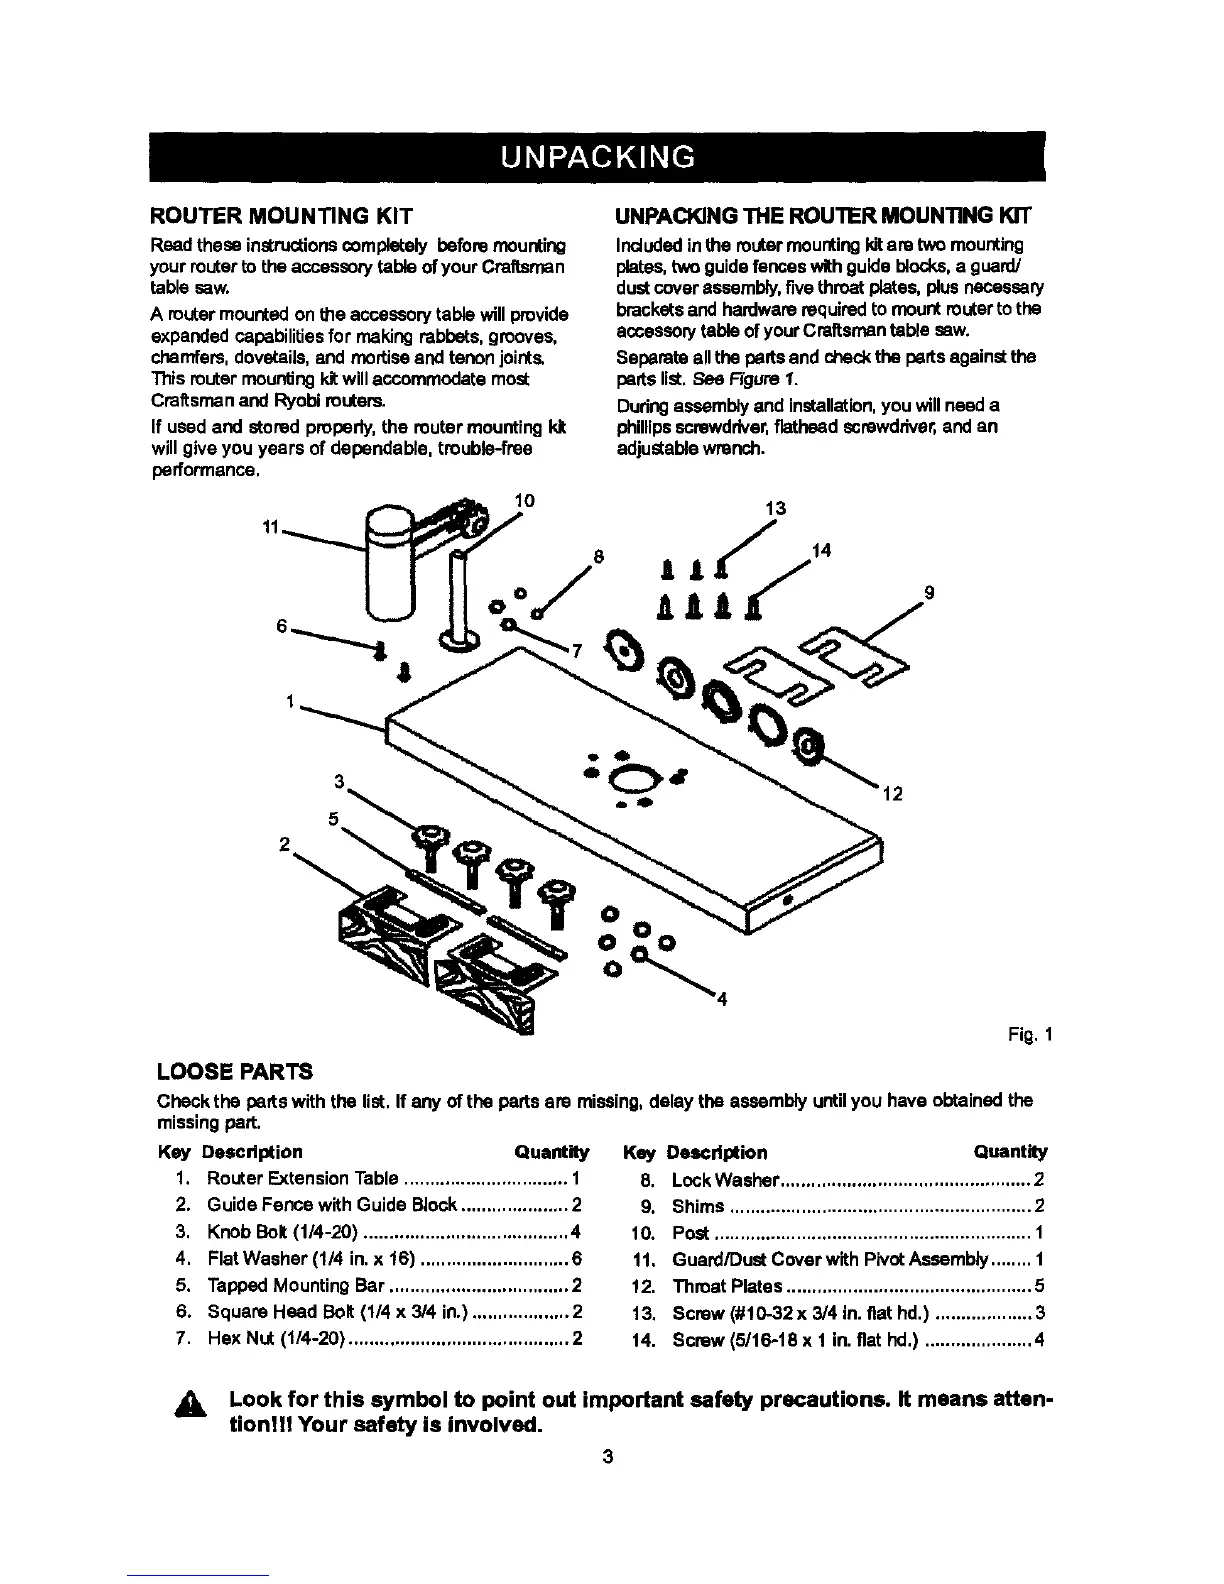
UNPACKING THE ROUTER MOUNTING KIT
Includedinthe muter mountingkitare two mounting
plates,two guidefences withguideblocks,a guard/
dustcoverassembly,t]vethroatplates,plusnecessary
bracketsand hardwarerequiredto mount routerto the
accessolytable of yourCraftsmantable sew.
Separateallthepartsand checkthe parts againstthe
parts list.See Figure 1.
Duringassemblyand installation,you will needa
phillipsscrswddver,flatheadscrawdriver,and an
adjustablewrench.
13
9
12
Fig. 1
LOOSE PARTS
Check the parts with the list. If any of the parts are missing,delaythe assemblyuntilyou haveobtainedthe
missingpart.
Key Description Quantity
1. Router ExtensionTable ................................ 1
2. Guide Fence with Guide Block..................... 2
3, KnobBolt (1/4-20) ........................................ 4
4. Flat Washer (1/4 in. x 16) ............................. 6
5. TappedMounting Bar ................................... 2
6. Square Head Bolt(1/4 x 3/4 in.)................... 2
7. Hex Nut (t/4-20) ........................................... 2
Key Description Quantity
8, LockWasher................................................. 2
9. Shims ........................................................... 2
10, Post.............................................................. 1
11. Guard/Dust Cover with PivetAssembly........ 1
12. Throat Plates................................................ 5
13. Screw (#10-32x 3/4 in.fiat hd.) ................... 3
14. Screw (5/16-18 x 1 in.fiat hd,) ..................... 4
_L Look for this symbol to point out important safety precautions. It means atten-
tiont!! Your safety is involved.
3