INSTALLROUTEREXTENSION
• Unplugthe saw.
A WARNING: Unplugthe powersupplycordof the
sawbeforemountingthiskit,Failuretounplug
yoursaw couldrasult inaccidentalstarting
causingpossible seriouspersonalinjury.
• ILWARNING: The saw's motor cord muStbe
H
disconnectedfromthe racaptacle on sawwhen
usingthis kit,The power cord ofthe router muSt
be pluggedintothe receptacle onthe saw, The
saw's maSter switchmuStbe usedto turnthe
muter On and Off, Failureto do socould result
in seriouspersonalinjury,
Note: The muter extensionincludedinthis kitreplaces
the _ tableextensionthat came withyourCrattsman
table saw. Ifyou are assemblingyoursaw forthefirst
timeandwishtomountyour muter kitatthistime,
follow the assemblyinStructionsthatcame withyour
saw,substitutingthe routerextensionforthe left
extensionwing.Oncethe muter extensionisattached
tothe saw,turntheheading labelled=InstallGuard/
DuStCover"on page5 ofthis manualandfollow the
remainderofthe assemblyinStructions.
Ifyouare mountingthis muter kitto a Craftsmantable
sawthat isalreadyassembled,proceedasfollows,
• Remove front and rear rails by looseningthe four
5/16-t8 hex nuts holdingthe left table extension
tothe rails,as well as the two 5116-18 hex nuts
sacudng the left side of the main tableto the rails.
The nutsare locatedon the undersideof the
table. Slide leftsectionsof beth front and rear
railsoff. Sea Figure 2.
Fig. 2
• With theassiStanceof another person, remove
the four hex nuts,washers and bells holdingthe
table extensionto the maintable and remove
table extension.
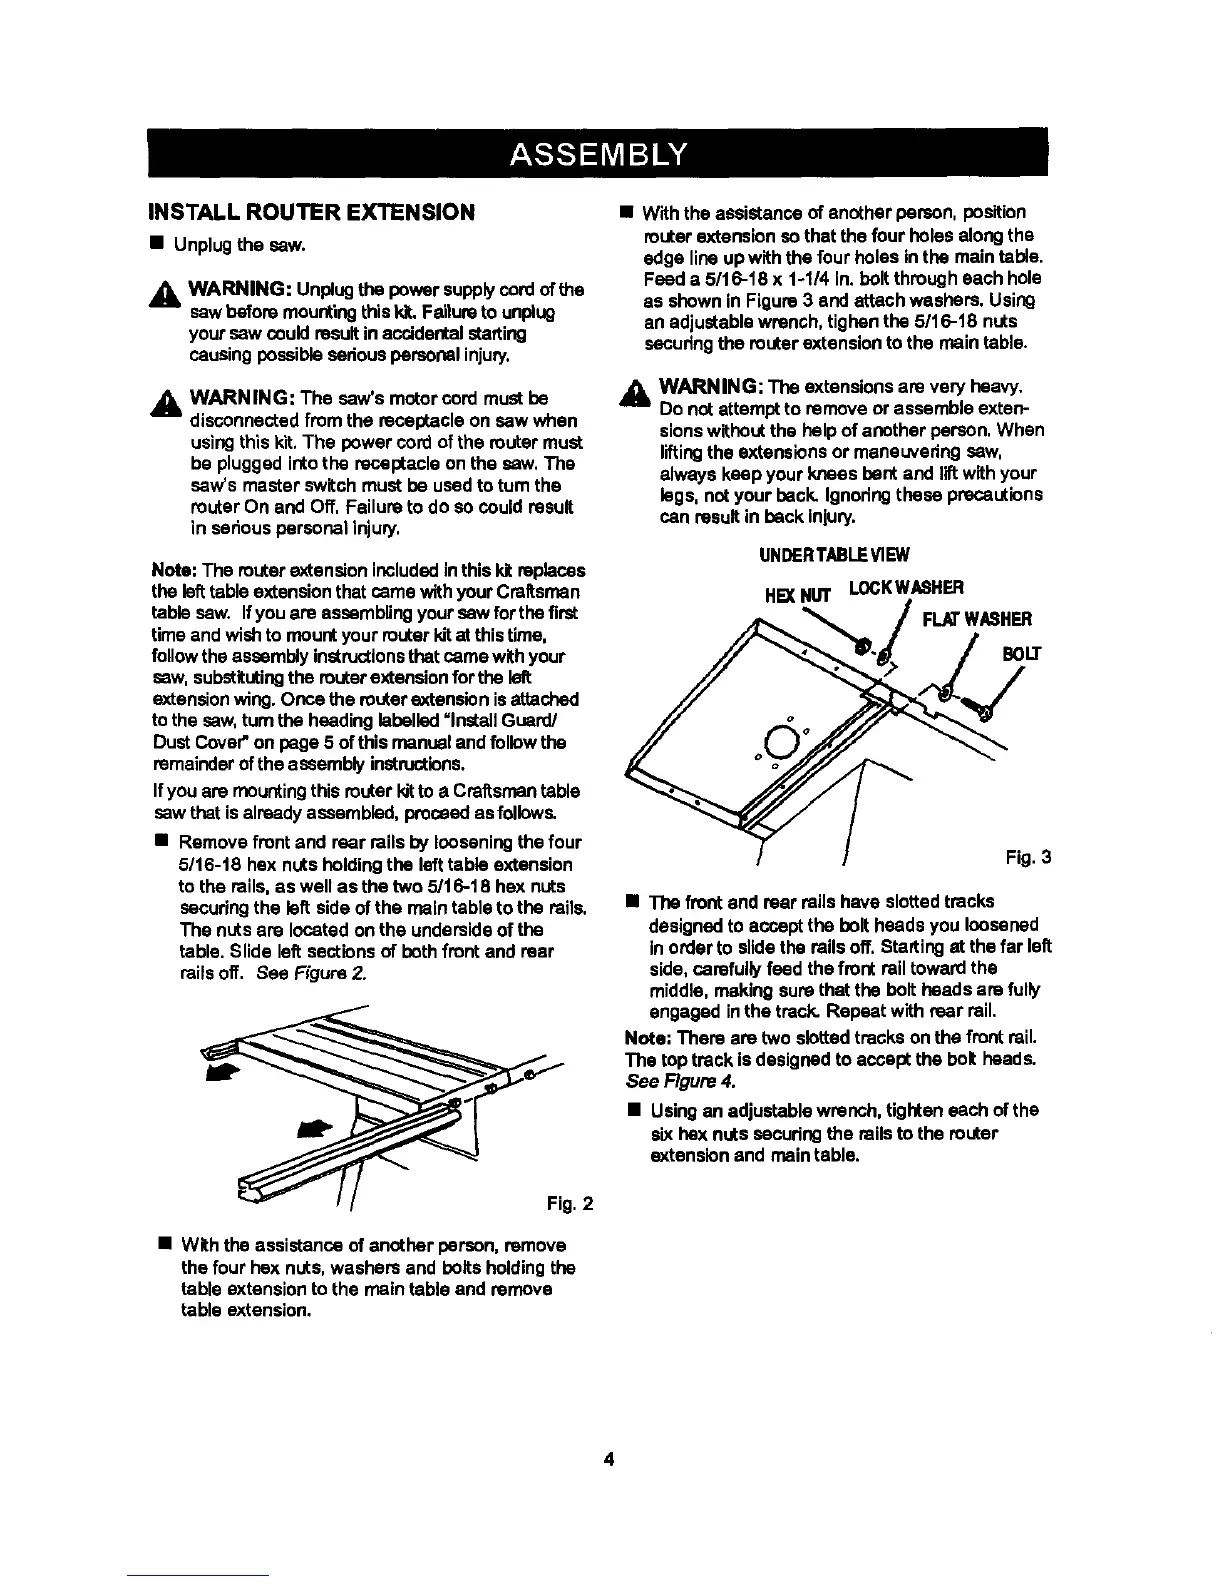
• Withthe assiStanceof another person, position
muter extensionsothatthe four holes alongthe
edge lineupwiththe fourholes inthe maintable.
Feed a 5116-18x 1-114in. belt througheach hole
as shownin Figure 3 and attach washers. Using
an adjuStablewrench,tighen the 5/1 6-18 nuts
sacudng the routerextension to the main table.
_ll WARNING: The extensionsare very heavy.
Do notattemptto removeor assembleexten-
sionswithoutthe helpof another person, When
liftingthe extensionsor maneuvedng saw,
alwayskeepyourknees bent and liftwithyour
legs, notyour beck. Ignodngthese precautions
can resultin back Injury.
UNDERTABLEVIEW
HB( NUT LOCKWASHER
,._ _ / FLATWASHEH
/ Fig.3
• The front and rear rails have slottedtracks
designedto acceptthe belt heads you loosened
Inorderto slidethe rails off.Stinting at the far left
side,carefully feed the front railtowardthe
middle,making surethat the bolt heads are fully
engaged inthe track. Repeat with rear rail.
Note: There are two slottedtracks onthe front rail.
The toptrackisdesignedto acceptthe boltheads.
See Figure4.
• Usingan adjustablewrench,tighteneach of the
sixhex nutssacudng the railsto the router
extension and main table.
4