The provided document, "CR-X Technical Notes," describes a 3D printer, likely a Creality CR-X model, focusing on its setup, common issues, and maintenance procedures.
Function Description
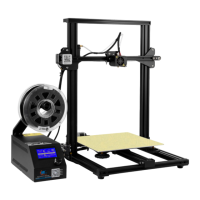
The CR-X is a 3D printer designed for additive manufacturing, specifically for creating three-dimensional objects from digital designs. It utilizes a Z-axis sensor for precise vertical positioning and requires bed leveling to ensure accurate and consistent prints. The printer extrudes plastic filament (such as PLA) through a nozzle onto a heated bed, building up layers to form the final object.
Important Technical Specifications
While specific numerical specifications like build volume or print speed are not detailed in these notes, several functional and operational specifications are highlighted:
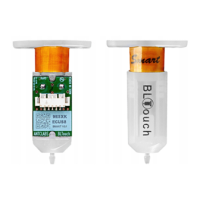
- Z-Axis Sensor: This is an externally mounted attachment crucial for the printer's operation. It must be attached and aligned correctly (bottom of the sensor mounting in line with the base of the printer) before powering on the machine. It is secured by two channel nuts. The sensor's function is to assist in determining the correct Z-axis position, which is vital for print accuracy. The document includes diagrams illustrating correct and incorrect sensor positioning.
- Bed Leveling: A critical setup procedure that adjusts the distance between the nozzle and the print bed. This process accounts for any irregularities in the two Z-axis motors and ensures the nozzle is at the "correct distance" for optimal plastic adhesion. The bed can be pre-heated to achieve a flatter surface for leveling.
- Filament Compatibility: The notes explicitly mention PLA (Polylactic Acid) as a compatible plastic, indicating it's a common material used with this printer.
- Extruder Head Stability: The X-axis railing and extruder head assembly are designed to be stable. A "tension nut" located behind the bottom wheel is used to tighten the extruder head if it becomes wobbly, ensuring smooth and precise movement during printing.
- Nozzle Assembly: The nozzle, heater, and thermocouple are integrated into the extruder head. The front shield/fan-housing of the extruder is easily removable (via 2-3 screws) to access these components. The nozzle itself is secured by a further 2 screws to the base plate.
- Thermocouple: This component is responsible for measuring the nozzle's temperature. It is held in place by a small screw on the side of the nozzle. Errors in temperature readings (e.g., abnormally high readings when the nozzle is cold) indicate a potential thermocouple issue.
Usage Features
The document emphasizes key aspects of using the CR-X printer effectively:
- Pre-Print Setup: The Z-axis sensor must be correctly installed and aligned before the printer is turned on.
- Bed Leveling Importance: This is a fundamental step before every print. The goal is to achieve a slight resistance when trying to remove a piece of paper between the nozzle and the bed, ensuring the plastic sticks without hassle.
- Symptoms of Nozzle Too Far from Bed: Plastic not sticking, plastic coming off mid-print, paper sliding easily between bed and nozzle.
- Symptoms of Nozzle Too Close to Bed: Plastic not extruding, plastic having rough edges on the first layer, requiring force to move paper between nozzle and bed.
- Print Quality Indicators: Consistent plastic lay-out and a small visible gap between the nozzle and the bed are indicators of proper bed leveling and good print conditions.
Maintenance Features
The "CR-X Technical Notes" provide clear instructions for common maintenance tasks and troubleshooting:
- Z-Axis Sensor Installation/Alignment: The sensor is secured by two channel nuts. Correct alignment is crucial for proper operation.
- Tightening a Loose Extruder Head: If the extruder head wobbles, the "tension nut" (located behind the bottom wheel on the X-axis railing) needs to be tightened. This can be done with an included spanner or a TH1910 set.
- Nozzle Assembly/Thermocouple Replacement:
- Remove the front shield/fan-housing of the extruder (2-3 screws).
- Access the nozzle, heater, or thermocouple. The nozzle is secured by 2 screws to the base plate.
- Replace the necessary component.
- Addressing Blockages: Blockages are more likely to occur in areas other than the nozzle itself. Disassembling the nozzle assembly can help clear them. The document suggests using tools like TH1766 and TD2132 for this purpose.
- Troubleshooting Thermocouple Errors: Abnormally high temperature readings when the nozzle is cold to touch are a sign of a thermocouple error. The thermocouple is held in place by a small screw on the side of the nozzle, implying it can be accessed and potentially replaced or re-secured.
The document serves as a practical guide for users to set up, operate, and maintain their CR-X 3D printer, addressing common issues that may arise during its use.