Do you have a question about the Creality CR-10 Series and is the answer not in the manual?
Secure the Gantry Frame to the base using M5X25 bolts.
Attach the T-shaped block to the profile, ensuring correct nut orientation.
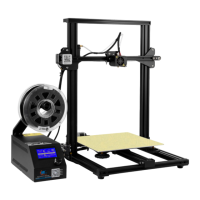
Attach the bracket and spool holder to the printer rack system.
Apply decorative strips to the printer for aesthetic enhancement.
Connect stepper motors to 6-pin ports based on yellow labels.
Connect limit switches to 3-pin ports based on yellow labels.
Connect aviation connectors to the power supply ports.
Preheat nozzle to the specified temperature for filament loading.
Insert filament into extruder and feed until it extrudes from nozzle.
Prepare printer and auto home nozzle to starting position.
Adjust platform height using leveling screws and paper for nozzle clearance.
Adjust leveling screws on all four corners of the platform.
Repeat bed leveling steps 1-2 times for optimal results.
Double click installer to begin Creality Slicer software installation.
Launch slicer, select language, machine, and complete configuration.
Load model in slicer, slice, and save gcode file to TF card.
Insert TF card, select file on printer, and initiate printing.
Details on printer return, replacement, and warranty periods.
Conditions for product return/replacement: appearance and completeness.
Items included/excluded from warranty and specific component warranty periods.
| Build Volume | 300 x 300 x 400 mm |
|---|---|
| Layer Resolution | 0.1-0.4 mm |
| Filament Diameter | 1.75 mm |
| Connectivity | SD Card, USB |
| Bed Temperature | Up to 100°C |
| Power Supply | 110V/220V, 360W |
| Nozzle Diameter | 0.4 mm (can be replaced with other sizes) |
| Supported Materials | PLA, ABS, PETG, TPU |
| Display | LCD |
| Frame Structure | Aluminum frame |