Do you have a question about the Creality CR-10S Pro V2 and is the answer not in the manual?
Guides the installation of the printer's gantry frame structure.
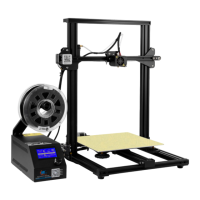
Details the process of mounting the filament holder onto the printer.
Explains how to adjust the X-axis for proper printer operation.
Instructions for changing filament while a print is in progress.
Guides users through slicing a 3D model file for printing.
Details the steps to start and manage a 3D print job.
Outlines service, replacement, and warranty terms for the printer.
Specifies accessories and conditions covered or excluded by the warranty.
Discusses prohibited printing activities and company declarations.
The Creality CR-10S Pro V2 is a 3D printer designed for enthusiasts and professionals alike, offering a robust platform for additive manufacturing. This user manual provides comprehensive guidance for operating and maintaining the device, ensuring optimal performance and longevity.
The CR-10S Pro V2 is a Fused Deposition Modeling (FDM) 3D printer, which builds three-dimensional objects layer by layer by extruding molten thermoplastic material. It is capable of printing with standard filaments such as PLA, and the manual suggests calibrating and testing the machine with these before experimenting with exotic filaments. The printer features a single nozzle for extrusion and supports various file formats including STL, OBJ, and AMF, making it compatible with a wide range of 3D modeling software. It can operate both online and offline via a TF card, offering flexibility in how print jobs are managed. The device is equipped with a touch screen for intuitive control and monitoring of print parameters. Key components include an X-axis limit switch, nozzle kit, hot bed, TF slot & USB port, Z-axis motors, couplings, power switch & socket, filament holder, filament detector, and an X-axis motor, all working in concert to facilitate precise and reliable 3D printing.
The CR-10S Pro V2 emphasizes ease of use, starting with its installation process. The gantry frame is securely attached to the base frame using M5X25 hex-bolts and lock washers, ensuring structural stability. The filament holder is then installed, and the X-axis is adjusted to ensure proper alignment, a critical step for print quality. Cable connections are clearly outlined, with specific instructions for connecting the Z1 and Z2 motors, as well as the ribbon cable. Users are reminded to plug the power cord into a grounded three-hole power jack for safety.
The touch screen interface is central to operating the printer. It provides access to various functions, including print selection, temperature control, and settings. Users can choose to print from a selected file on the TF card, adjust print speed, nozzle and hot-bed temperatures, and Z-offset. The screen also allows for manual control of cooling fans and preheating settings for PLA and ABS filaments.
Loading filament is a straightforward process. The manual describes two methods:
Bed leveling is a crucial step for successful prints, and the CR-10S Pro V2 offers both manual and automatic leveling options. For manual leveling, users slightly tighten the four leveling nuts at the bottom of the platform. They then navigate to the "Level mode" in the settings and follow on-screen prompts to adjust the platform height at four corners using a piece of A4 paper as a guide, ensuring the nozzle lightly presses on the paper. After adjusting the corners, the center point is tested. The manual provides visual cues to indicate whether the nozzle is too far, just right, or too close to the platform. For automatic leveling, users can activate the "Auto leveling" function in the settings, and the printer will perform the leveling process automatically.
Software installation is guided through the Creality Slicer. Users double-click to install and open the software, then select their language and machine model (CR-10S Pro V2) to configure the slicing parameters. Once a 3D model is sliced, the generated G-code file is saved to the TF card. To initiate a print, the TF card is inserted into the printer, and the desired model is selected from the "Print" menu on the touch screen.
The manual emphasizes several maintenance practices to ensure the printer's longevity and consistent performance:
The after-sales service policy outlines warranty coverage and replacement requirements. The printer comes with a one-year warranty and lifetime maintenance, with specific conditions for returns and replacements. Certain accessories like platform stickers, TF cards, and filaments are not covered under warranty if not damaged during transportation. Components like the nozzle assembly have a 3-month warranty, while the motherboard, LCD display, power supply, and hot bed have a 12-month warranty. The warranty does not cover damage from unauthorized modifications, incorrect installation, use in an unsuitable environment, improper use, or use of other branded components or low-quality consumables.
| Build Volume | 300 x 300 x 400 mm |
|---|---|
| Layer Resolution | 0.1 - 0.4 mm |
| Filament Diameter | 1.75 mm |
| Nozzle Diameter | 0.4 mm |
| Connectivity | SD card, USB |
| Leveling | Automatic |
| Frame Material | Aluminum |
| Print Technology | FDM (Fused Deposition Modeling) |
| Resume Print Function | Yes |
| Filament Runout Sensor | Yes |
| Supported Materials | PLA, ABS, TPU |
| Max Nozzle Temperature | 260°C |
| Display | 4.3-inch Color Touchscreen |