10
7.Reset print key( / ): Reset print function.
8.Measuring unit: It is functional unit.
9.Locking lever: Fixation the main body to the base.
10.Power switch: Turn on or off the instrument power switch.
11.Forehead rest: Here on the forehead.
12.Measuring window: Measurement of retinal imaging
13.Chinrest: Fixed chin.
14. Eye level marker: The height of the chinrest should be adjusted so that the patient’s eye
roughly aligns with this line.
15.Adjust the foundation: Support the instrument to adjust the level of equipment.
16.Fixing pins: Fix the model eye and chinrest paper.
17.Fuse holder: 2 fuses installed inside.
18.Power inlet: Connect ~220V, 50Hz AC.
19.The cover of measuring window
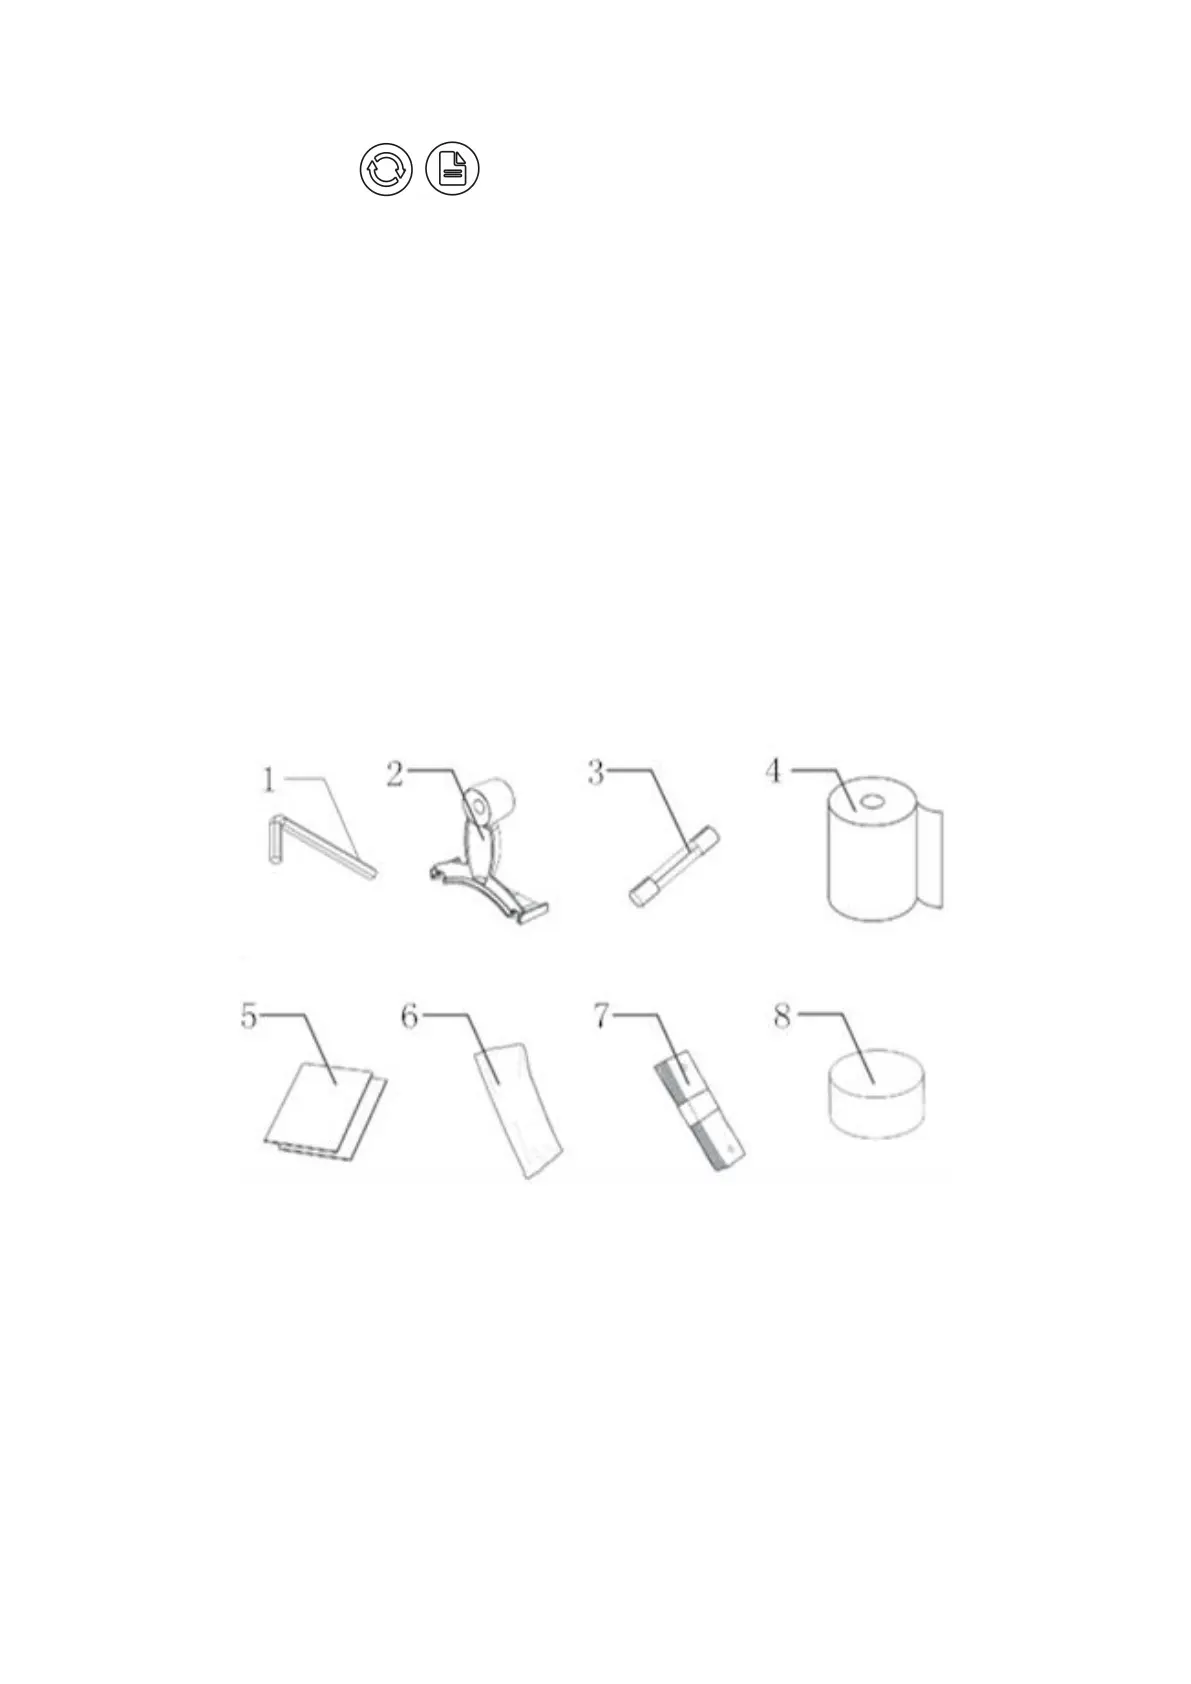
3.2 Accessories
1.Socket head wrench: Unlock plug screw.
2.Model eye: Use to proofreading accuracy.
3.Fuse wire: To prevent short circuit.
4.Printing paper: Measurement of retinal imaging.
5.Operator’s manual: Instructions for use of this device.
6.Dust cover: When not using the instrument, dustproof.
7.Chinrest paper:Customer put on the chinrest.
8.Horizontal bubble: Display instrument level.