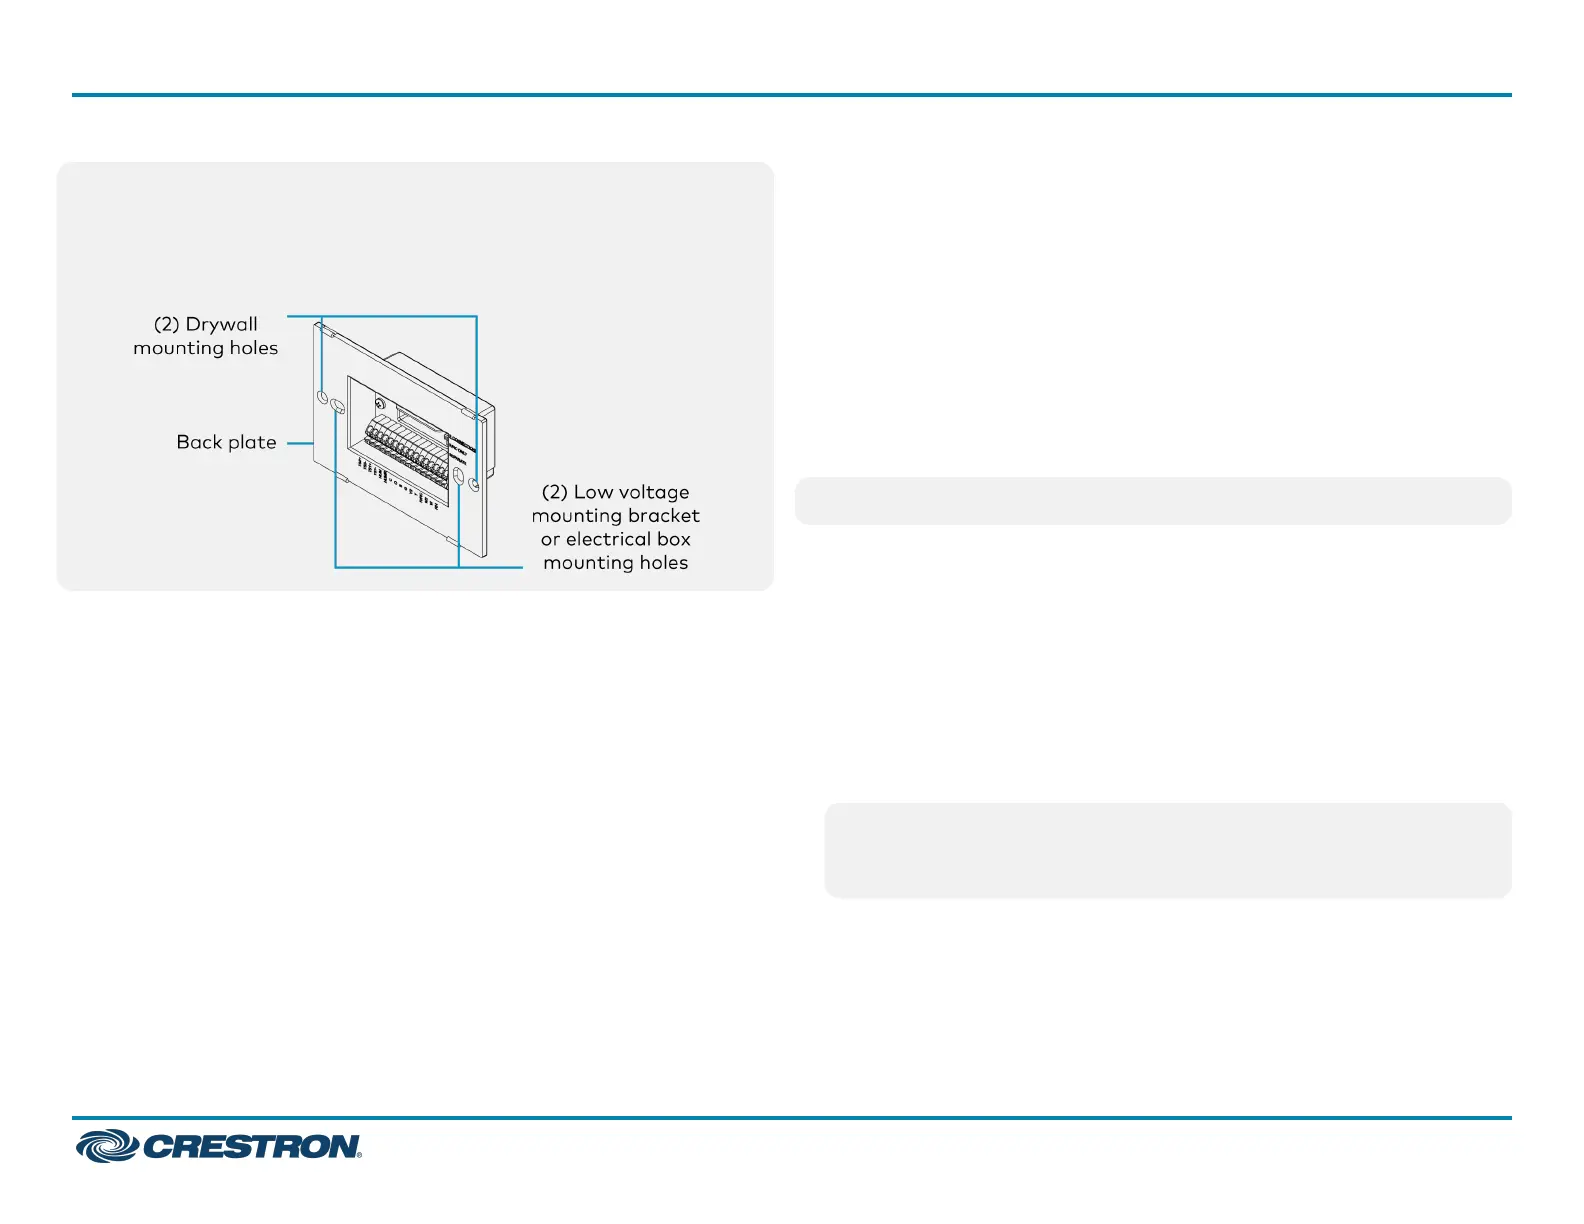
Cutout Template
NOTE: For drywall installations, use the included drywall anchors.
Make sure to use the outer screw holes on the back plate. For electrical
box and low voltage mounting bracket (not included) installations, use
the inner screw holes on the back plate.
Mount to an Electrical Box or Low Voltage Mounting
Bracket
For applications with an existing electrical box or low voltage mounting
bracket:
1. Turn the HVAC system power off.
2. If there is an existing thermostat, take a picture or label the existing
wire configuration before removing the old thermostat.
3. Skip to step 7 in the following procedure.
Mount the thermostat to an electrical box or low voltage mounting
bracket:
NOTE: Use a stud finder to avoid any studs behind the wall.
1. Turn the HVAC system power off.
2. Level the box or bracket and draw a cutout template for the
appropriate size.
For an electrical box, trace the outside of the box
For the low voltage mounting bracket, trace the inside of the bracket
or use the corner holes for markings.
3. Use a utility knife to cut around the outline of the drawn template.
4. Keep retracing the outline cutting deeper until penetrating the back
paper of the drywall. Clear away the excess drywall.
NOTE: Identify the wall type as Insulated (packed with insulation)
or Non-Insulated (hollow). Assigning the wall type is necessary for
Installer Settings configuration.
5. Push the box or bracket through the mounting hole.
6. Tighten the retaining screws until the box or bracket is held firmly in
place.
7. Pull the wires through the thermostat backplate, and push the
backplate into the box or bracket.
4
HZ-THSTAT
QuickStart
Horizon® Wireless Thermostat

 Loading...