kart and possible injury to operators/riders, Do NOT operate this kart
unless the rear shocks have been placed in the operating position.
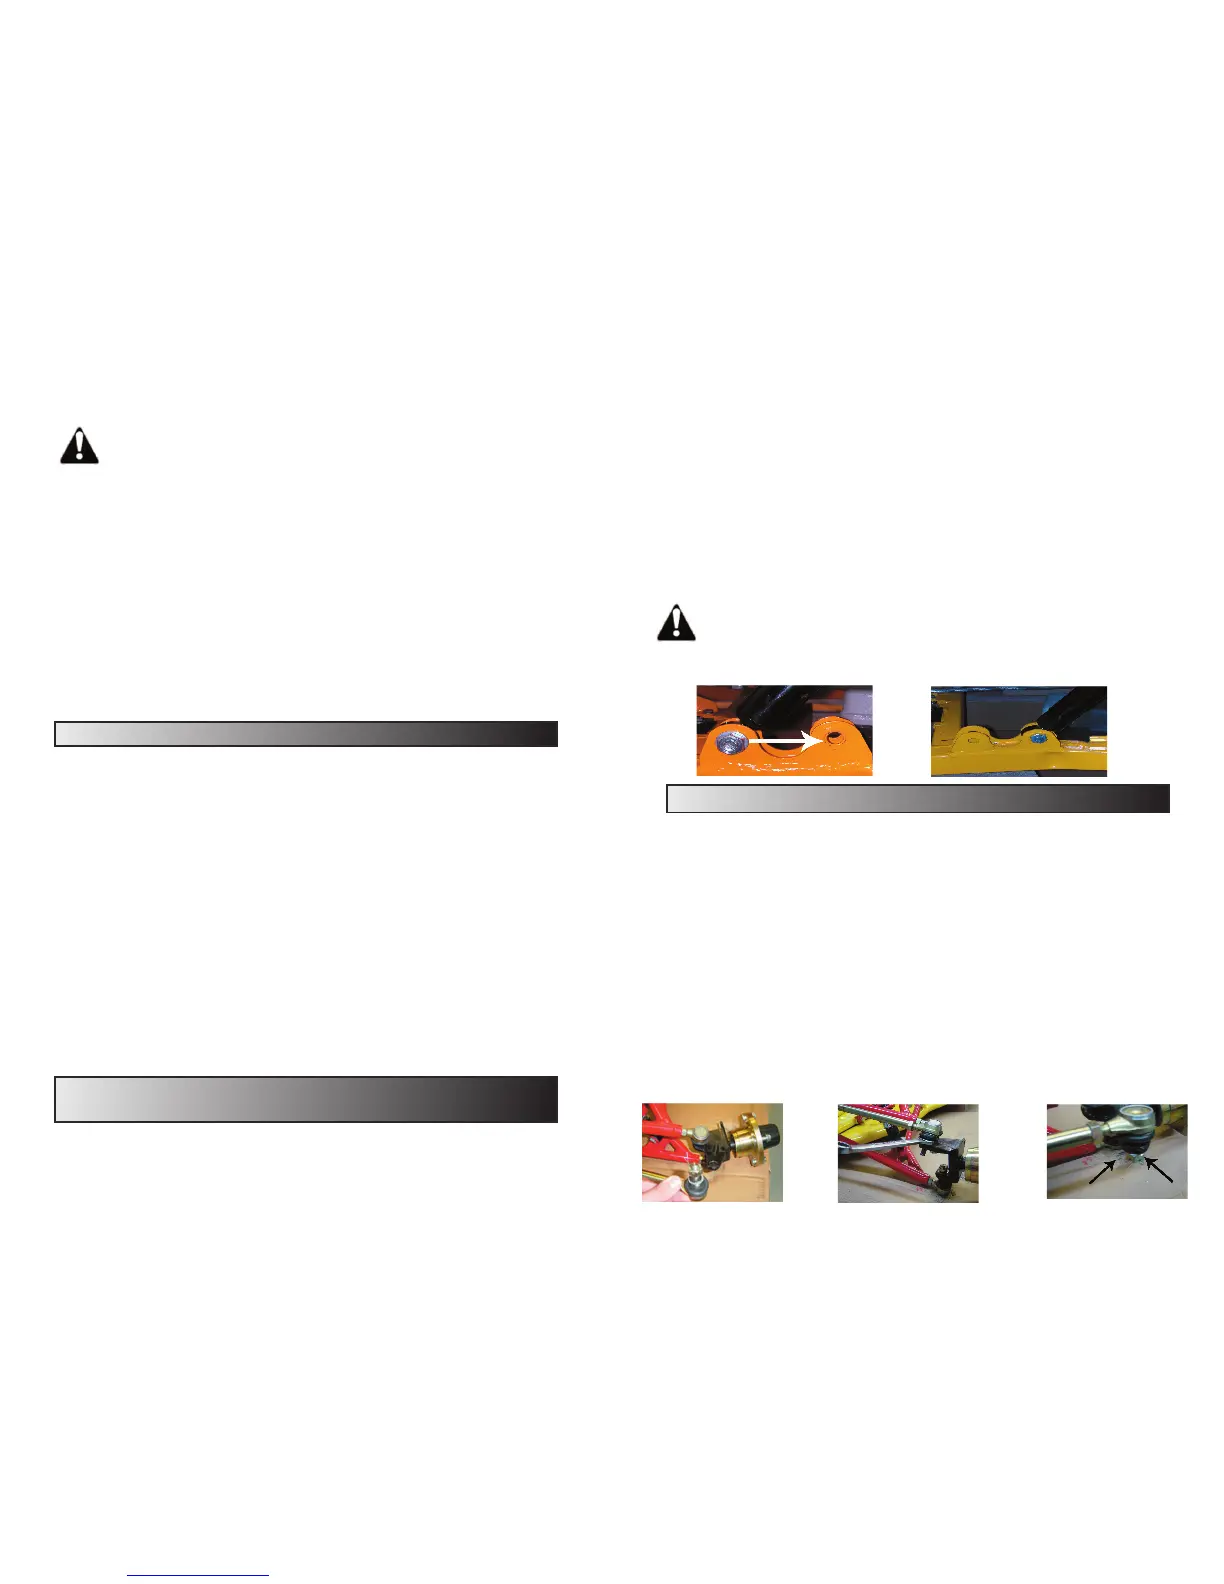
The rear shocks must be adjusted before the go-kart is operated. The
rear shocks are located on each side of the kart, next to the
engine. To adjust the rear shocks, remove the bolt holding the
bottom of the shock in place and move the shock to the opening in
the bracket directly in front of the position in which the unit was
shipped. Be sure to tighten the bolt to ensure that the shock will not
slide out of place during operation. To prevent damage to the kart or
severe injury to passengers, the rear shocks must be moved.
WARNING: Do NOT attempt to move the shocks if the
kart frame is not supported. If the kart frame is not properly
supported, it could fall causing serious injury.
Front Tie Rods
The front tie rods need to be attached to the spindle on each side. To
do this, remove the washer, castle nut, and cotter pin from the tie rod.
Slide the bolt on the tie rod down through the hole in the spindle so
that the threads are sticking through the bottom. Place the flat
washer, spring washer, and castle nut on in that order. Tighten the
castle nut. Be sure that the hole in the bolt that the cotter pin slides
into lines up with openings in the top of the castle nut. This will
allow for the cotter pin to slide into position. After sliding the cot-
ter pin through the castle nut openings and the hole in the bolt, bend
the end without the curve (one side at a time) to a ninety (90) degree
angle (away from the center) to prevent it from sliding out of place.
Repeat this process for the tie rods on each side of the kart.
Do NOT operate this go-kart without attaching the tie rods as shown.
13 14
WARNING: Do NOT open sealed caps to add water
to the battery.
- Batteries contain sulfuric acid. Eye protection should
ALWAYS be used when working around battery acid.
- If battery gets hot to the touch while charging, immediately
remove from charging and allow battery to cool down.
- While attaching the red and black cables for charging, be sure
that the charger is not plugged into the outlet.
- Charge the battery in a well ventilated area out of reach of
children and animals.
- Do NOT smoke around batteries
- Do NOT expose batteries to open flames
Charging The Battery
- The battery must be charged before use.
- Connect the positive (+) red clamp from the battery charger to the
positive (+) pole of the battery.
- Connect the negative (-) black clamp from the battery charger to
the negative pole of the battery.
- Do NOT plug the charger into the outlet until the clamps have been
placed in their proper location on the battery.
- The battery should charge between 500-700 milliampere for 6-10
hours.
- When the battery has finished charging, unplug the charger from
the outlet, then proceed to remove the clamps from the charger.
- Press down firmly on the cap strip to slide it into place. Do NOT
hammer or strike the caps to force them into place.
- Do NOT attempt to remove the electrolyte caps after sliding them
into place.
Assembly
Rear Shocks
The rear shocks have two positions; shipping and operating. The
shocks must be moved from the shipping position to the operating
position before the kart may be driven. To prevent damage to the
 Loading...