MAINTENANCE INFORMATION
Owner’s Manual and Service Guide
45
Front / Rear bridge
Maintain the front suspension and steering system regularly.
1) Check all the spare parts for loose, abrasion and damage.
2) Lubricate the ball head joint and wheel bearing.
3) Check the caddie pedal, armrest and the bolts whether they are in a good condition.
Tool Qty
Butter gun 1 Pcs
Cover cap According to
the demand
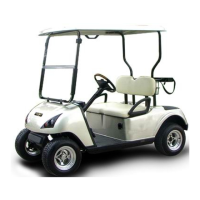
1) Daub butter for the connection ball head of the rack(1)
and drag bar (2,3) regularly . Clean the redundant butter
exuded from the cover after finished daubing.(Fig 1)
2) Check the bearing of the wheel and the cover of the lock
pin.
3) Jack up the front part of the cart, then rotate the front
wheel to check whether it is flat.
4) The tiny clearance between the claw axle and U plate is
a normal phenomena. If the clearance is too big, the
bearing should be added butter, adjusted or changed.
Please refer to section“The content of adjusting the rim
bearing for your reference.”
5) If the wheel hub bearing is in good condition, the claw axle should be replaced.
Please refer to section “replacing the claw axle.”
Lubricate the wheel hub bearing
Tool Qty
Butter gun 1pcs
1) Remove the wheel hub from the claw axle. Please refer to
section “Replace the hub bearing and dust cover”.
2) Clean the bearing, oil seal, wheel hub and the dust cover then
check them for damage. If there is spot or blue moulage on the
bearing, please replace a new one. Please refer to section
“Replace the hub bearing and dust cover”
3) The front wheel bearing is a tapered roller bearing, you
should fill butter into it after each inspection.
4) Install the wheel hub and claw axle. Please refer to section
“Replace the wheel hub”.
Adjust the front wheel bearing
Tool Qty
½” Sleeve 1pcs
Torque wrench 1pcs
1/2”couplier 1pcs
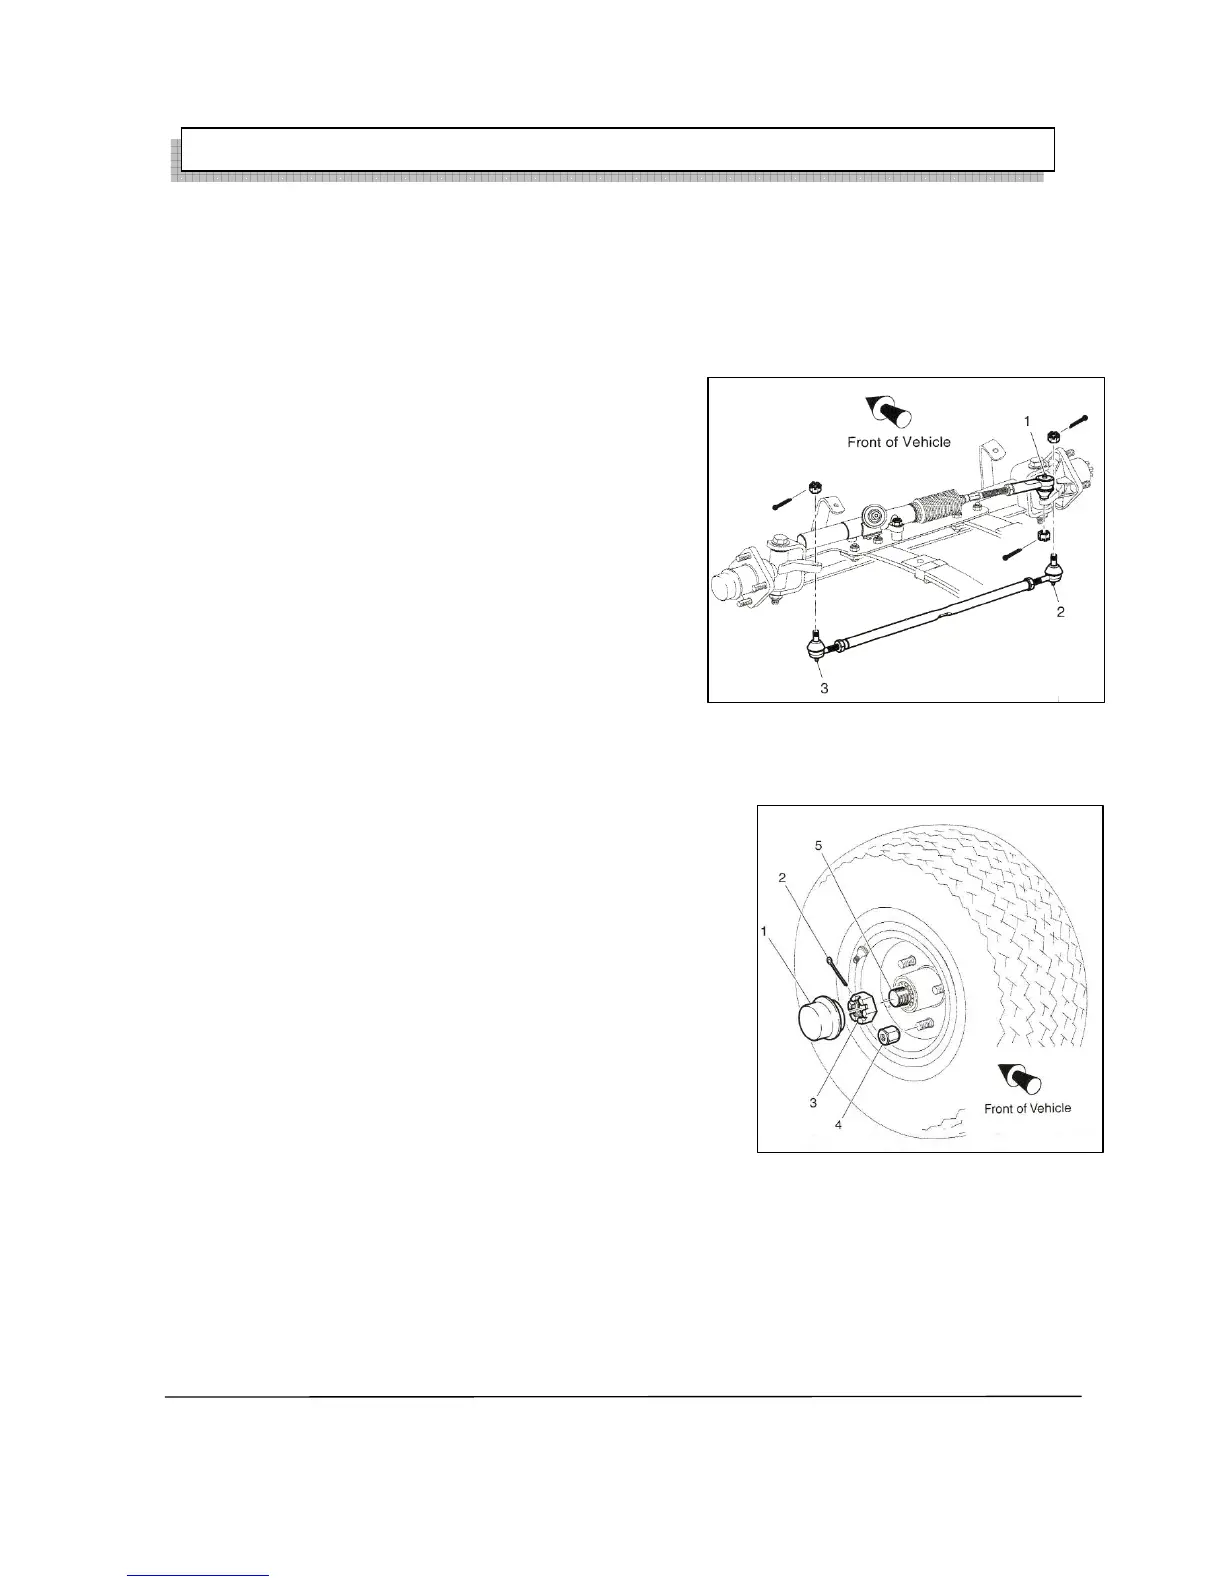
1) Jack up the front part of the cart. Then remove the dust cover (1) and cotter pin (2) and loosen the
nut(3). (Fig 2)
2) If the wheel bearing inspection is only a part of the inspection please leave the
Fig1
Fig2