MAINTENANCE INFORMATION
Owner’s Manual and Service Guide
46
fixed spare parts of wheel on the cart.
3) Rotating the tire whilst fastening the nut of the tire till there is resistance.
4) Rotate the tire for 2-3 circles to let the butter spread in the bearing equally. According to the
factual situation to fasten the nut till the cotter pin(2) can be installed. If not, please loosen the nut
little until you can insert the cotter pin into wheel.
5) Rotate the wheel to check radial clearance and lock the cotter pin up.
6) Install the dust cover well and put down the cart.
Correct the toe-in
Tool Qty
Tapeline 1
9/16”Spanner 1
3/4” Spanner 1
3/4” Sleeve 1
Torque wrench 1
13mm Jacket 1
1) Jack up the front part of the cart and confirm the position of
spring armor plate. Please refer to section “Position correction of
front spring plate”.
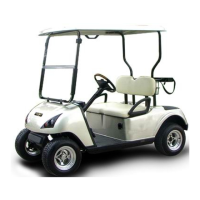
2) Rotate both the wheels and remark in the middle of the wheel with chalk. Then
rotate it several circles to let the wheel in the normal running position.
3) Measure the length between the front wheels top point and
the rear wheels
top point, the front length should be shorter 2-6mm than rear
length.
4) Loosen the nut (1, 2) on the middle drag bar and the middle
rotated drag bar of the wheel to correct the toe-in in the
standard range. Torque for fastening the nut is 36~4020IN.IBS
(49~54N.M). (Fig 3)
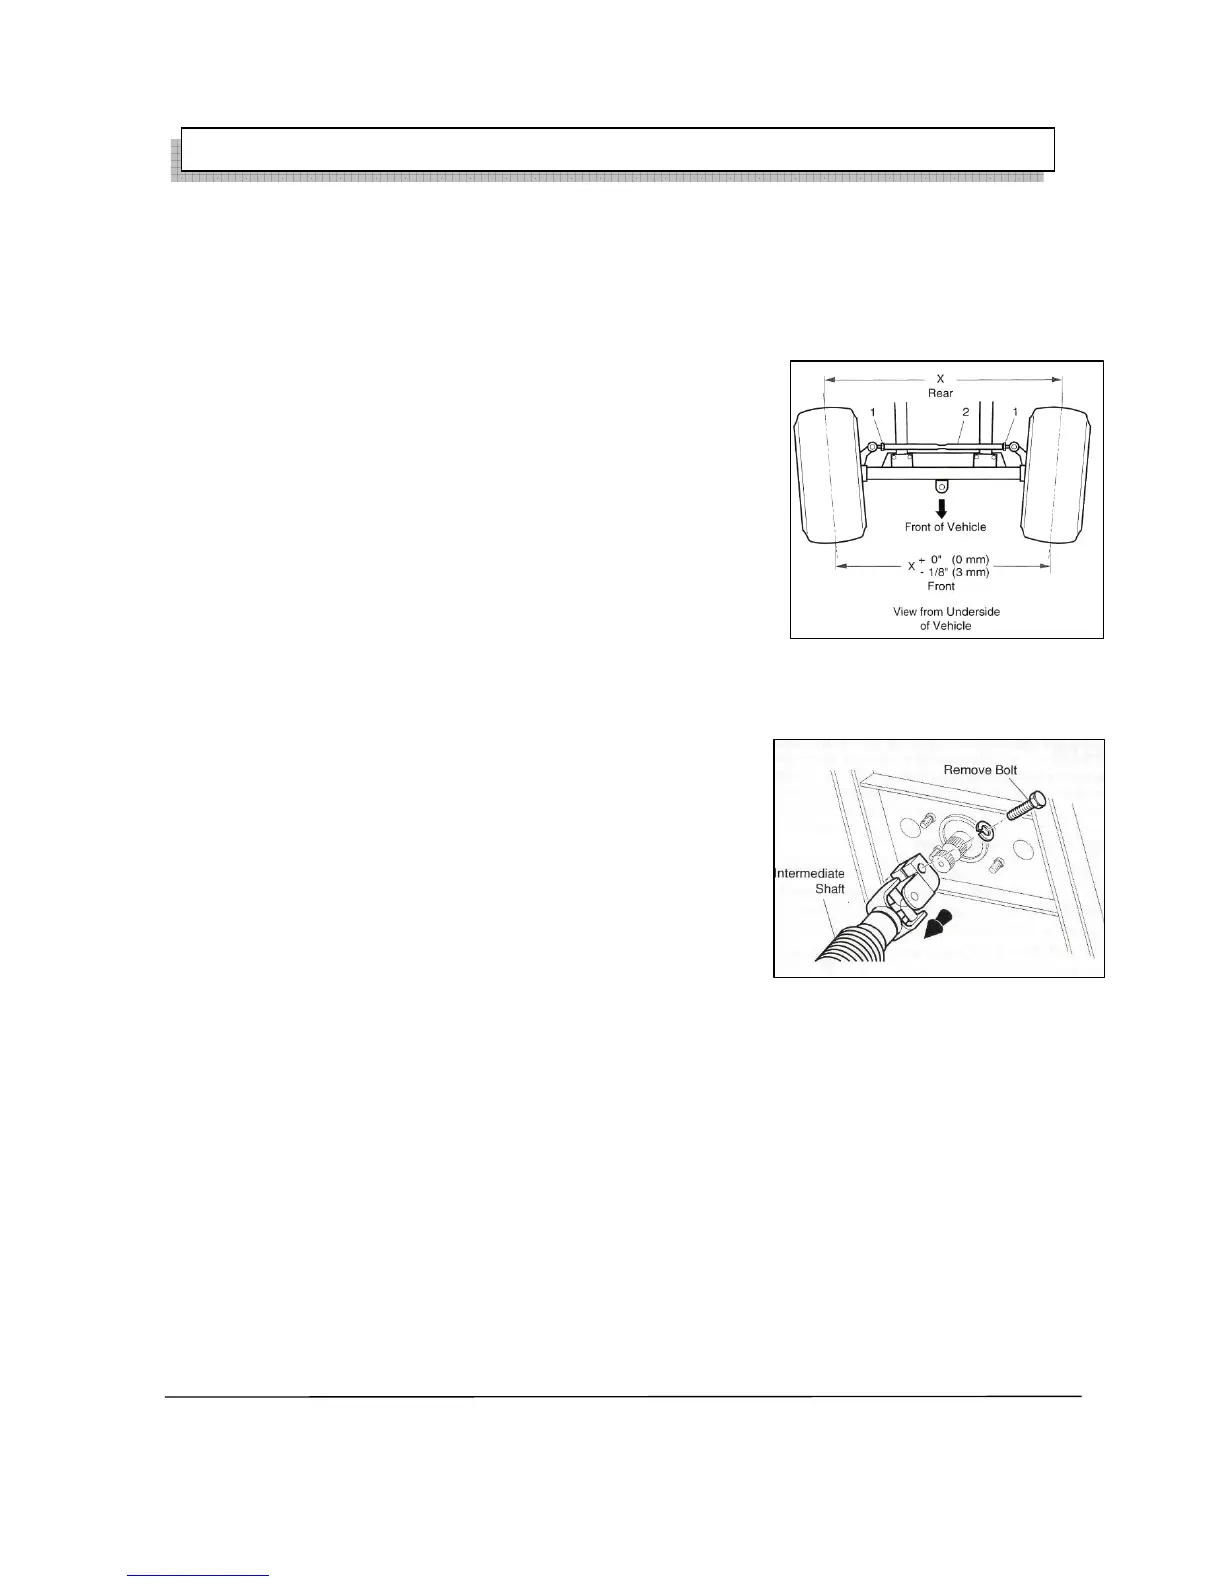
5) Confirm the steering wheel is in the middle position, then
disconnect the steering axle and steering wheel to correct the
position then fasten the screw, torque is 15.5~21.5N.M. (Fig 4)
Front suspension
Replace the front shock absorber
Tool Qty
9/16”Spanner 1 pcs
1) Remove the nut(1) at the bottom of the shock absorber(2) on the front axle(3).(Fig5)
2) Compress the shock absorber to let it depart from the bracket.
3) Loosen the connection nut between shock absorber and the frame, then rotate the shock absorber
with spanner.
4) Remove the shock absorber.
5) The step of installing the shock absorber is opposite to the step of removing it. Fasten the lower
lock nut till the rubber cushion is parallel with the shock absorber cushion.
6)
Replace the front beam
Fig3
Fig4