MAINTENANCE INFORMATION
Owner’s Manual and Service Guide
50
6) The torque applied to the locknut(5) should be 75-95N.M. After fasten it, it is necessary to
check the core pin to make sure it can running freely in the claw.
7) The torque applied to the locknut(2) should be 50N.M and fasten it till the cotter pin could be
inserted into it.
8) After installing the wheels put down the cart.
9) Correct the wheelbase.
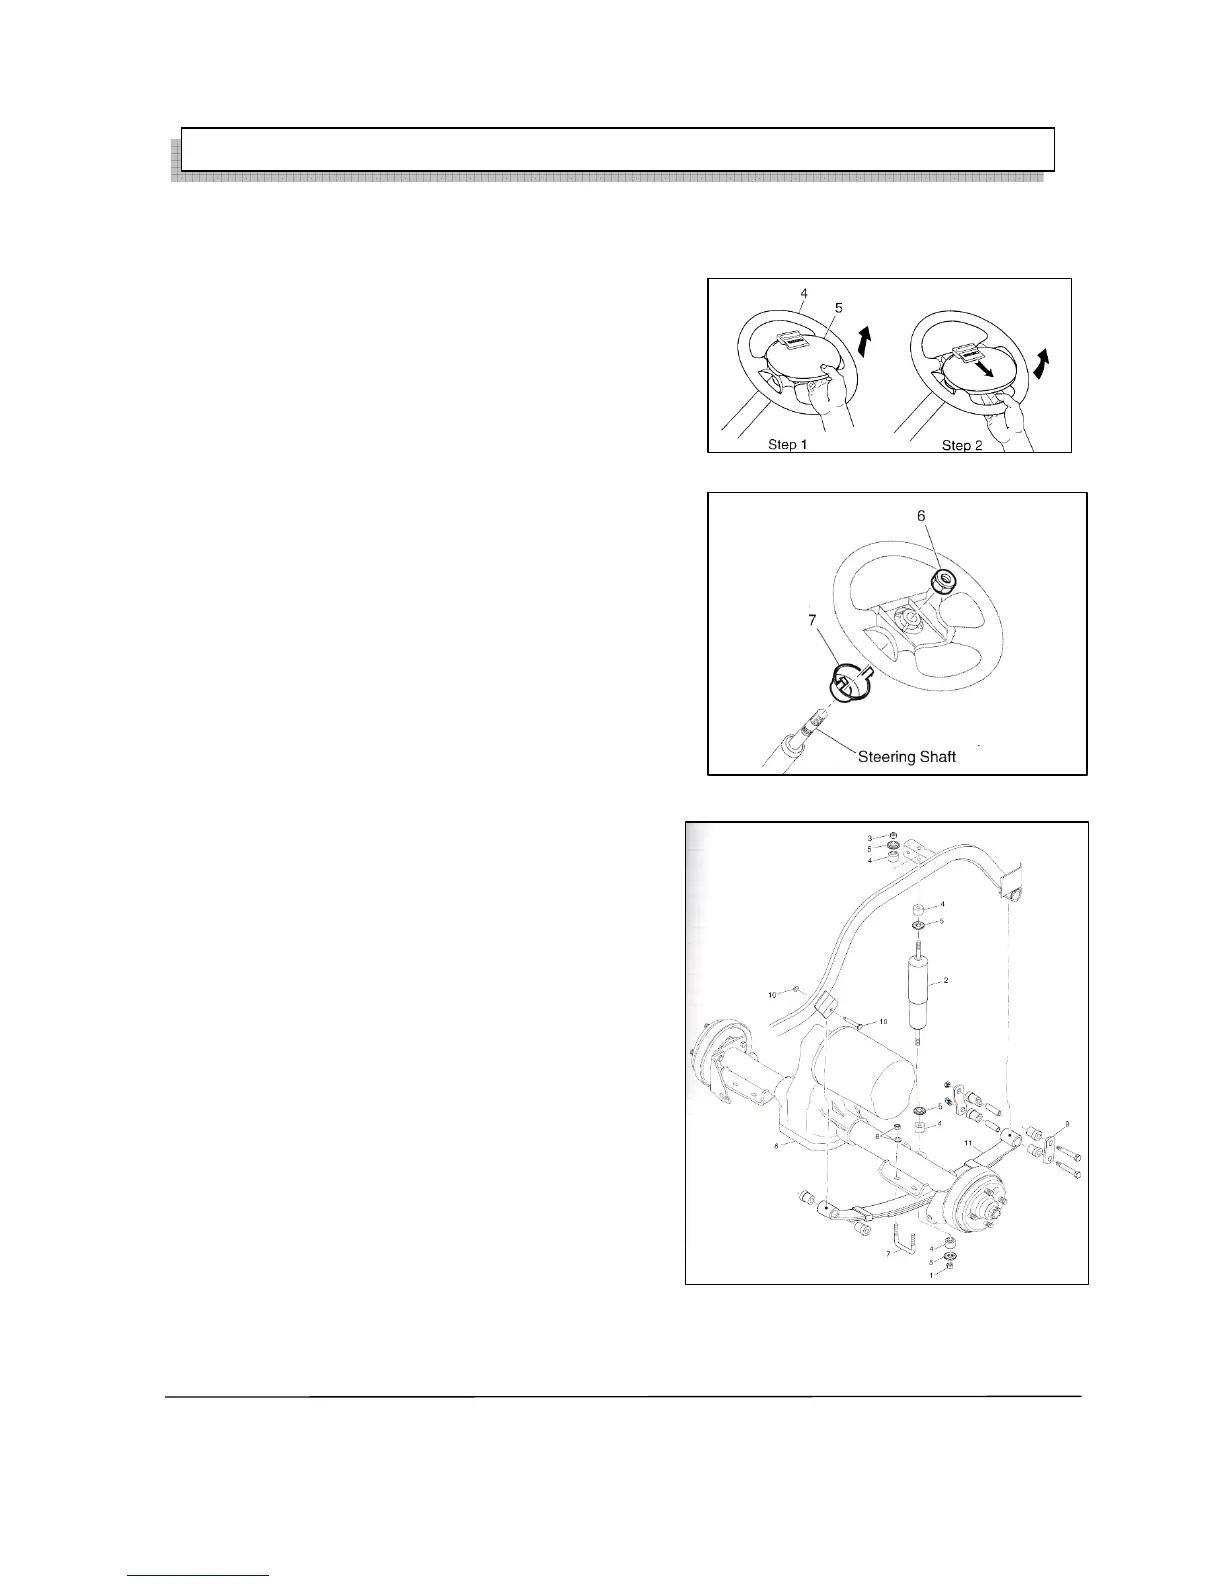
Replace the steering axle (Fig 12/13)
Tool Qty
¾” jacket 1pcs
13mm jacket 1pcs
9/16” jacket 1pcs
Clip-ring plier 1pcs
1) Release the steering wheel.
2) After releasing the front wheel jack up the cart and
then remove the front wheel.
3) Remove the bolt(1)and washer(2) for connecting the
short axle(3) and steering axle(4).
4) Remove the connection steering axle sleeve (7) and
four screws on the frame
and then take out the sleeve tube.
5) Take out the big clip-ring(8)at the bottom of the
steering axle sleeve and pull out the whole axle and
bearing. Then take out the spring washer(10) and keep well for spare.
6) After taking out the small clip-ring(11) disconnect
the bearing and steering axle.
7) At first, press the new bearing to the bearing gear
and install the small clip-ring to the clip-ring slot.
8) Install the washer at the bottom of the steering tube.
9) After installing the axle in the tube(12) and
lubricate it, then install the steering axle and
bearing assembly. When installing the big clip-
spring make sure the clip-ring is installed at the
bottom completely.
10) After installing the steering tube to the cart, fasten
the screws(5)of the tube and the torque supplied to
it is 29N.M.
11) Fasten the screws to connect the short axle and
steering axle and the torque supplied
to it is 15.6~21.6N.M.
12) After installing the front wheel, put down the cart
safely.
13) Install the steering wheel.
Rear axle assembly
Required tool Qty
Fig12
Fig13
Fig14