MAINTENANCE INFORMATION
Owner’s Manual and Service Guide
47
Tool Qty
Speedness spanner,1/2”couplier 1 pcs
3/4”jacket,1/2”couplier 1 pcs
9/16”Spanner 1 pcs
3/4” Spanner 1 pcs
Plastic hammerhead 1 pcs
5/8”Spanner 1 pcs
11/16”Spanner 1 pcs
9/16” jacket,1/2”couplier 1 pcs
5/8” jacket,1/2”couplier 1 pcs
Torque wrench,1/2”couplier 1 pcs
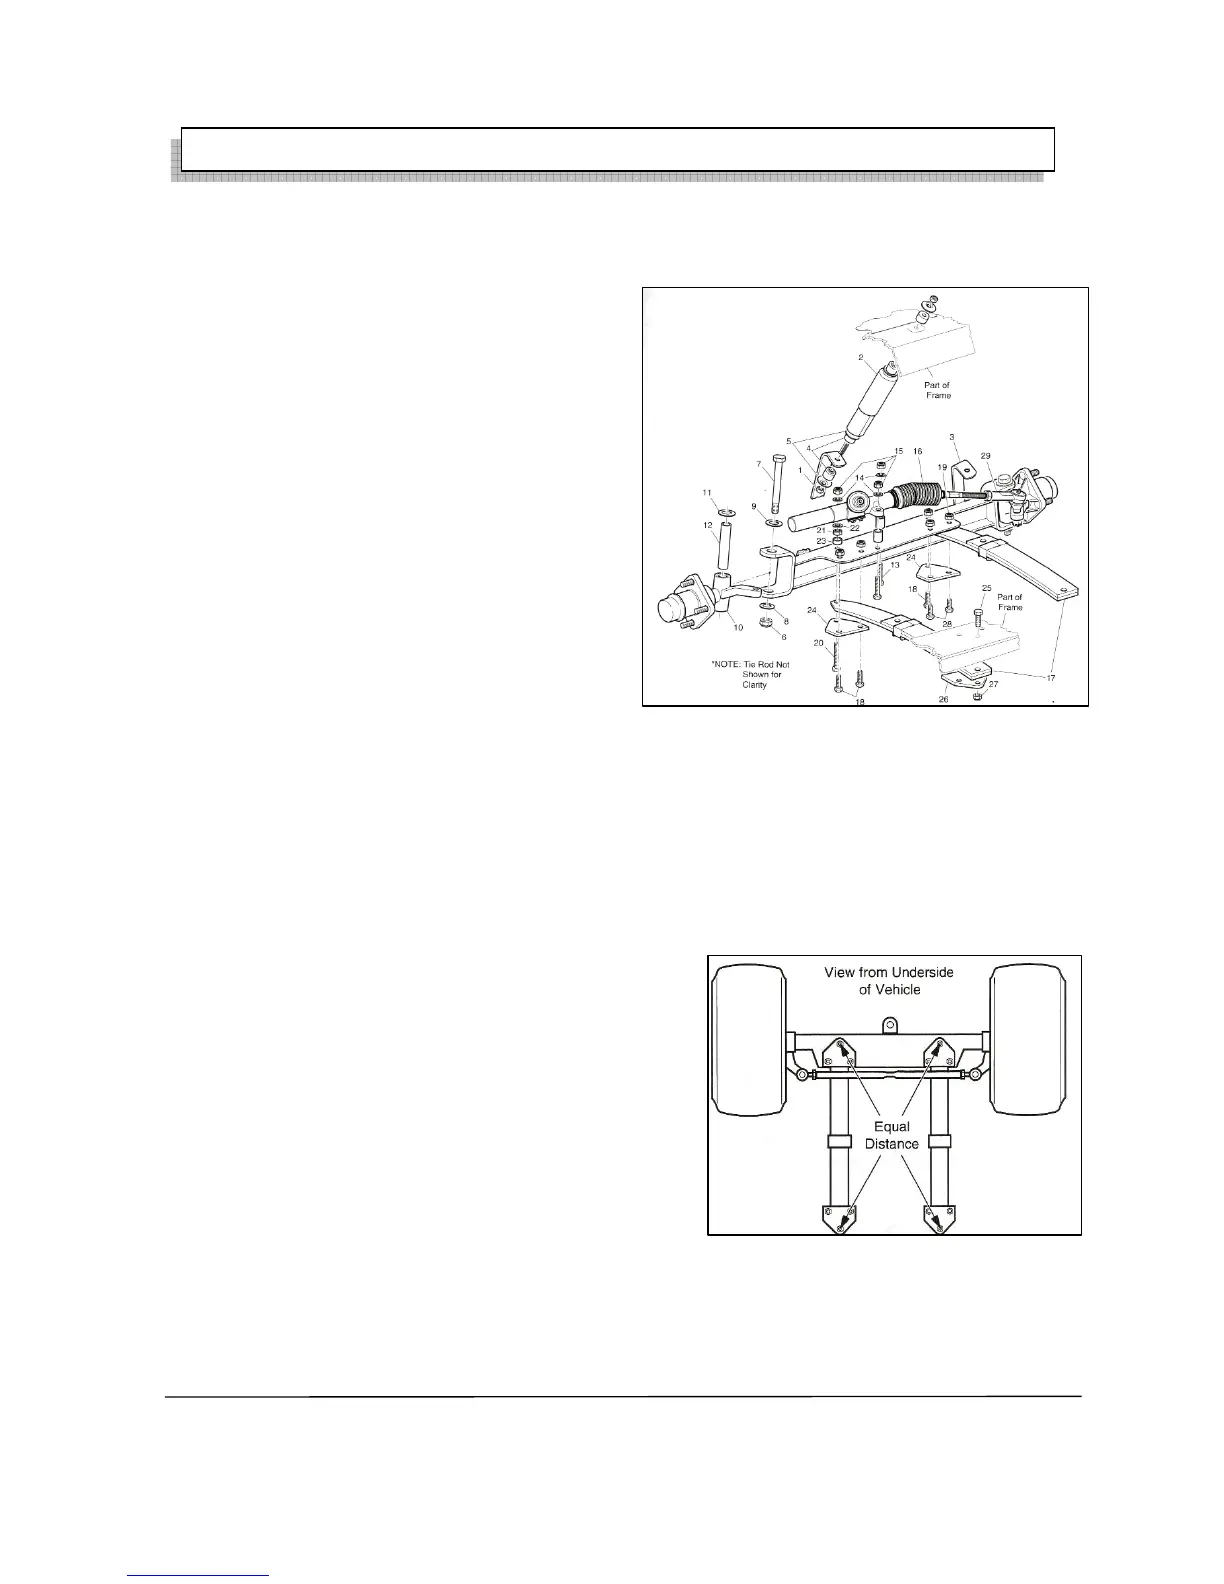
1) Loosen the front wheel, then jack up the cart.
2) Remove the spare parts(1,4,5) which connect
with the shock absorber(2)
3) Remove the locknut(6) ,washer(8,9), screw(7),
thrust washer(11),core pin(12) and keep them
well.
4) Remove the spare parts of the other side as
above method.
5) Remove the spare parts from the connection
rack assembly(16) and keep them well, then
fix the rack assembly on the armor plate spring.
6) Remove the three
1 3/4 screws(18), two 1 ½ screws(28), spring piece(24), and
five locknuts on the front beam, and the locknuts can be used again.
7) Remove other connection spare parts separately and keep them well for assembling again.
8) The steps for assembling the beam is opposite to remove it and the connection spare parts(18-
24,28)should be assembled at the former position.
9) The torque of (13~15,18~21,28)is 35-50N.M.
10) Assemble the thrust pad(11), core pin(12), claw, washer(9) and screw(7) and the torque for
fastening the locknut is 56-60N.M.
11) Fasten the connector of the shock absorber, and the
locknut on the nether-end should be fastened to let the
rubber cushion and
shock absorber keep parallel.
12) After assembling the wheels put the cart down safely.
13) Check the front wheels for correct position, if
necessary please correct the toe-in. Details are given
in “correct the front wheel part”.
Replace the front spring armor plate
Tool Qty
Jack 1pcs
1) After releasing the screws of the wheels jack up the cart safely and the jack
should support at the front beam, then take the front wheels away.
2) Replace the beam. Remove the nuts(15)of the rack assembly and the locknuts
can not be used again.
Fig5
Fig6