~RE~V"'.
O~
__________
D:,:.C'75'.CP:oO~
"'
~E!2
R
~AI~"P,-!L"-IF"IE,,R,-
____
~(j'@(!!lI](RJ
9
Appendix A: Installation
Befo
re
beginning
Ih
e insta
ll
a
ti
on
of your amplifier, please
c
arefuUy
note the following:
It
is always wise to remove
pow
er from
th
e unit and
tu
m
the
input leve\ controls off
while
maki
ng
co
nn
ec
ti
ons - especially if
th
e load
is
a
loudspeaker system. This w
ill
elim
ina
te any chance
of
lo
ud
blasts or damage
to
the loudspeakers.
A.l
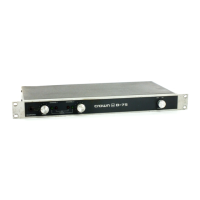
Mounting
The
0-
75
c
an
be
mounted
into a
standard
19
inch
wide
equipment rack or a custom cab
ine
t of your own desig
n.
It occupies
1.75
in
c
he
s
of
vertical rack spa
ce.
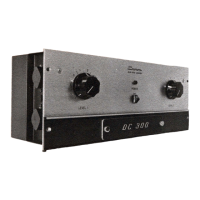
I:
1
•
O'lY!'O
,
"
~:I:
•
l,J
o 0 I
:
1
~5
=
•
•
I
I~
F
ig.
A.
1 0-75 Mounting
Dimentions
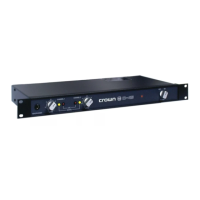
A.2 Wiring
The input and output jacks arc located
on
the rear panel.
Please use care
in
making connections, selecting signal
so
urces and controlling
th
e out
put
level. The l
oad
yo
u
save
ma
y
be
your
ownl Crown
is
not liable
for
an
y
damage done
LO
loa
ds
due to careless amplifier usage and
de
li
berateovCI'pOwcring.
The D·75
may
be
operated
in
either STEREO (Dual or
two-channel) or
MONO
mode
by
switc
hi
ng
the stereo-
mono
switch
on
th
e rear panel of
th
e amplifi
er.
There are
VERY
IMPORTANT wiring differences
betw
een these
two
modes which are discussed next.
A.2.1
STEREO
The
in
stallation
is
very
intuitive in STEREO m
ode.
The
input
of
Channe
ll
fee
ds
th
e output
of
th
e same cha
nn
el
as
does
th
e input of Channel
2.
To p
ut
the amplifier
in
stereo mode, s
lid
e
th
e Stereo-Mono switch at the back of
th
e amplifier downward.
Be
very careful not to shan the
tw
o
Outputs
together
whil
e
in
STEREO mode and observe
c
OITCC
tl
oudspeaker polarity. The load impedance shou
ld
not
be
less
Ihan
4 ohms at e
ith
er channe
l.
CAUTION: Never paraUellhe
two
outputS
by
directly
tying
them
;ogelher or para
ll
el
them
with
the outp
ut
of
any other
amp
lifier. Such connect
ion
does not result in
increased
power output and can possibly
ca
use the
unit
to
f
ail.
A.2.2
MONO
Installing lhe amplifier
in
MONO
mode
is
very
differe
nt
.
MONO
mode
is activat
ed
wh
en the Stereo-Mono sw
itc
h
is
pushed upward. In
thi
s
mode
o
nl
y
th
e Channel I
inpu
t
should
be
used.
DO
NOT
US
E
THE
CHANNEL 2
INPUT or sig
nal
leveL
Keep the Level
conlTO
l of
Channel 2 tumed compl
elC
ly
do
wn.
Note: The input jack and Level control
of
Channel 2 are
not
defeated
in
MONO
mode.
Any signal
fed
in
to
Cha
nn
el
2
will
beat against the sig
nal
in Channel I.
The
Output
wiring
is
very
different, too. The pol
arit}'
of
the
ou
tput
of
Channel 2 is inverted so
it
can
be
bridged
with ;
he
outpUl
of Channel!. The
OUlPLlts
Qf
both
channels rece
iv
e
the
s
am
e s
igna!
from
th
e
inpu
l of
Channel I.
The
flfSt
and
mOSI
comm
on
co
nfi
gu
rati
on connects
th
e
pos
iti
ve
lead
from
th
e loudspeaker 10
th
e
red
post or
positive
tem
li
na
l
of
Channel I and the negative le
ad
(0
the
red
pos
t or positive terminal of Channel 2 (
the
inn
er
bla
ck
POSts
are
not
used). This method, called "b
rid
ged
·mo
no,
"
produces
lhe
si
ngle highest-powered output and is
the
configurati
on
refClT"'...d
to
in
section 7.2
of
th
e
Spccifia;tions. The load impedance sh
ou
ld
not be less
tha.'!
8 ohms
in
this mode.
CAUTION:
Be
certain
th
at all equipment (meters,
switches, ctc.) connected
10
the MONO outp
ut
lines are
balanced.
Both
sides
of
the
li
ne
mu
st
be
totally isolated
fro
m
th
e input
gro
und
s.
Ir
thi
s is not smct
ly
obser
ved.
severe
oscill::ltion
may
result.
A.3 Input
The
unb
al
anced inputs have a
nom
inal
impedance of
25
K
o
hm
s
and
w
ill
acce
pt
mo
st
lin
e-level outputs. The
XLR
inputs are 20 K ohms balanced and 10K o
hm
s unbalanced
(pin 2
is
non in
ve
rtin
g). There are
thr
ee precautions to
take
when
co
nn
ec
ti
ng
to
the
inputs: I)
Keep
unde
si
rabl
e
signals off
the
inputs,
2)
Avoid
ground loo
ps
and
3)
Avoid
feedback
Ix:twcen
an
output
and
an
inpuL
Large sabs
on
ic (subaudible) frequenc
ies
are
sometimes
prCSCnt
in
tJle
in
pm
signal a
nd
can overload,
ov
e
rh
eat or
oth~rwisc
damage loudspeakers. To remove such
Append
ix A A·1