36
Lead-acid Battery Wiring Inspection :
1.Please follow the same steps as above to remove the
battery pack.
2.The connectors inside the pack can then be checked.
a.Negative power output charging wire - check the position
of the negative hole on the battery pack.
b&c.Series wiring set (without electrode wire).
d.Positive power output charging wire - check the position
of the positive electrode hole in the battery pack.
e.Charger socket power cable.
※Repair of the lead-acid battery is generally the same as
for the lithium battery. Except that SERVICE-6-3 Battery Pack-Battery Removal provides
special instructions for the removal and replacement of each kind of battery, for the
rest of the repair steps, refer to SERVICE-6-1 Battery Pack-Charger Socket
SERVICE-6-2 Battery Pack-Power Socket.
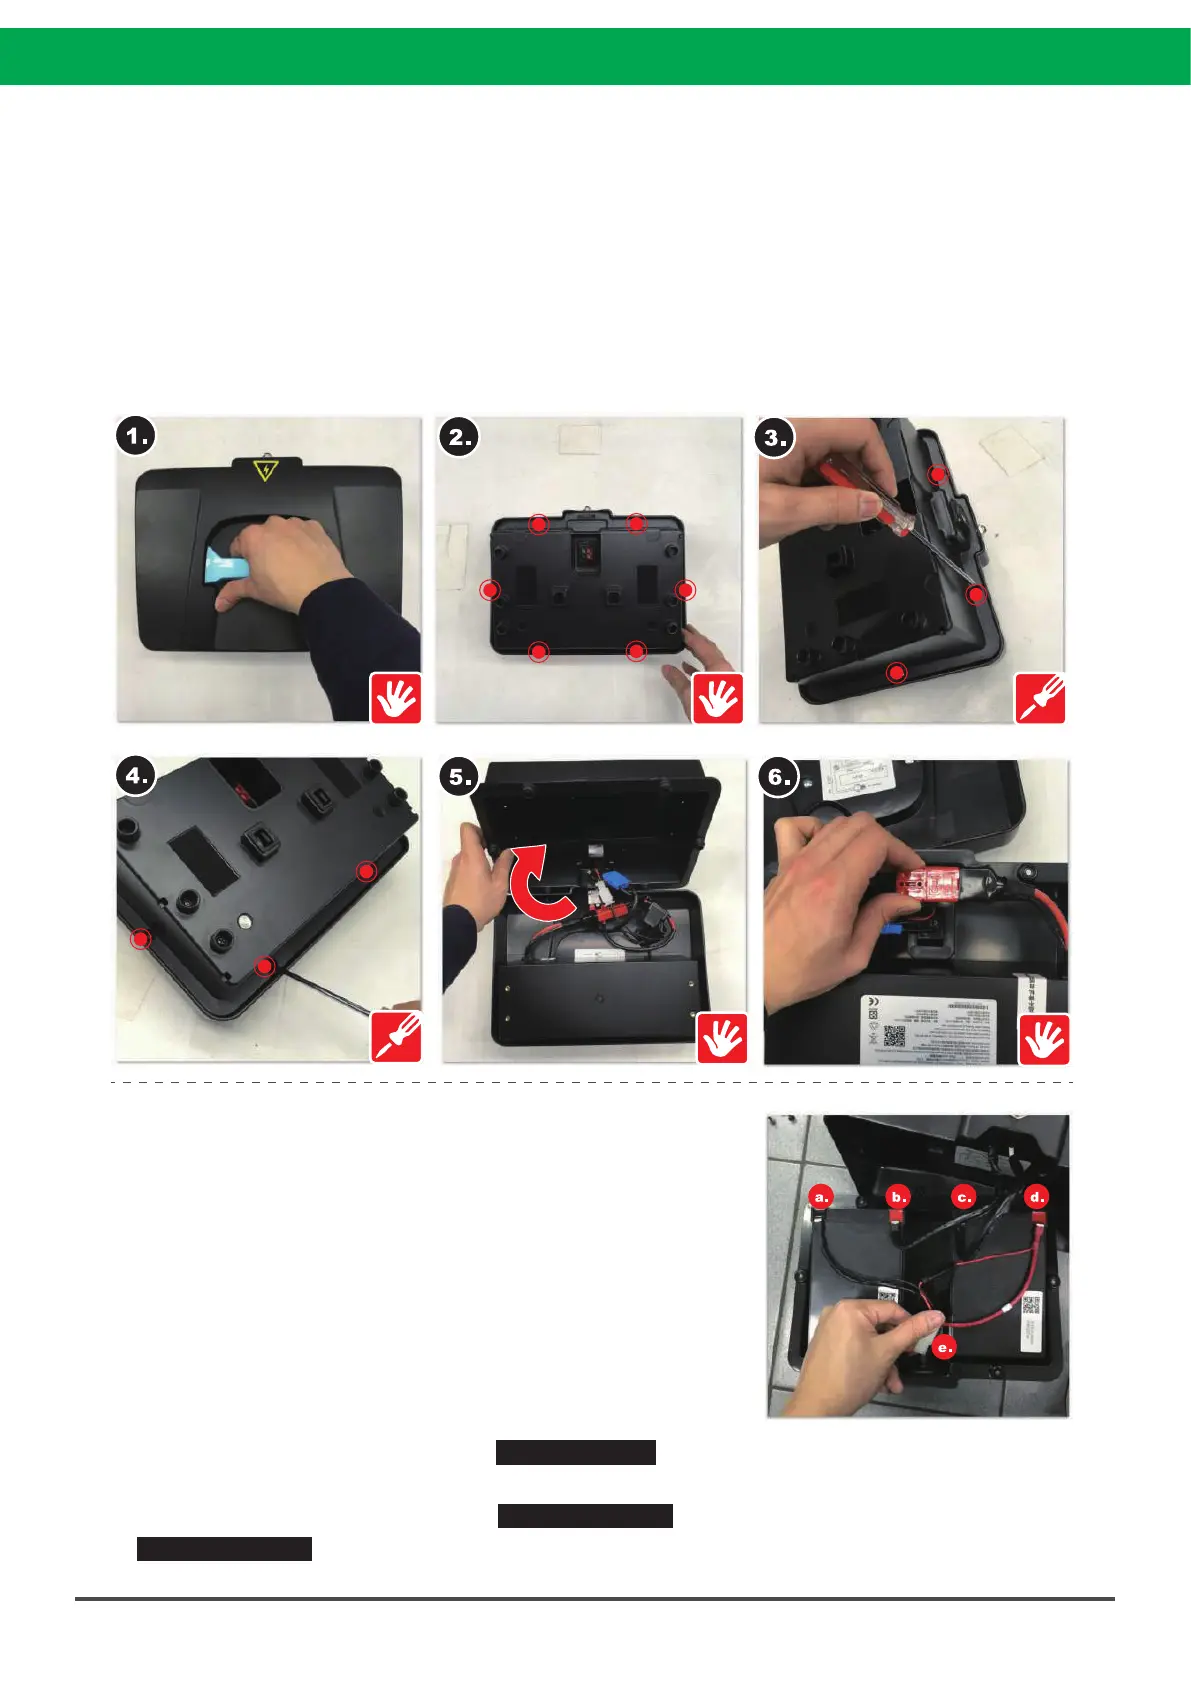
Battery Pack Wiring Inspection :
1.Remove the battery pack from the scooter.
2.Turn the battery pack over and locate the six screws that hold the cover.
3.Remove the screws (12mm, 6pcs).
4.Remove the cover and open the battery pack.
5&6.Remove the battery main cable connector first, then check the rest of the connectors.
※After removing the battery main cable connector, please set it aside safely.
※For re-installation, please follow the exact reverse sequence.
※If a check shows the wiring to be normal, but the charger still does not charge the battery
pack, the charger may need to be replaced.