53
SERVICE - 12
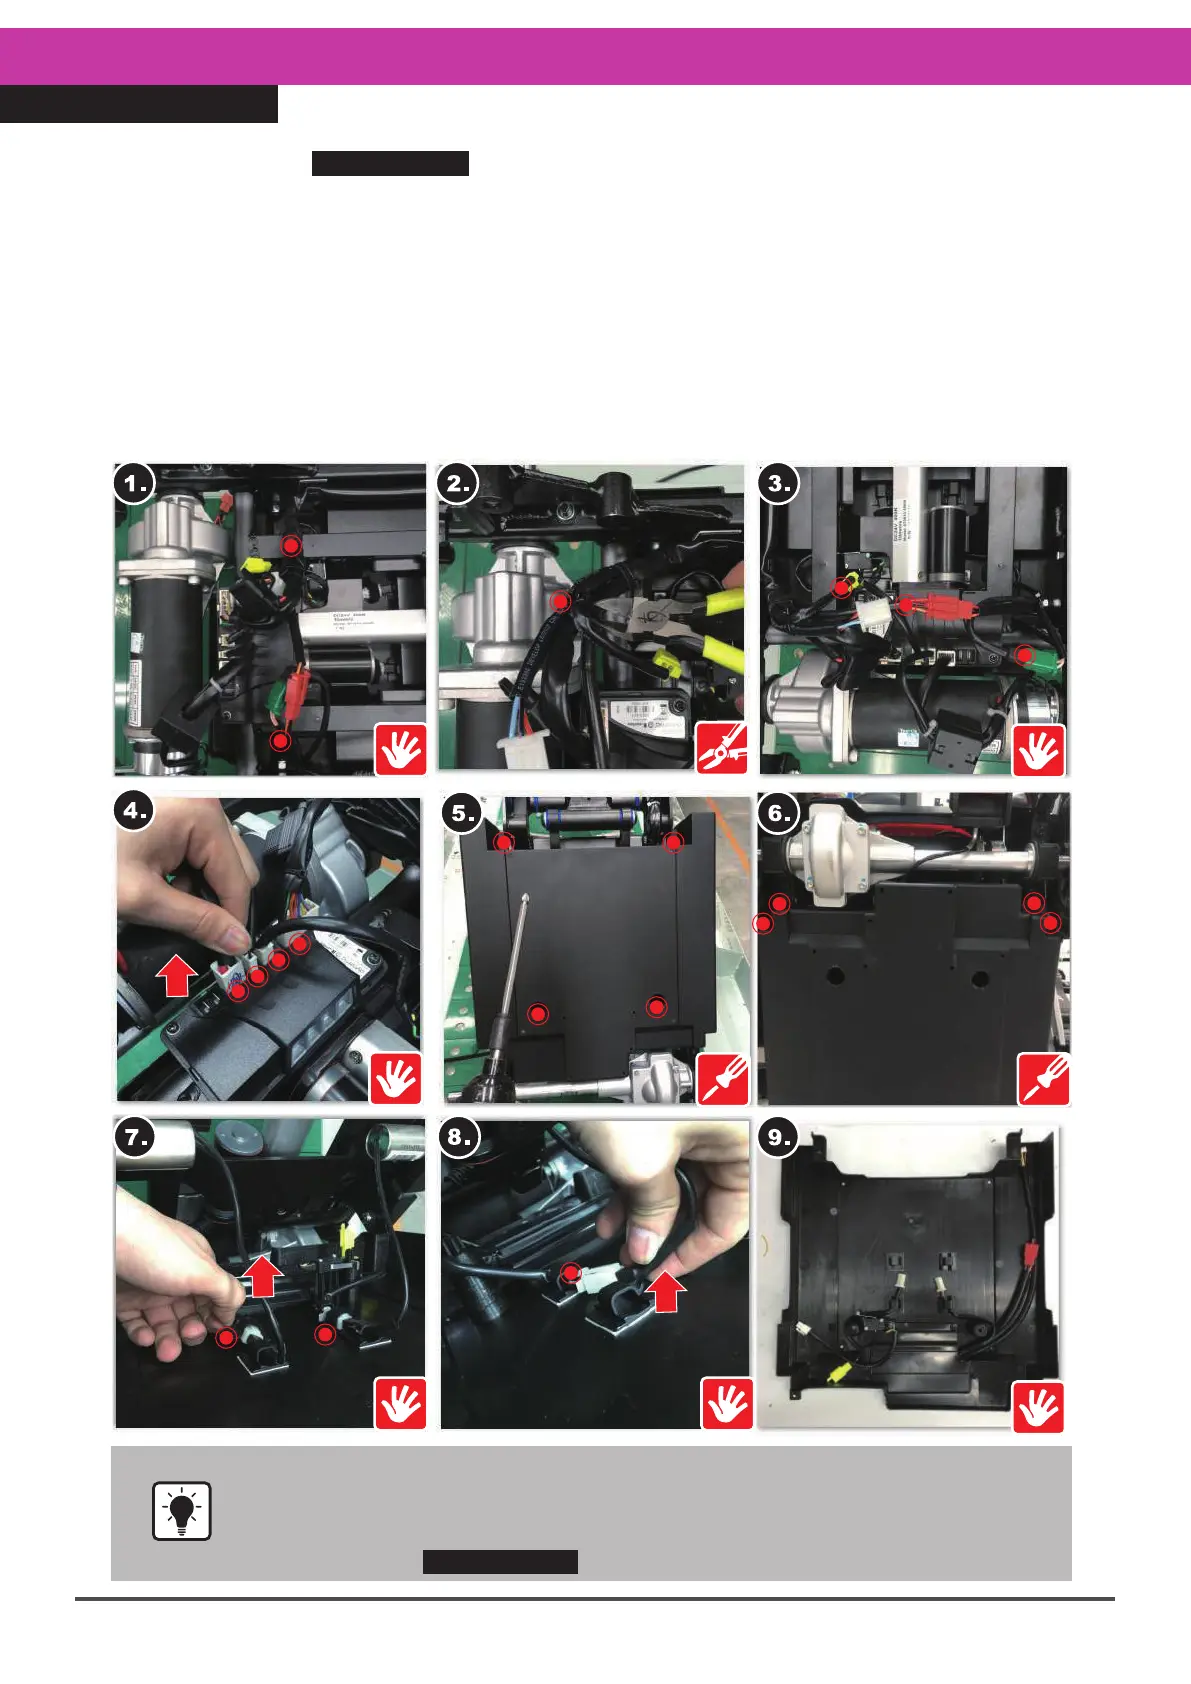
Rear Lower Cover Repair
•Re-installation of the lower cover is more complicated because incorrect
connections will cause malfunction. Please refer to the re-installation
instructions on the next page.
•Steps 3 and 4.For connector positions and instructions, please refer to the
instructions in SERVICE-11 Rear Top Cover Repair.
Please follow the SERVICE-11 Rear Top Cover Repair steps for removal, then :
1.Remove the rear top cover, and find the cable ties on both sides.
2.Cut and remove the cable ties on the wires on both sides.
3&4.Unplug all the connectors on the rear lower cover and DR controller.
5.Locate the four screws (12mm, 4pcs) holding the bottom of the rear lower cover.
6.Remove the four screws.
7.Open up the rear lower cover, and tear off the solenoid valve tape on both sides.
8.Disengage the solenoid valve connectors on both sides, and disconnect the lower cover hook.
9.Take the cover off.
※When reinstalling, please carry out these steps in the exact reverse sequence. Please
also refer to the Cautions on the next page.
※For relevant connectors, please refer to the instructions on the next page.