- Always replace both the filters each time the “Replace filters” message is displayed.
- Use only dedicated original spare parts. There are no compatible filters on the market.
- The “Replace filters” message warns you when the filters need to be replaced, but does not in any way lock
unit operation . If you ignore the “Replace filters” message and continue using the unit, you may irreparably
compromise proper functioning of the unit and forfeit the warranty because of improper use.
- Check that the old oil container is empty.
- Select the “SERVICE” option from the main menu.
- Move the cursor to “REPLACE FILTERS”.
- Close the HP and LP valves as shown on the display.
-
Press the OK button. The electronic system activates a procedure to release the pressure from the filters and, when this has been
completed, the message “REPLACE FILTERS” will be shown on the display. Do not turn off the unit.
- Insert the appropriate remover and press firmly downwards. (Fig. 1)
- Remove the snap rings seeger rings. (Fig. 2)
- Remove the filter caps with the dedicated extractor provided (Fig. 3-4). Check the condition of the O-rings and replace them if
necessary.
- Remove the cartridges with the extractor using the other end (Fig. 5).
- Fit the new cartridges, respecting the fitting direction (Fig. 6).
- Follow the procedure in reverse order to close the cartridges.
- Only after having closed the caps, press “OK” to continue the procedure.
The unit automatically performs the dehumidification procedure, a leak test, gas recycling in the cylinder, and finally resets the
partial counter (recovery counter) and the service message. If there are any problems, an error message is displayed and the
operation blocked.
The time required for the entire operation is approx. 30min.
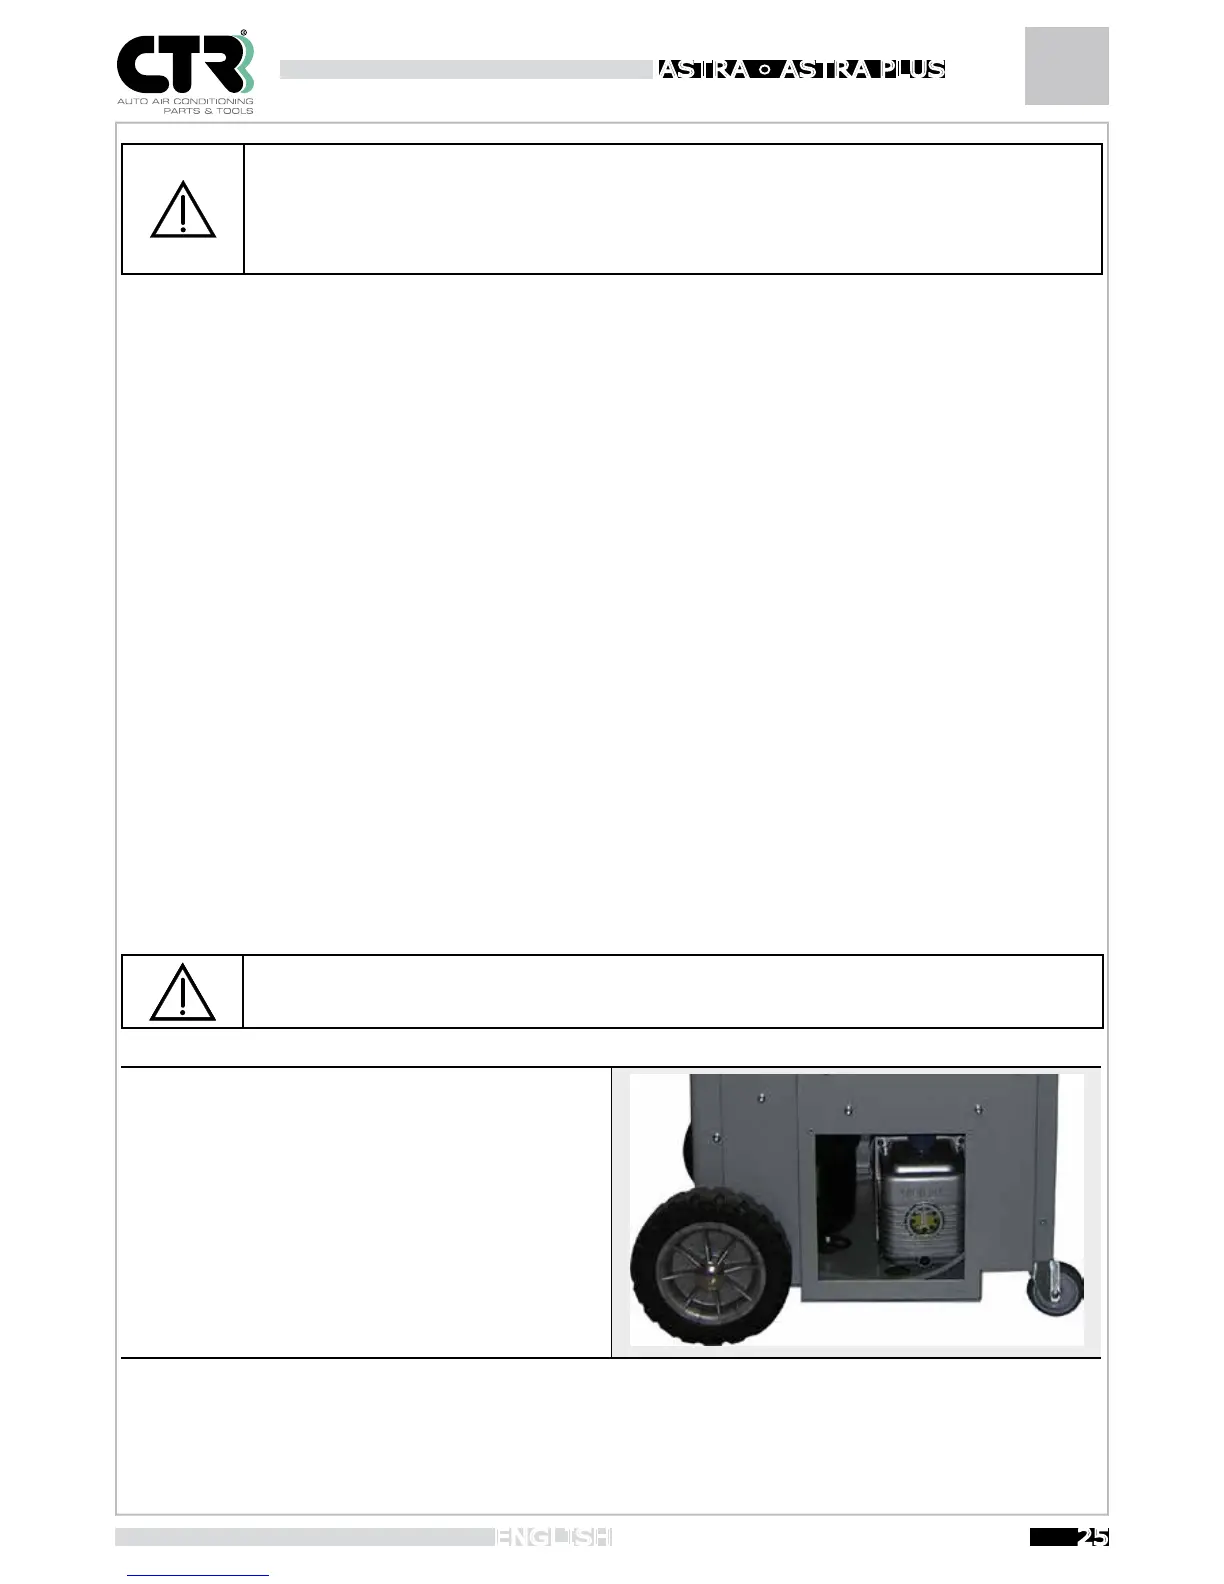
8.2 Vacuum pump replacement:
The life of the vacuum pump is monitored by the electronic system in order to always ensure optimal efficiency and a long life in
normal operating conditions. When the service message “Change vacuum pump oil” is displayed, proceed as follows:
When topping up or changing the oil in the vacuum pump, use specific oil for vacuum pumps.
To top up (see figure), unscrew the bleeding (A) cap and pour
in oil until it reaches mid-level of the sightglass (C); when
done, screw the bleeding cap back on.
To change the oil:
- Run the pump for 10 minutes
- disconnect the unit from the power supply
- Remove the drain plug positioned in the lower part of the
pump (B);wait until all the oil has drained out Refit the drain plug
-
Unscrew the bleeding cap and pour in new oil until it reaches
mid-level of the sightglass. Screw the bleeding cap back on.
When the message “Change vacuum pump oil” is displayed, ESC and OK will appear under the item “Vacuum pump hours” in the
SERVICE menu. After changing the oil , press OK to reset the partial counter.
B
A
C