-03-
-www.ctronics-tech.com-
-04-
-www.ctronics-tech.com-
Set up the camera
2
The camera starts to run immediately after connection with power supply. It can
be used as a standalone video recorder.
It’s recommended to connect the camera with your mobile device or PC. After the
setup, you’ll be able to access the camera more conveniently. There’re 3 ways to
set up the camera: with mobile application, with PC software, with PC browser.
2.1 Set up the camera with mobile application
No LAN cable is required if you set up the camera with mobile application.
Step 1: Preparation
1.Download mobile application “Ctronics” from Google Play or App Store
to your mobile device;
2.Connect the camera to power supply and keep it close to your
mobile device.
Step 2: Connect the camera to mobile device
1.Enter WLAN settings of your mobile device, find the network named
“IPCAM-XXXXXX” in the network list. This is the network of the camera.
2.Connect this network with password “01234567”, your mobile device will
be connected to the network of the camera;
Step 3: Connect the camera to Wi-Fi network
1.Open mobile application “Ctronics” on mobile device, you may add the
camera either by “Scan QR Code add UID” or “Search camera from LAN;
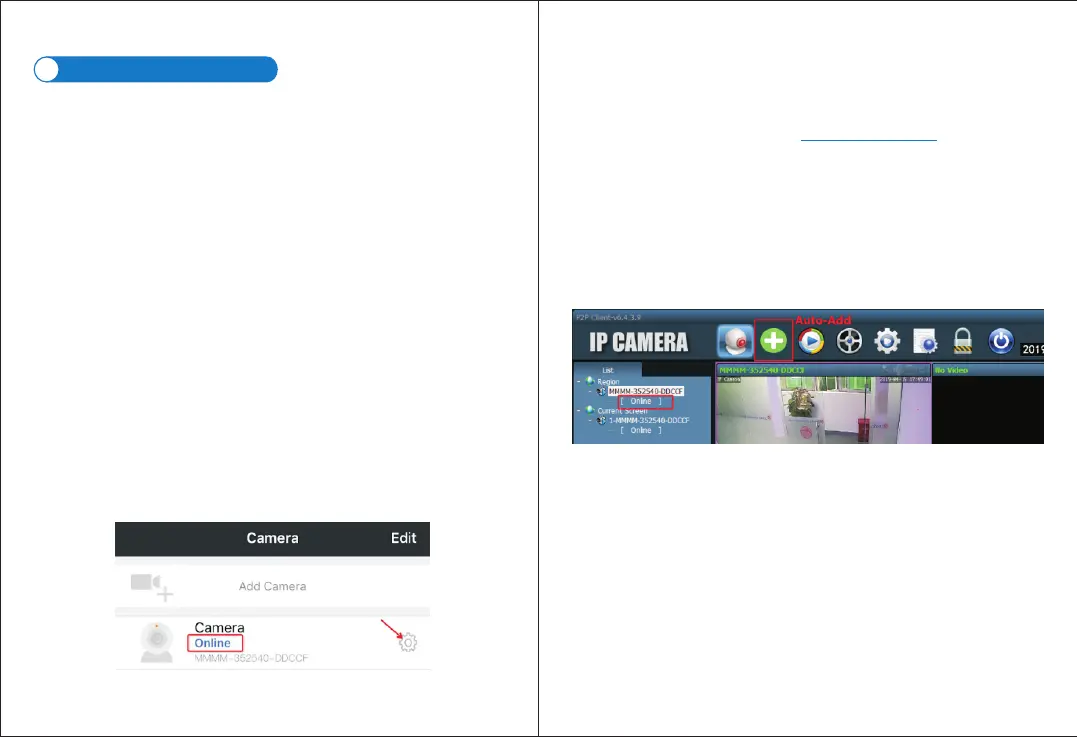
The camera will be displayed with status “Online”. (Picture 1)
2.Click on Setting icon on the interface (Picture 1) to enter camera setting
menu. Go to Wi-Fi setting, click on Wi-Fi manager, select your Wi-Fi
network in the list, input your Wi-Fi password and save the setting. The
camera is now connected to your Wi-Fi network.
2.2 Set up the camera with PC/MAC Software
LAN cable is required if you set up the camera with PC/MAC software.
Step 1
www.ctronics-tech.com
: Preparation
1.Download and install PC/MAC software “HiP2P” from Support -
Download of Ctronics website ;
2.Connect the camera to power supply;
3.Connect the camera to the router by LAN cable. Make sure that your
PC/MAC and your camera are in the same local network.
Step 2: Connect the camera in HiP2P software
1.Run “HiP2P” software on your computer;
*By default, there’s no password for the software. You may leave the
password blank.
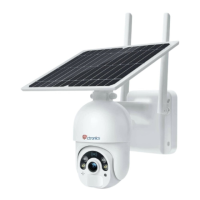
2.Click on Auto-Add icon on the menu bar (Picture 2).
3.The software will find and add the camera automatically. Within a few
seconds, the camera will be displayed on the interface with status
“Online” (Picture 2).
Step 3: Connect the camera to Wi-Fi network
1.Click on Settings icon on the menu bar (picture 3);
2.Click on Parameter settings, select the camera XXXX-XXXXXX-XXXXX
(camera UID) under Region, click on Wi-Fi, Wi-Fi setting window will
appear;
3.Click on Search to show all available Wi-Fi network, select your Wi-Fi
network, input your Wi-Fi password (Key) and Apply the setting. The
camera is now connected to your Wi-Fi network.
Picture 2
Picture 1