1. On carbon saddle post and/or saddle
stem
•
Apply assembly paste to the saddle post
and to the inside of the seat tube and only
use assembly paste for carbon parts for this
procedure.
•
Saddle post and seat tube must not be
greased. Only carbon assembly paste may
be used.
•
Saddle posts made of aluminium may only
be tted using a carbon assembly paste.
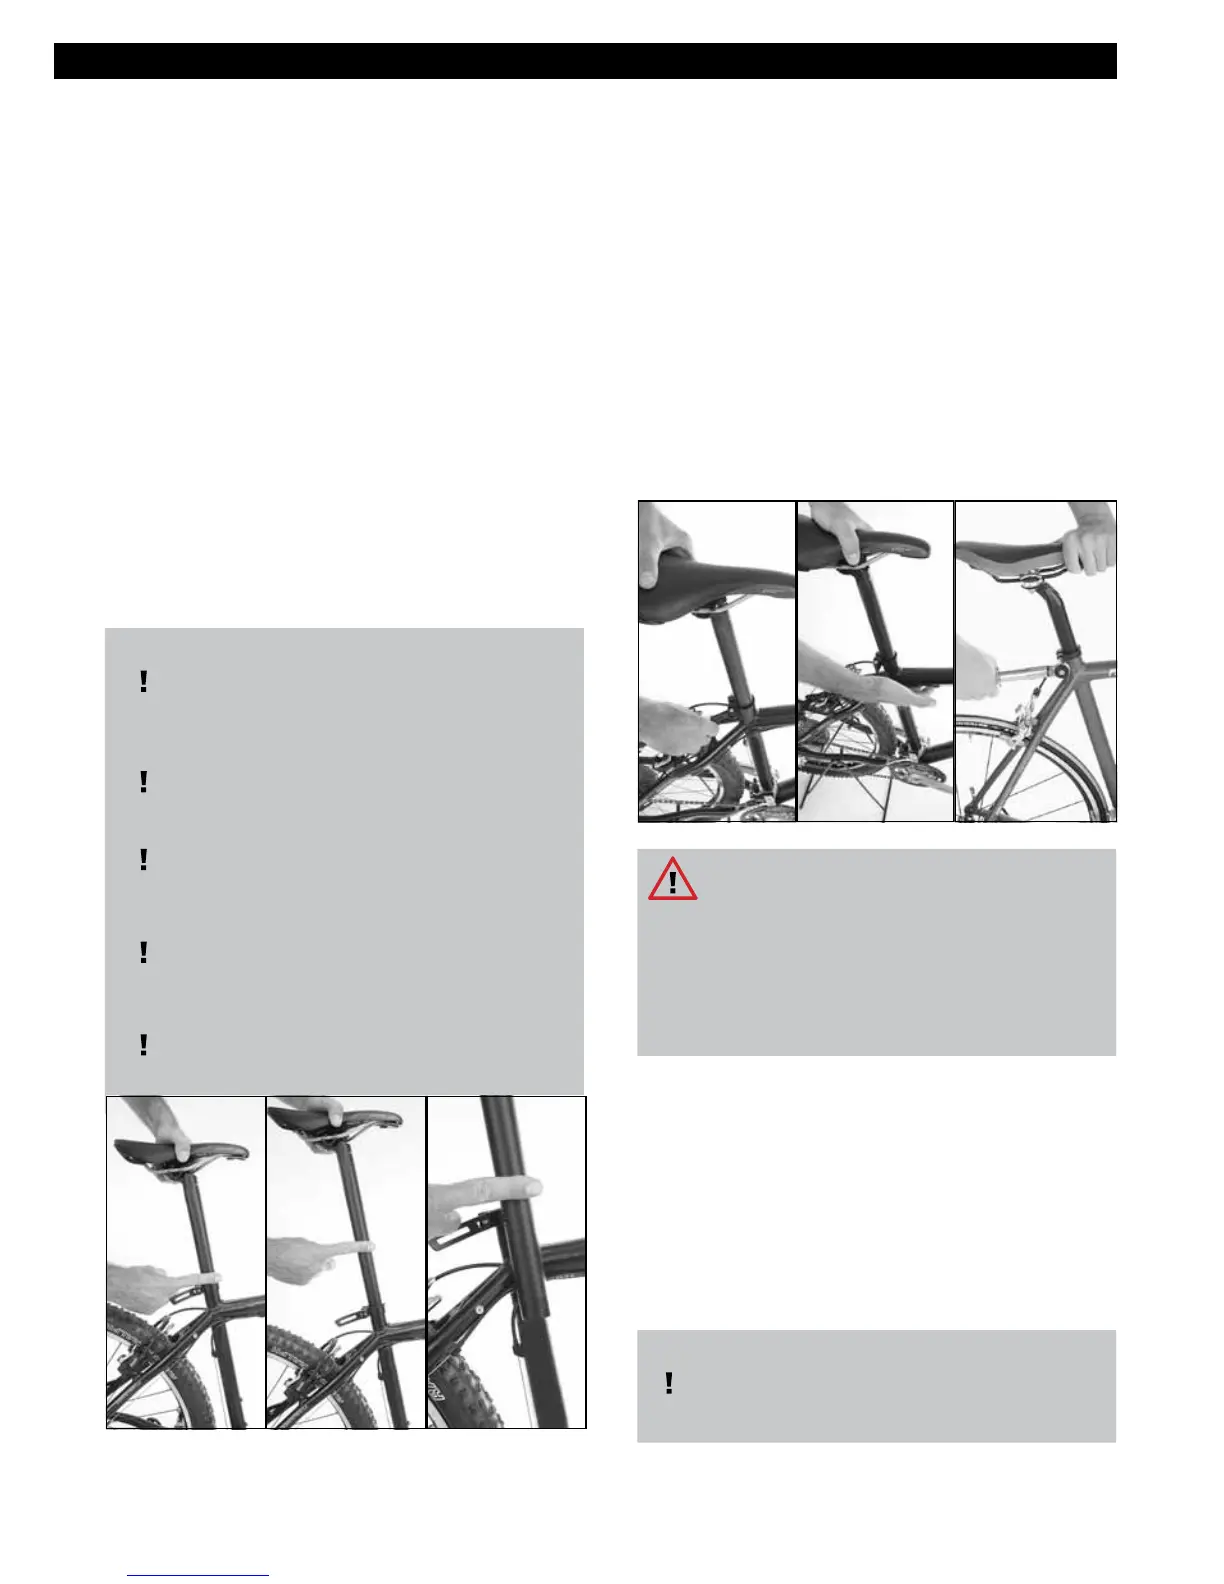
2. Push the saddle complete with saddle
post into the frame seat tube until the
desired saddle height is obtained. In this
position the lower end of the saddle post
must be a minimum of 10 cm below the
lower edge of the top tube.
Do not rely on the marking on the saddle
post.
To check the correct insertion distance:
Hold a nger tip against the saddle post
when tted directly above the clamp.
Keep your nger tip in this position and
withdraw the saddle post from the seat
tube.
Hold the saddle post laterally beside the
seat tube so that your nger is again level
and directly above the clamp.
In this position the lower end of the
saddle post must be a minimum of 10 cm
below the lower edge of the top tube.
3. Turn the saddle so that the saddle points
in the direction of travel.
4. Ensure that the clamp is ush in the
frame and that the seat tube slots and the
clamp are covered.
5. Close the quick release as per Chapter 8.8
or tighten the Allen screw with a torque
wrench.
Please observe assembly instructions
and the specied torque in the accompa-
nying component instructions indicated
in table 3.3.
Risk of Personal Injury and
Material Damage!
An over-tightened carbon bre saddle
post can break when riding and lead
to dangerous riding situations, falling,
accidents and material damage.
•
The seat tube clamp must be tightened rm-
ly in order to prevent the saddle post from
lowering into the frame or laterally twisting
during the ride.
•
If the saddle post does not remain in the
desired position, even though you have
reached the maximum admissible tighte-
ning torque, please consult your specialist
dealer immediately.
Please observe assembly instructions
and the specied torque in the accompa-
nying component instructions