MTB/ ROAD BIKE/ TREKKING
•
There is no lever on the brake:
•
Follow the reverse procedure to opening
and press the pin on the brake lever from
outwards to inwards.
•
At the same time pull the brake lever.
4. Check installation:
•
Operate the brakes.
•
If the brake block or brake touches the rim
or the brake disks this can indicate incorrect
seating of the hub in the dropouts.
•
In that case release the quick release, check
and correct the hub seat and close the quick
release again.
•
The brake (on rim brakes) must not be
opened during this procedure. If there is no
improvement after this please contact your
dealer immediately.
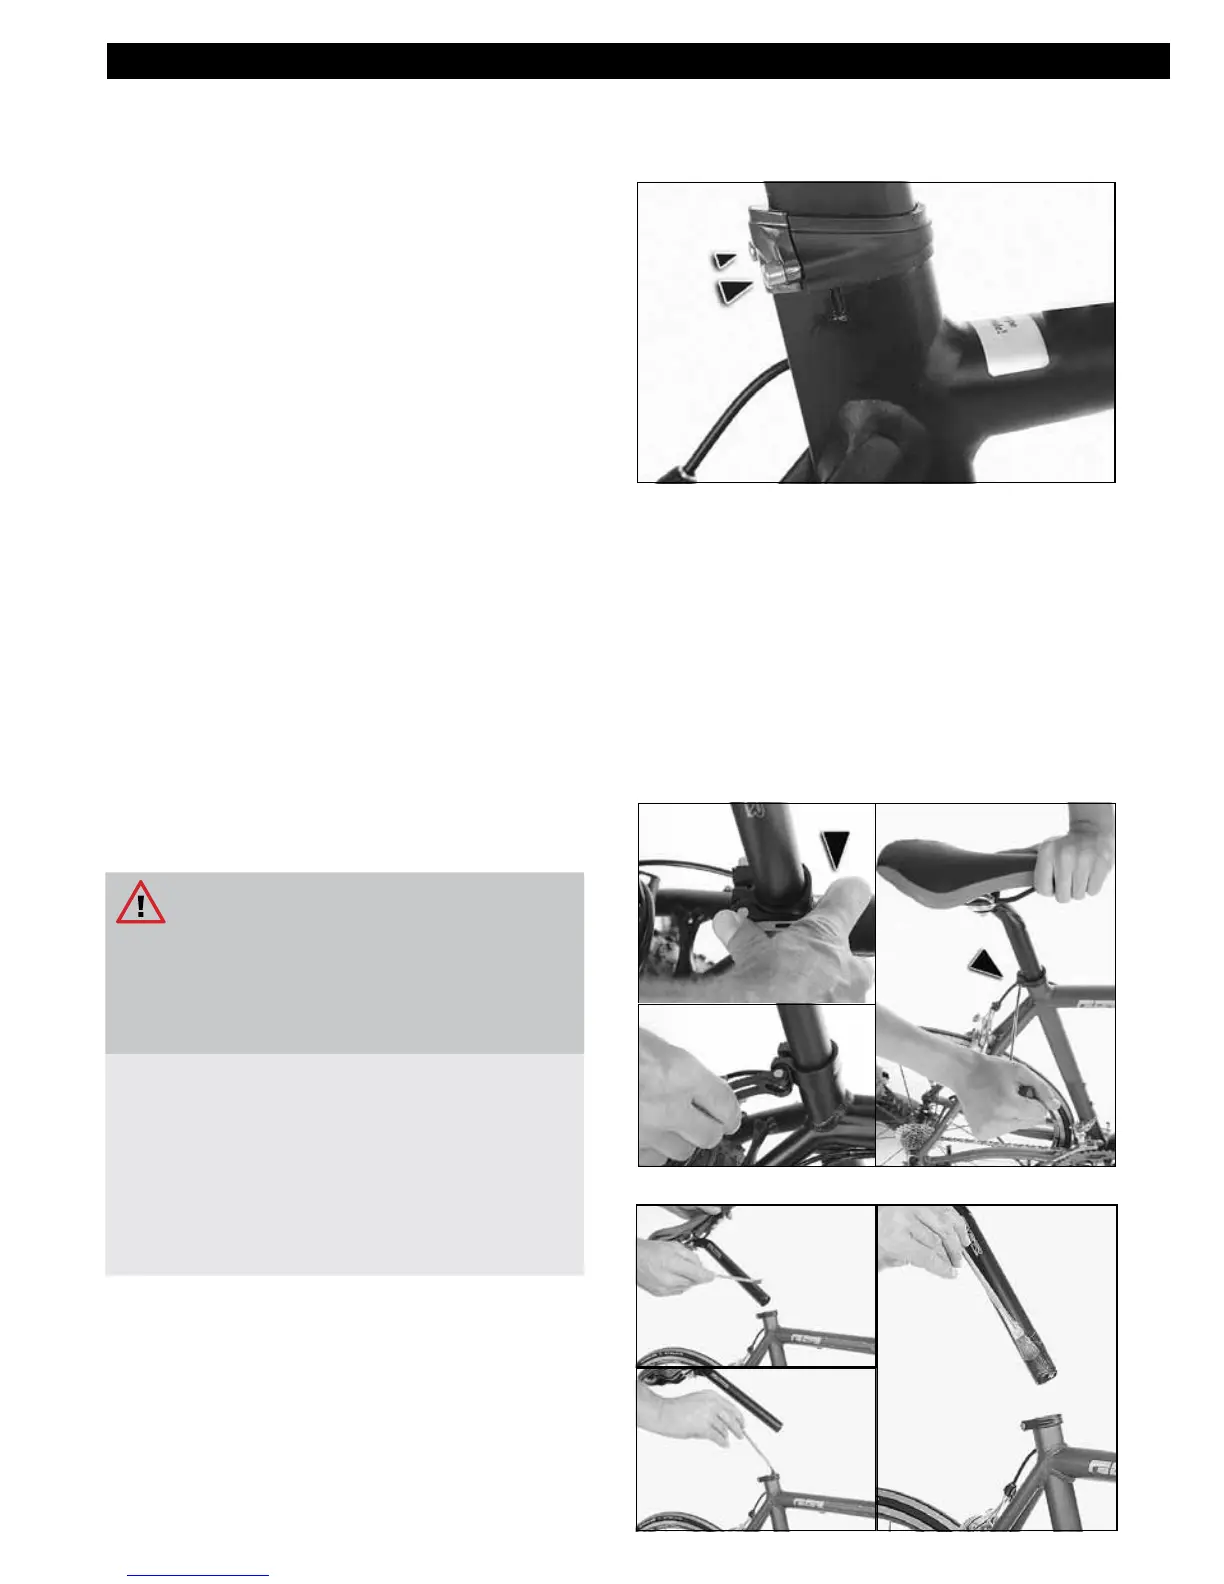
11. 2 Remove and replace saddle post
and saddle
Risk of Personal Injury and
Material Damage!
An incorrectly tted saddle post can lead
to dangerous riding situations, falling,
accidents and material damage.
•
You must have your dealer demonstrate
tting and removing your saddle post.
•
Practice this job at least once under his
supervision and control.
•
Only remove and t the saddle post and
saddle if you are sure you have mastered
this job.
For transportation you can remove your bike‘s
saddle post complete with saddle and replace it
again afterwards.
The saddle post is held with a clamp in the frame se-
at tube and is tightened with either a quick release
or a hexagon socket.
On carbon bre saddle posts special types may be
tted with two screws.
For clamping without a quick release a hexagon
socket and a torque wrench of the appropriate size
are required. Please also consult your dealer.
To remove your saddle post:
1. Release the saddle clamp at the quick re-
lease as per Chapter 8.8 or by loosening
the Allen screw with an Allen key.
2. Withdraw the saddle with saddle post
from the frame.
To replace your saddle post: