Wired Touch Panels - User Manual
14© CUE, a.s. | All Rights Reserved.
MountIng
Tabletop Models
Desktop models can be placed on any flat surface. Installation steps are as follows
1. Don’t forget to prepare proper bushing for the cable including standard connector. A minimum diameter of the bushing
for Ethernet connector is approx. 20 mm.
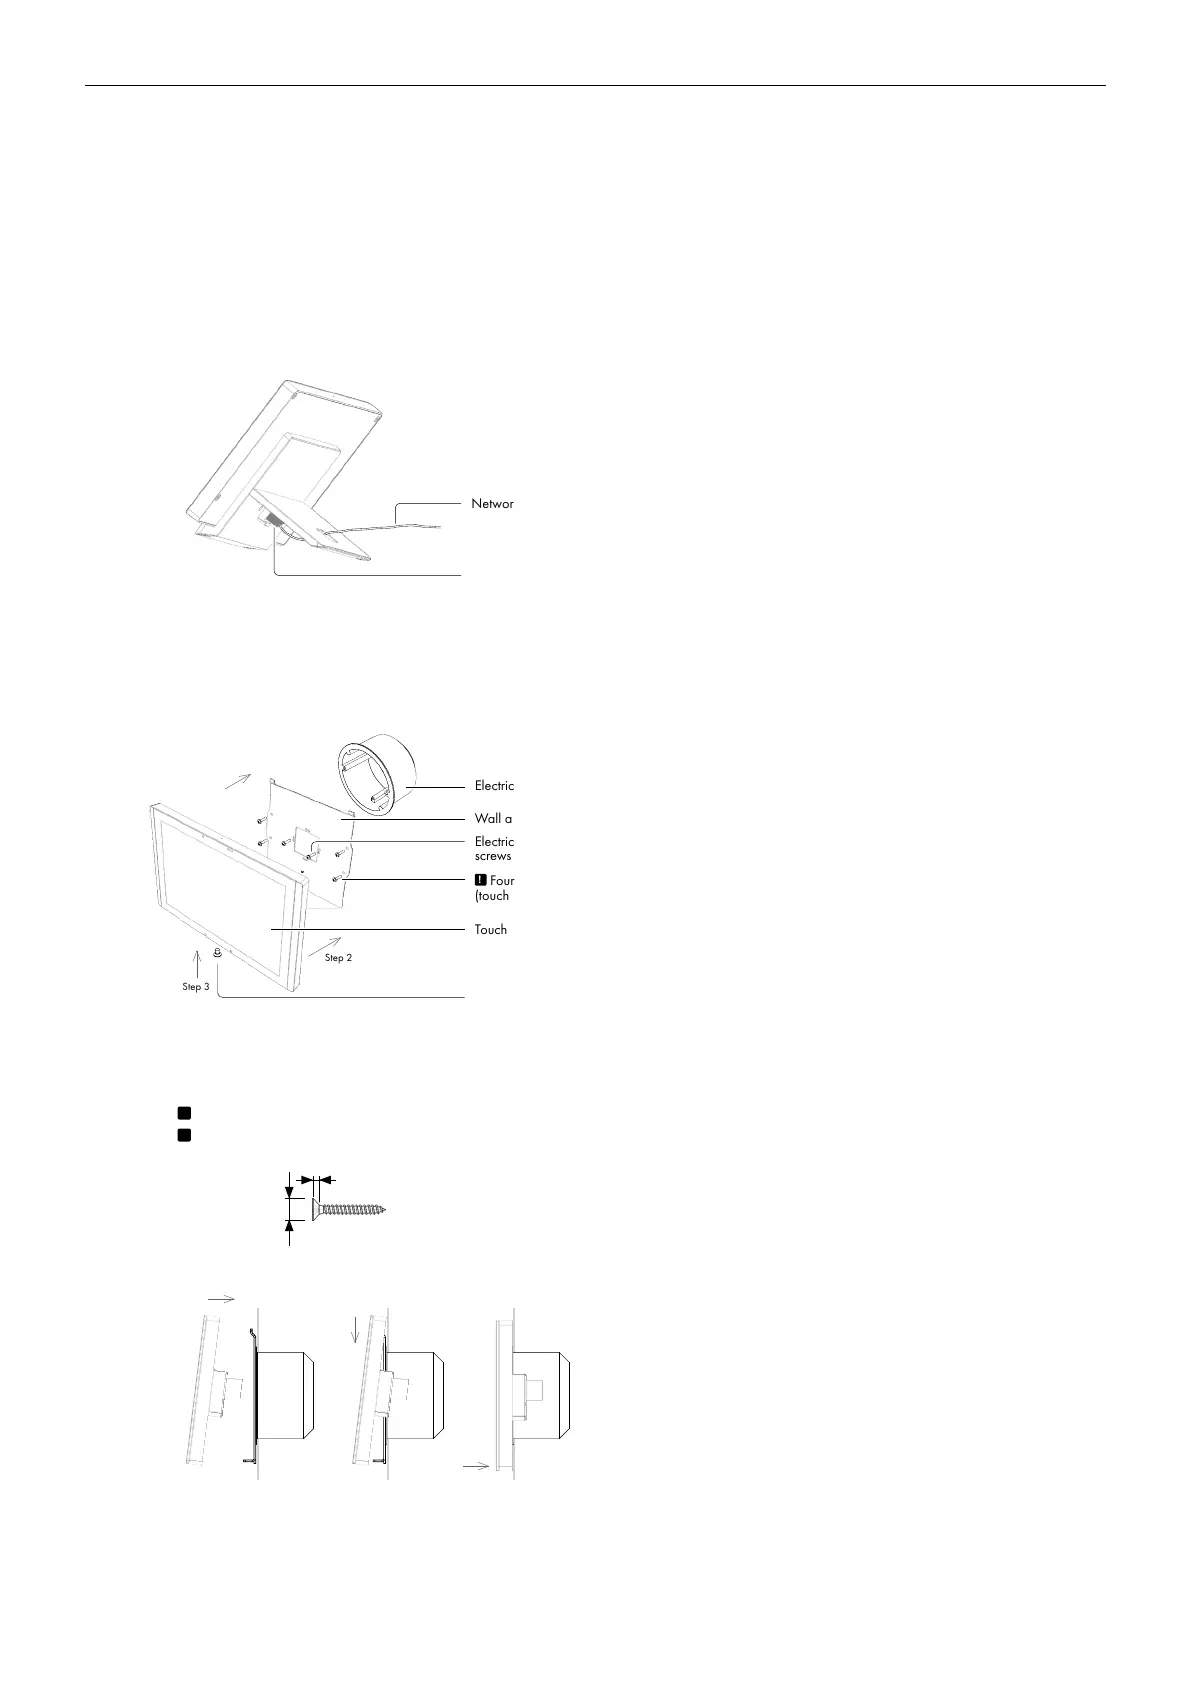
2. Install the network cable as described on the following picture and connect the network connector.
Network connector
Network cable
3. Place the touch panel on a table.
Built-In Models
All built-in models are compatible with standard European/UK electrical wall boxes as described in the following picture.
Electrical wall box
Wall adapter
Touch panel
Step 1
Step 2
Step 3
Fixing screw
Electrical wall box
screws
!
Four screws for additional fixing
(touchCUE-12-B only)
Installation steps are as follows
1. Install wall adapter on the electrical wall box and provide additional fixing by four delivered screws and fasteners.
!
Additional fixing is strictly recommended for touchCUE-12-B.
!
Use delivered screws or keep maximum screw dimensions as described below.
Max. Ø 5.5 mm
max. 1.7 mm
2. Connect network cable and put the touch panel on the wall adapter.
3. Carefully tighten the fixing screw to fix touch panel on the wall.